Zapier Webhooks
Why do you need it?
SignalWire has an already set up integration with Zapier where you can use incoming calls or messages as a trigger in order to execute a second action. For some users, this might be as simple as incoming messaging triggering an outgoing message with SignalWire. However, many of our customers like to take advantage of Zapier’s large number of partners in order to have SignalWire triggers respond with an email or a push to their CRM. By using Webhooks by Zapier, you can actually expand the number of SignalWire APIs available to you.
What does it do?
In this example, we will show how you can use incoming calls as a trigger to access a recording link and forward the recording link in an SMS message. However, you can easily replace the SMS part with your ideal action step (send to GMAIL, send to your CRM, send to a database, etc).
What do I need to replicate this example?
You will need to already have a SignalWire account and a Zapier account.
On your SignalWire Space, you will need to have at least one already existing call that includes a recording so that there is a recording link accessible for testing. Read here for more information about how to include recording on calls.
The Process
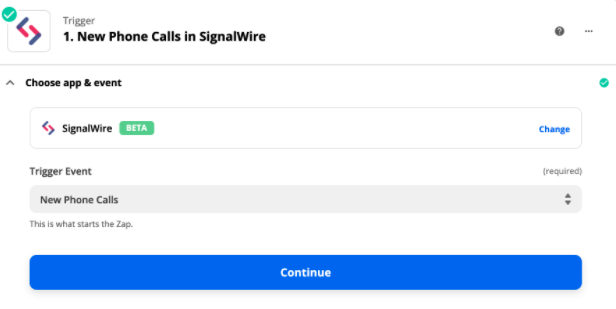
Click Make a Zap and let's get started! The first part of creating a Zap is that you have to identify the trigger. In this example, we will search for SignalWire and choose ‘New Phone Calls’ as the trigger event.
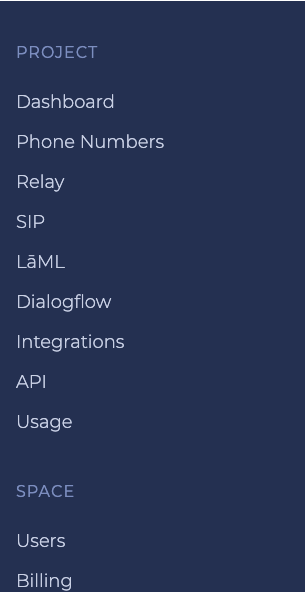
Next, you will need to connect your SignalWire account. You only need to provide the same authentication that you would provide if you were executing a regular API call - i.e. Space URL, Auth Token, and Project ID. You can easily find these values in a copyable format by clicking the API tab on the lefthand sidebar of your SignalWire Space.
Once your account is authenticated, the next step is setting up the trigger. Here, you can narrow down the criteria for when the Zap is triggered. Maybe you want recording links pushed to your CRM, but only if they are coming from a certain number or on a certain day. This would be the way to do that! For this example, we will not narrow it down further on the assumption that in this case, the end-user would like all calls recorded and all recordings forwarded to their phone.
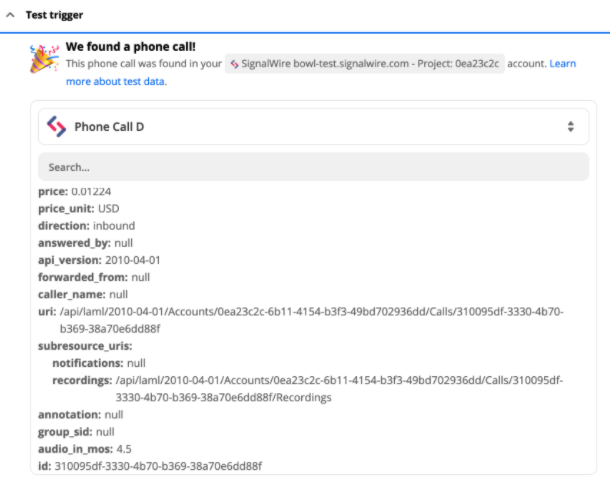
Next, you will click Test Trigger! This will use the authenticated account information and your specific trigger details in order to find an example of a call we can use throughout the process to test this Zap. If you have a phone number with a recording on your account, you should see it show up here with a full JSON response. If you have multiple examples, you will have the option to choose whichever one you prefer to use as your test.
Next, click the + button in order to move on to the next step. You will need to search for Webhooks by Zapier and choose GET as the action event.
We need to identify the URL for the HTTP request as well as any parameters. For this example, we will be using the Call SID returned in the JSON response along with the Retrieve Recording API in order to get a recording link.
There is no SpaceURL parameter returned in the JSON object, so you'll need to hard code that to your own Space instead of the example below which shows bowl-test.signalwire.com. You can use the Account Sid parameter and the Call Sid parameter (denoted 'Sid') from the call object.
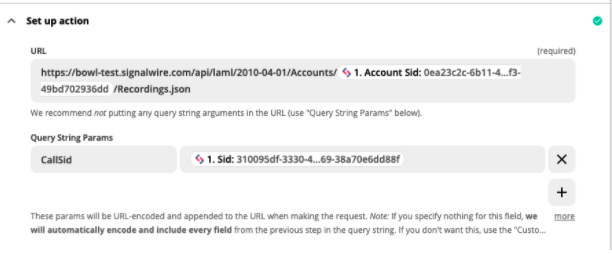
Make sure to put your project ID and auth token in the basic auth spot at the bottom of this page. (ProjectID|AuthToken) You can put a | in between the two values to separate them.
This will return another JSON object in which you will see a parameter called 'sid' again except this time, it refers to the recording sid. CallSid in this object is denoted by call_sid, but we don't need it.
When you send the data to your next step, you just need to construct a URL using this recording SID.
The URL will look like this:
https://your-space.signalwire.com/api/laml/2010-04-01/Accounts/{{use_account_sid_parameter_from_Call}}/Recordings/{{use_recording_SID_parameter_from_GET_request}}.wav
If you send the above URL with a .json extension, you will see all of the metadata. If you send it with .wav as the extension, you will get a clickable link that takes you to the recording.
You will need to customize this part depending on the action that you want to take as part of your call flow. The next step could be sending this information in an email, pushing it to your database or CRM, or sending a message like this example shows. Either way, choose the + button in order to choose your next step, set up the event, and then you can use the URL above with any information you want to be sent along with it! Here is an example of what you might send in a message.
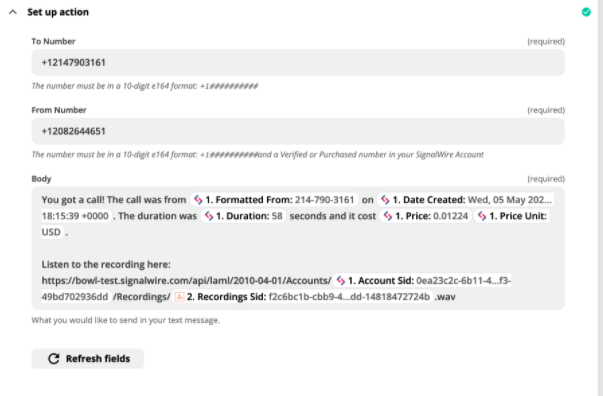
The message body that ends up being received looks like this:
You got a call! The call was from 214-790-3161 on Wed, 05 May 2021 18:15:39 +0000. The duration was 58 seconds and it cost 0.01224USD.
Listen to the recording here:
https://bowl-test.signalwire.com/api/laml/2010-04-01/Accounts/0ea23c2c-6b11-4154-b3f3-436dd/Recordings/f2c6bc1b-4a95-bd40-f45bf2a3373-6a25-412f-8add-14818472724b.wav
The recording SID and Account SID in this example are for show only and therefore the above link cannot be accessed.
Using Zapier Webhooks to get the recording link is only one way this can be utilized to enhance your SignalWire call/message flow! You could do the same thing for retrieving and sending transcriptions, or you could change up the trigger and use any of the SignalWire APIs. Happy Building!