chan_sip FreePBX
Taking advantage of SignalWire’s extremely disruptive pricing for DIDs and minutes with FreePBX on chan_sip is super easy!
The chan_sip module in Asterisk has been deprecated since Asterisk 17 and will receive no further development effort. Further, there are limitations in chan_sip when it comes to receiving inbound calls from SignalWire, and moving to PJSIP is strongly advised - as discussed in this guide.
IF you still prefer to move forward with chan_sip, here are the instructions!
Creating a SIP Endpoint
If you don't have a SIP endpoint set up already, the first step is to create a SIP Endpoint and connect it to a phone number.
Editing the Signalwire SIP Endpoint for chan_sip FreePBX
There are a couple of settings we need to change on the SIP Endpoint we have created in SignalWire to get good interworking with FreePBX:
- Set Encryption to ‘Required’
- Disable the Encryption option for AEAD_AES_256_GCM_8 as Asterisk is not currently supported and will cause a warning on the Asterisk Command Line (though calls would still work).

Setting Up chan_sip FreePBX
With the above in place, having this SignalWire SIP Trunk added and working on FreePBX is done in just a few easy steps.
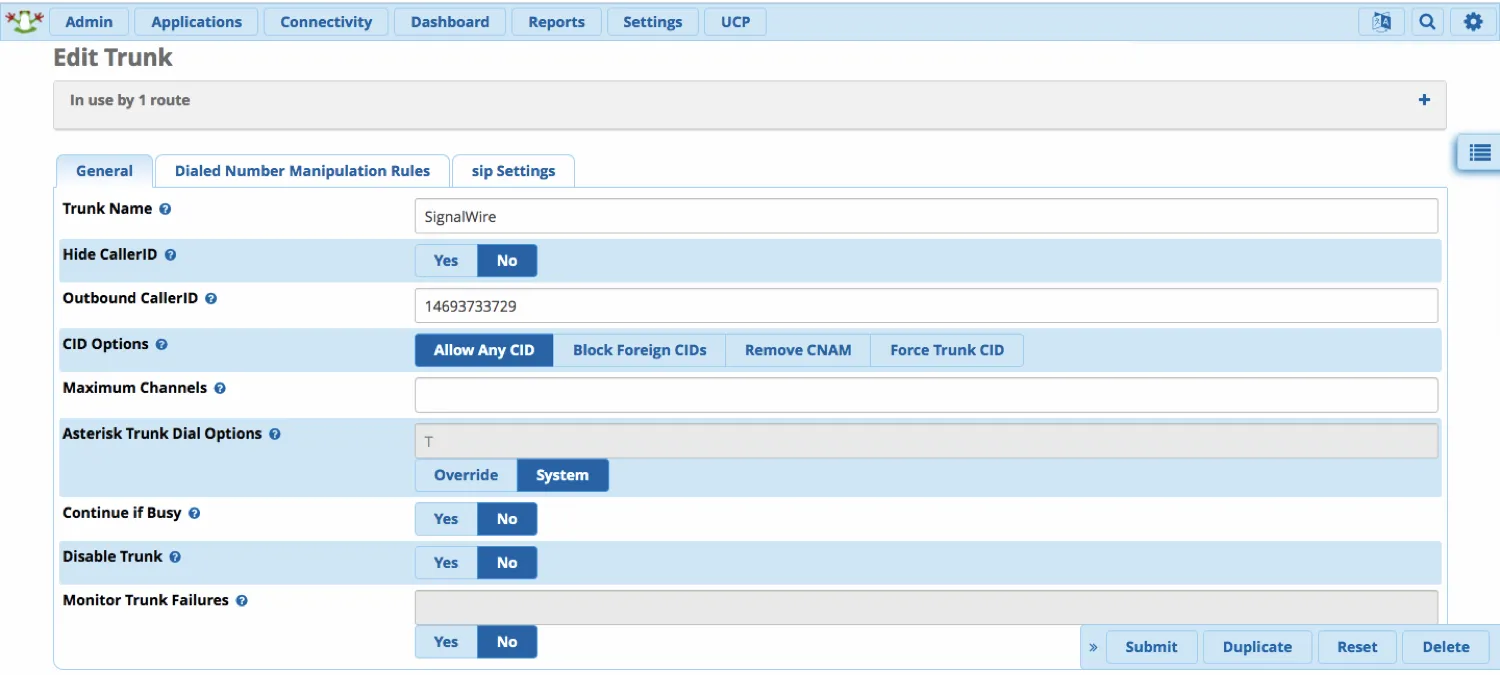
Find Trunks under the Connectivity menu, then add a SIP (chan_sip) trunk, and on the **General ** tab enter the following:
Trunk Name: SignalWire (Can be anything you want)
Outbound CallerID: 1-111-2223333 (whatever DID you purchased)
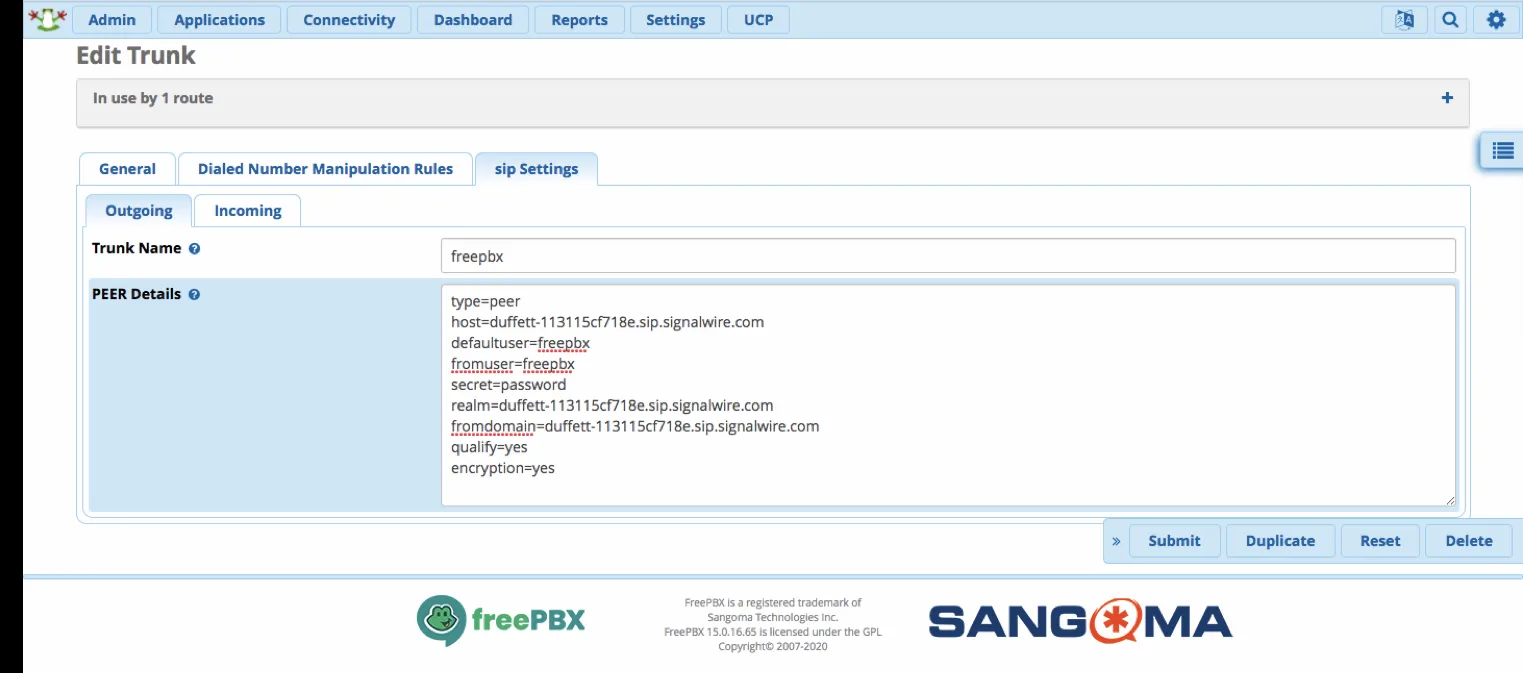
On the Sip Settings tab and the Outgoing sub-tab, enter the following:
Trunk Name: freepbx (the name you gave the SIP endpoint)
In the Peer Details box, add the following lines:
type=peer
host=duffett-113115cf718e.sip.signalwire.com (your space URI)
defaultuser=freepbx (your SIP endpoint name)
fromuser=freepbx (your SIP endpoint name)
secret=password (your SIP endpoint password)
realm=duffett-113115cf718e.sip.signalwire.com (your space URI)
fromdomain=duffett-113115cf718e.sip.signalwire.com (your space URI)
encryption=yes (enables media encryption)
type=peer
host=duffett-113115cf718e.sip.signalwire.com
defaultuser=freepbx
fromuser=freepbx
secret=password
realm=duffett-113115cf718e.sip.signalwire.com
fromdomain=duffett-113115cf718e.sip.signalwire.com
encryption=yes
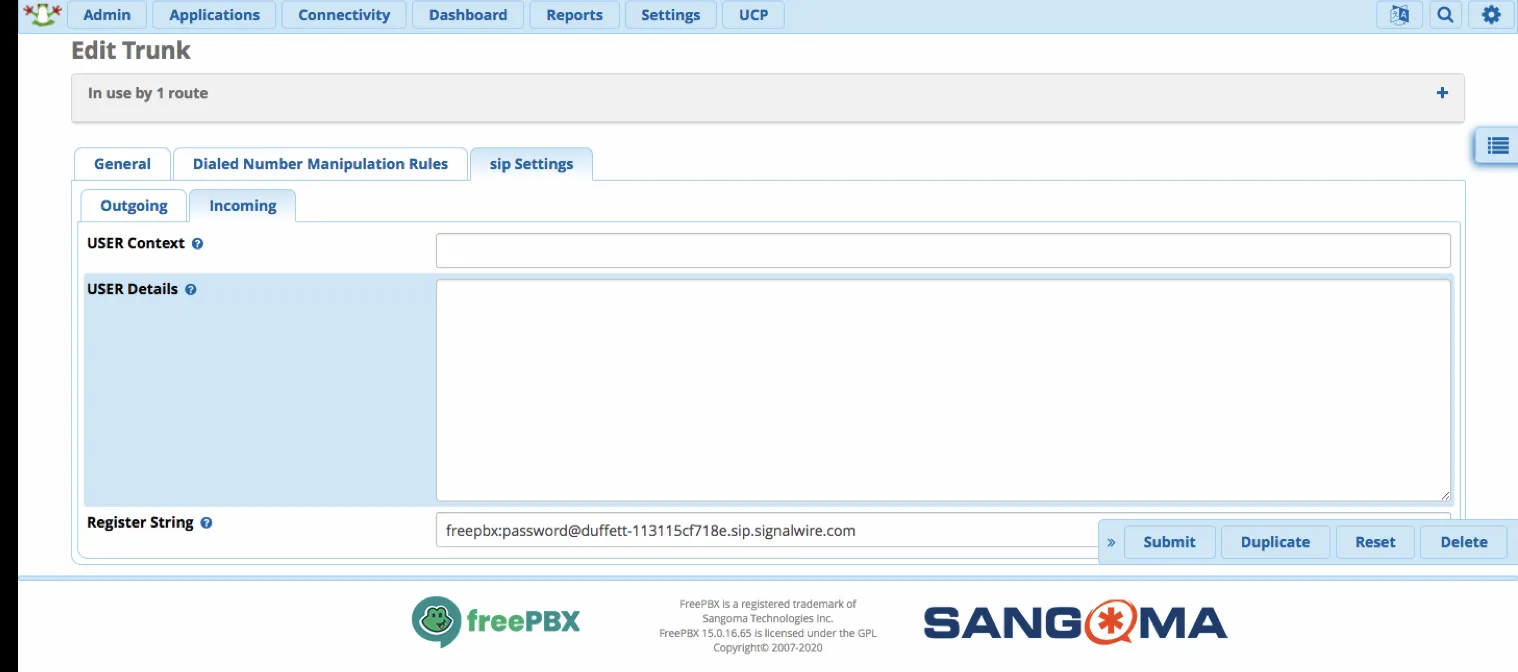
In the SIP Settings tab and the Incoming sub-tab, there is just one thing to add, and that is the Register String, at the bottom:
Register String: freepbx:password@duffett-113115cf718e.sip.signalwire.com
(username:password@your space URI)
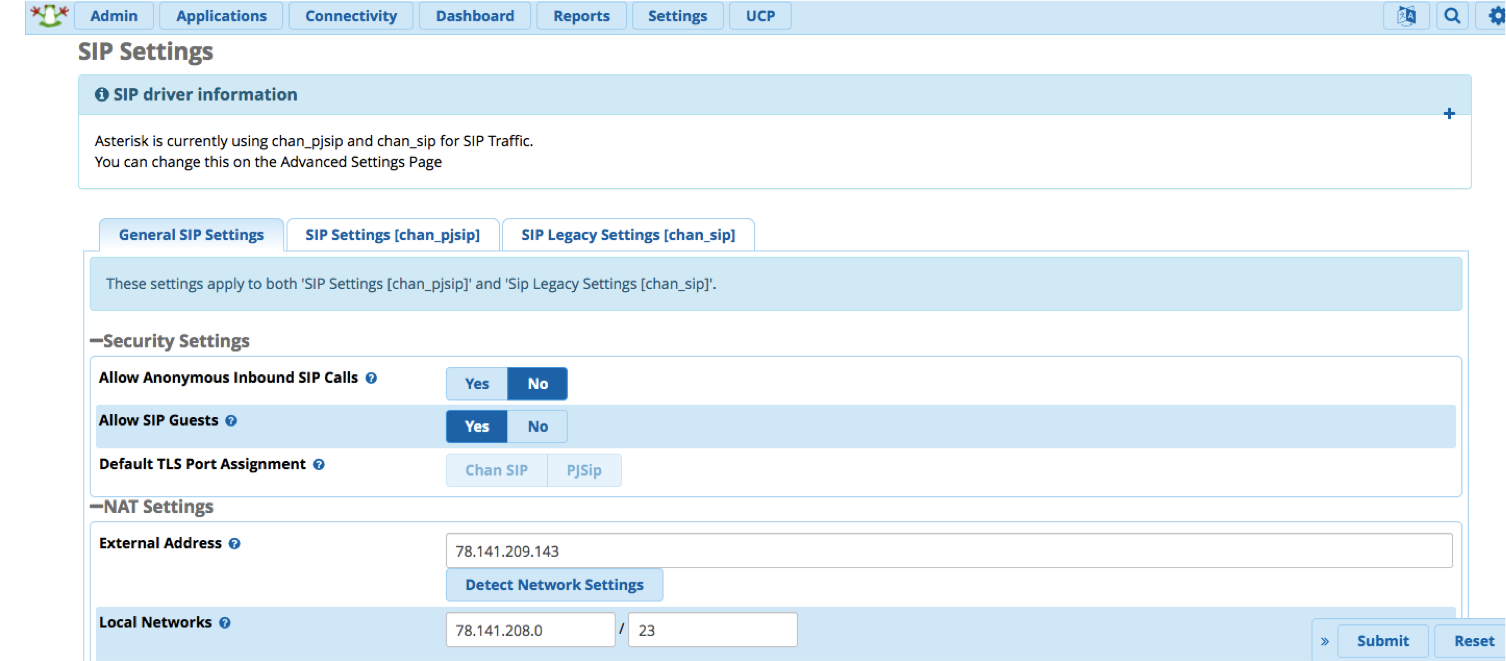
There are just three more SIP settings to change, and they are all to be found under the top-level Settings menu and then picking the Asterisk SIP settings option.
The first two are found on the General SIP settings tab, under Security Settings. They are:
Allow Anonymous Inbound SIP Calls = NO
Allow SIP guests = YES
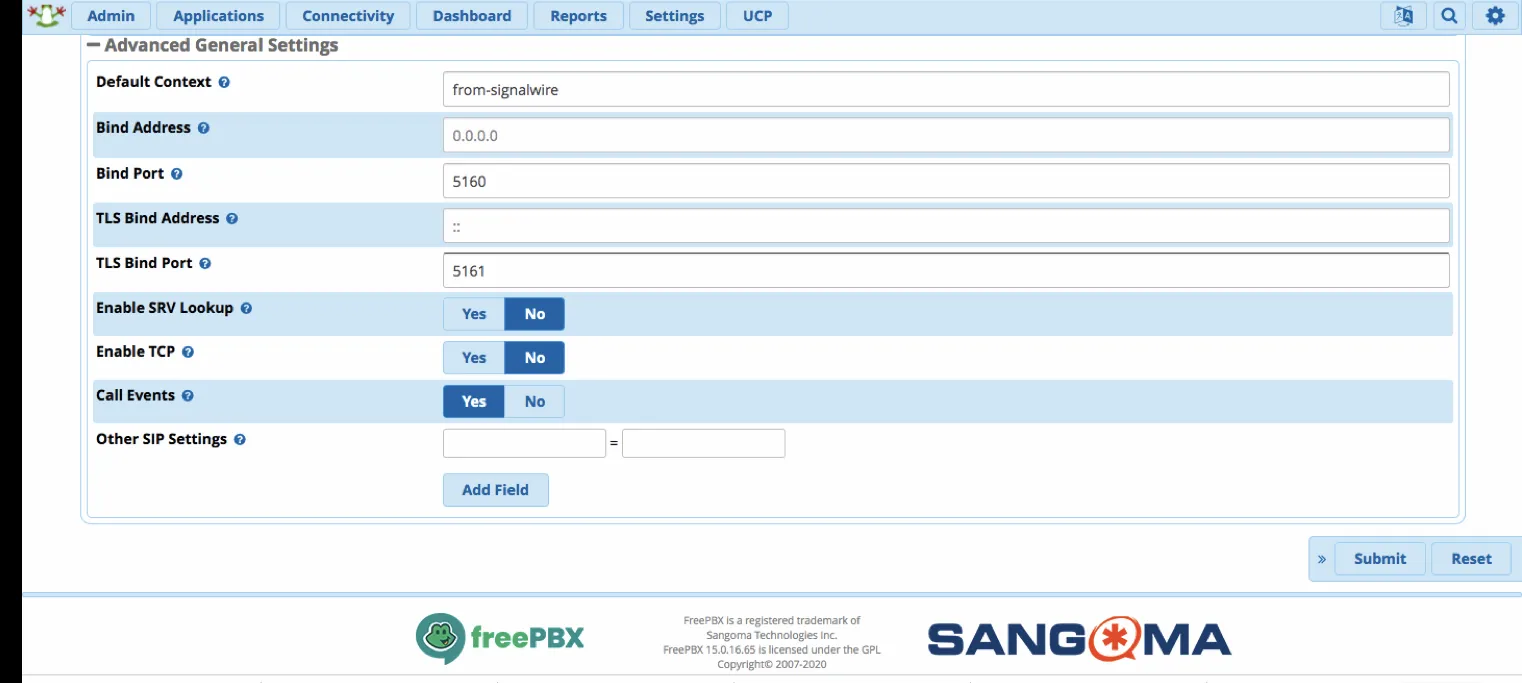
The last one is on the SIP Legacy Settings [chan_sip] tab in the Advanced General Settings section, where you will change the following:
Default Context: from-signalwire (this directs all ‘unrecognized’ SIP calls into)
(the ‘from-signalwire’ dialplan context,)
(where we will obtain the dialed number)
(from within the SIP header)
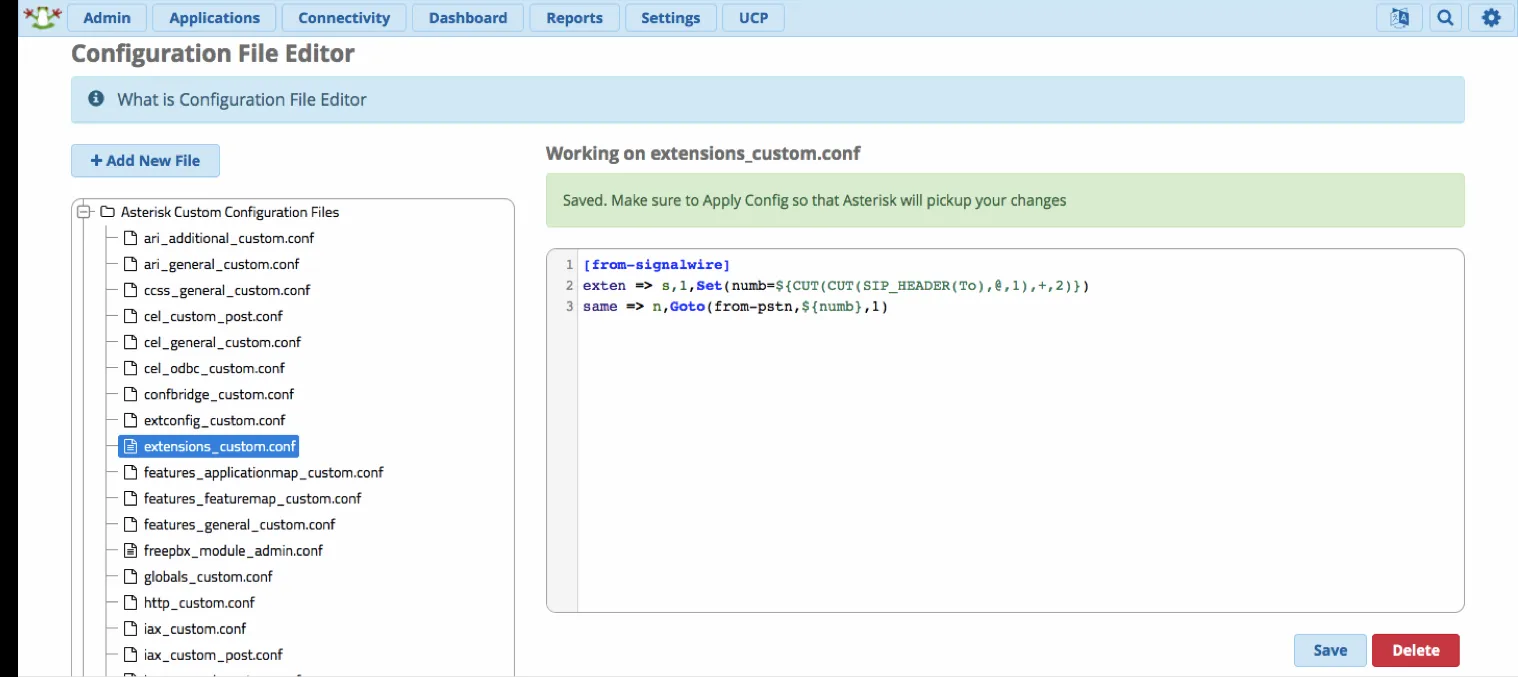
Lastly, there is a small amount of dialplan script to add (which we will place in a context called ‘from-signalwire’ - which we just set as the Default Context above), in order to extract the dialed number from the SIP Header, before passing the call to FreePBX for normal processing. We do this by entering the following lines in a file called extensions_custom.conf (which may be empty) using the inbuilt config editor in the Admin menu (Admin > Config Edit > extensions_custom.conf):
[from-signalwire]
  exten => s,1,Set(numb=${CUT(CUT(SIP_HEADER(To),@,1),+,2)})
  same => n,Goto(from-pstn,${numb},1)
Now just set up your inbound routing (the DID will be in the format 14693733729) and your outbound routing as normal. You should now be able to make outbound calls over your SignalWire SIP trunk and accept incoming calls to the number you purchased, saving you a ton of money!
Troubleshooting
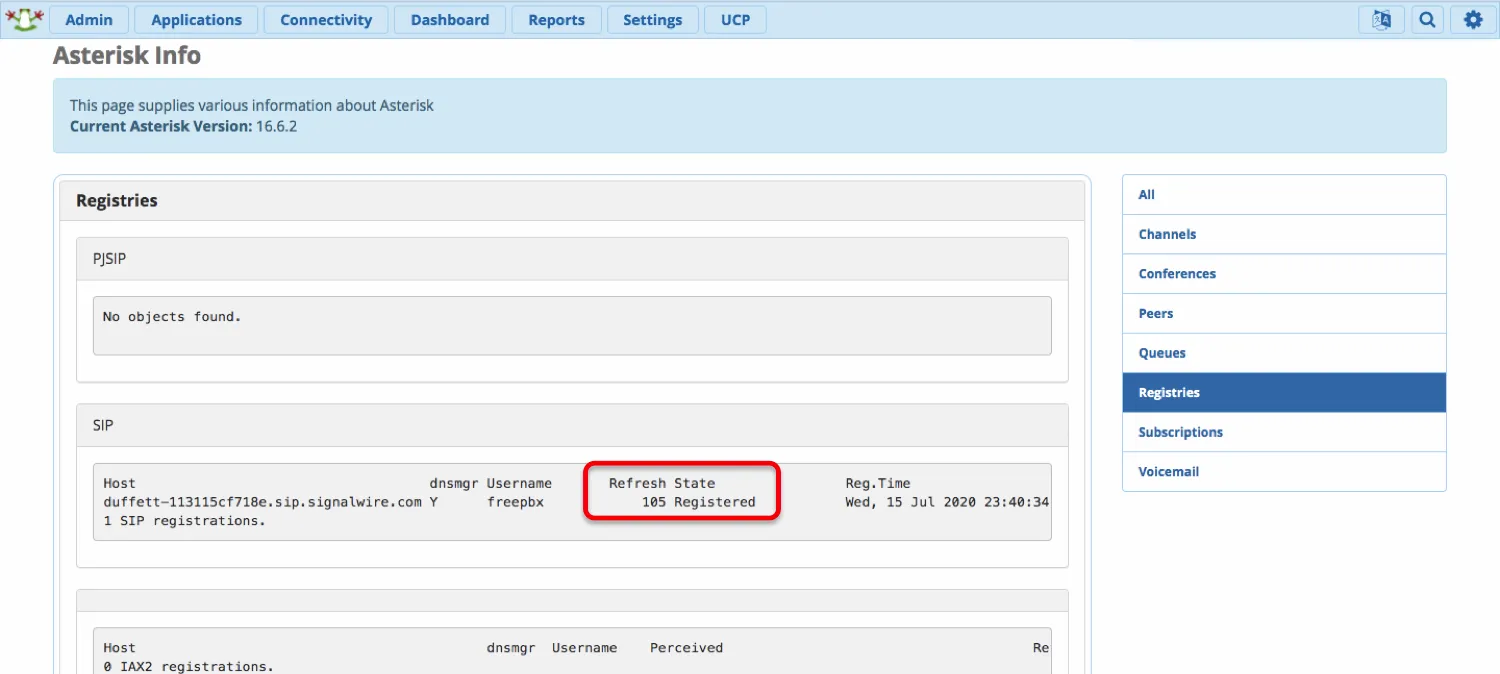
If you are not receiving inbound calls, make sure that your FreePBX has successfully registered with SignalWire - this is done by clicking on Reports and choosing Asterisk Info, then clicking on Registries from the list on the right-hand side.
If it does not show ‘Registered’ (as shown below), go back to step 4 above, and double-check that your Registration credentials (your SignalWire SIP endpoint name, password, and space URI) are all correct.