Zoiper Softphone
Zoiper is a popular desktop softphone app used to make/receive calls! Follow this guide to set up Zoiper with SignalWire.
Create a SIP Endpoint and Register It to a SignalWire Phone Number
The first step is to create a SIP Endpoint and connect it to a phone number. When creating this endpoint, keep the default Encryption and default Codecs/Ciphers.
In order to set up Zoiper with SignalWire, regardless of the platform, you will need the following:
- Your SIP Endpoint username;
- Your SIP Endpoint domain;
- Your SIP Endpoint password.
Your full SIP domain is always your username and domain with an @ in-between: YOUR_USERNAME@YOUR_DOMAIN, so it may look something like: ZoiperEndpoint@example.sip.signalwire.com
Set up Zoiper Applications
You are now ready to connect with Zoiper! Let's take a look at how to do this on both Desktop and Mobile.
On Desktop
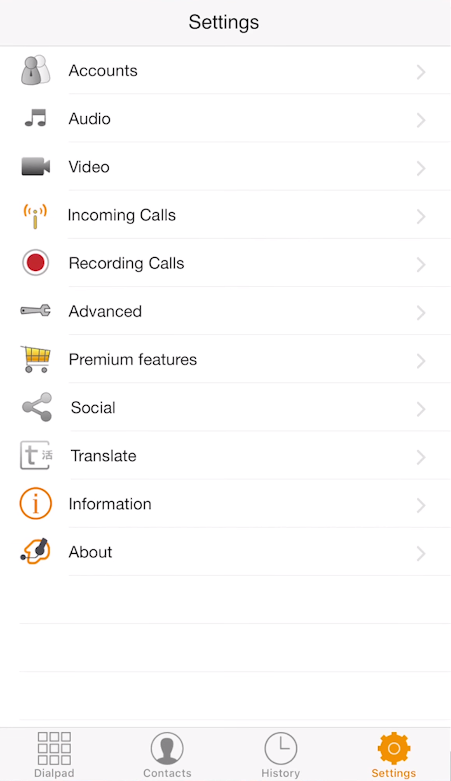
Open the Zoiper application and click on the Settings gear icon. Click on Accounts and then click Add.
Enter your full SIP domain such as ZoiperEndpoint@example.sip.signalwire.com. If you don't remember the SIP domain created in the previous step, go back to your SIP Endpoint and copy the full address under Username.
You can skip the ‘Optional: Authentication and Outbound Proxy’ step, this is not needed. When asked for a Transport Method, choose either TLS or TCP. You should now see a green checkmark next to the SIP endpoint in your Zoiper window, indicating you're ready to make calls!
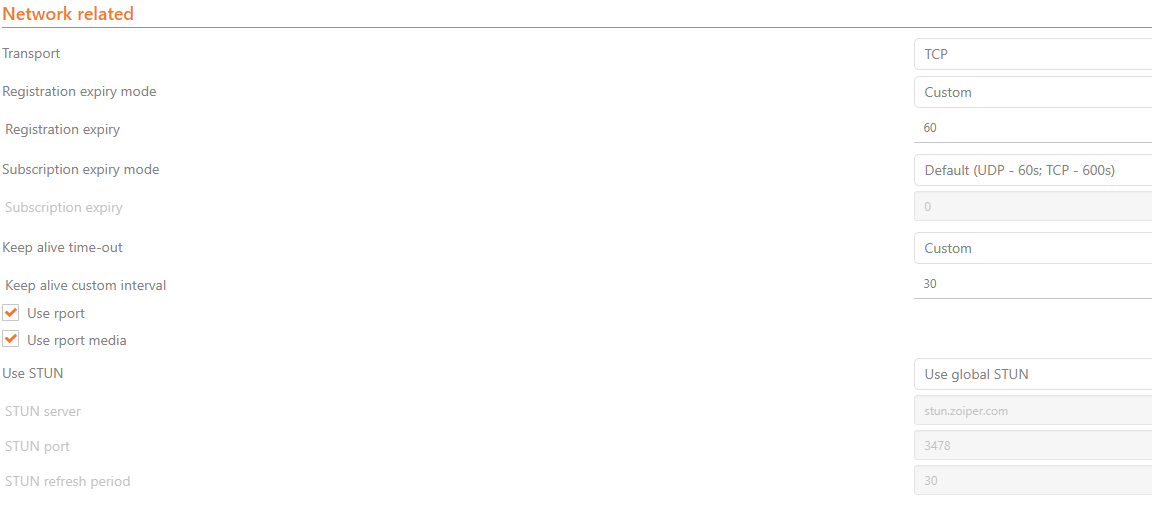
If you are having trouble getting your endpoint to authenticate, go to Advanced Settings and check to make sure your settings match the below reference table!
| Item | Value |
|---|---|
| Transport | TCP |
| Registration expiry mode | Custom |
| Registration expiry | 60 |
| Subscription expiry mode | Default (UDP - 60s; TCP - 600s) |
| Subscription expiry | 0 |
| Keep alive time-out | Custom |
| Keep alive custom interval | 30 |
| Use rport | Yes |
| Use rport media | Yes |
| Use STUN | Use global STUN |
On Android
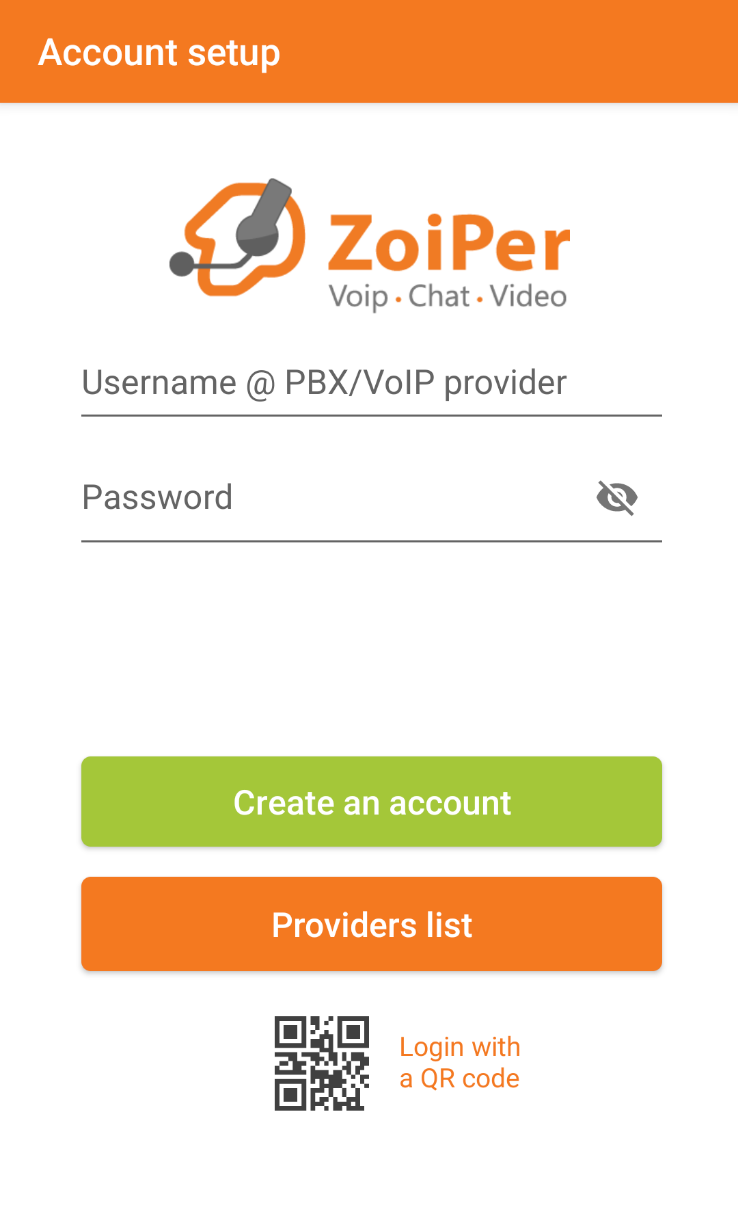
Open the Zoiper application and you should see something similar to this screen. Enter your full SIP domain such as ZoiperEndpoint@example.sip.signalwire.com. If you don't remember the SIP domain created in the previous step, go back to your SIP Endpoint and copy the full address under Username. Under Password, enter your SIP endpoint password, and then tap "Create an account":
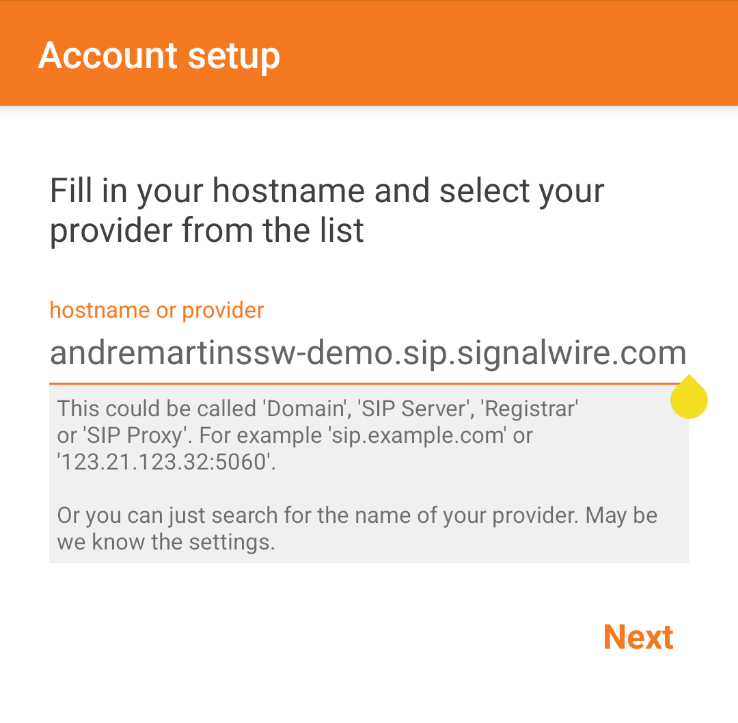
You'll then see this screen, which should have the hostname (your SIP domain) already populated. Just tap "Next":
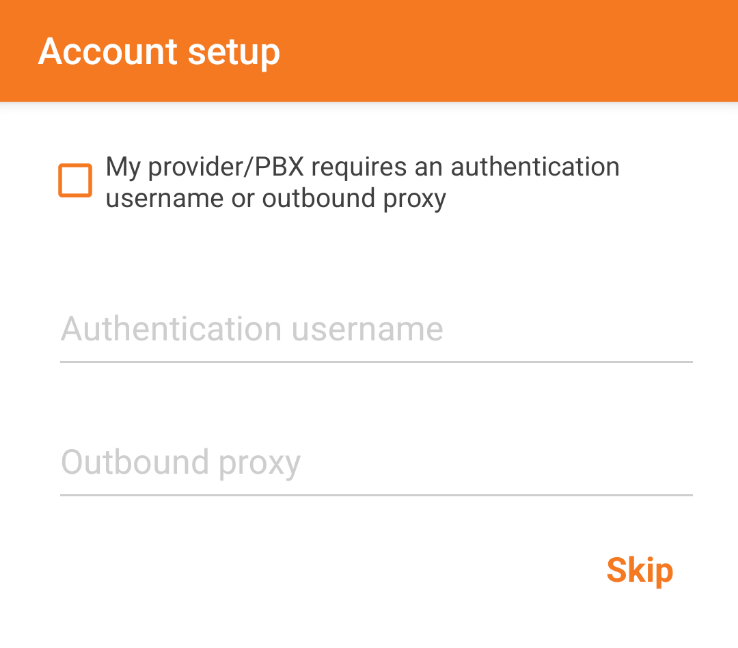
On this step you can Skip the page by tapping on "Skip":
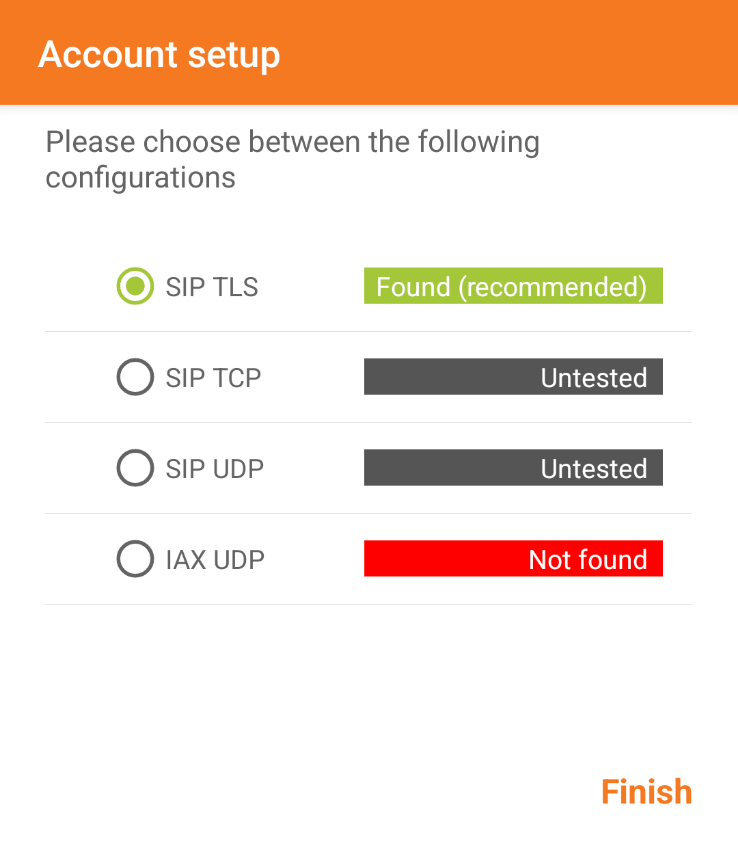
Lastly, Zoiper will try to find compatible protocols to use. Give it a few seconds, and once SIP TLS turns green you can tap on "Finish":
That's all there is to it, and you can now start using your Zoiper Softphone with SignalWire!
Due to recent changes on the iOS and Android operating systems, incoming calls on Zoiper may not work reliably in background.
To address this, we suggest taking advantage of Zoiper's Push Proxy feature.
On iOS
Open the Zoiper application, go through the permissions prompts according to your preferences, and you should then see the following screen. Tap on Settings in the bottom-right corner of the screen to get to the Settings page:
Tap on Accounts to get to the Accounts page:
Tap on the + icon in the top-right corner of the screen to add a new account:

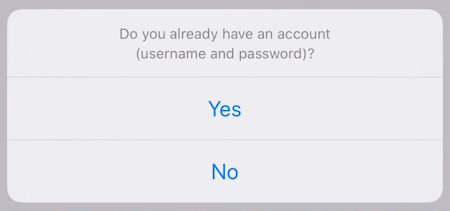
When asked if you already have an account, select Yes:
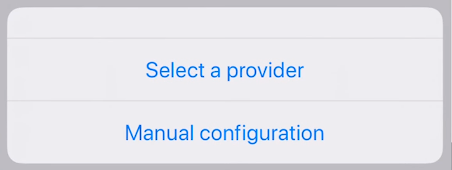
Select Manual configuration:
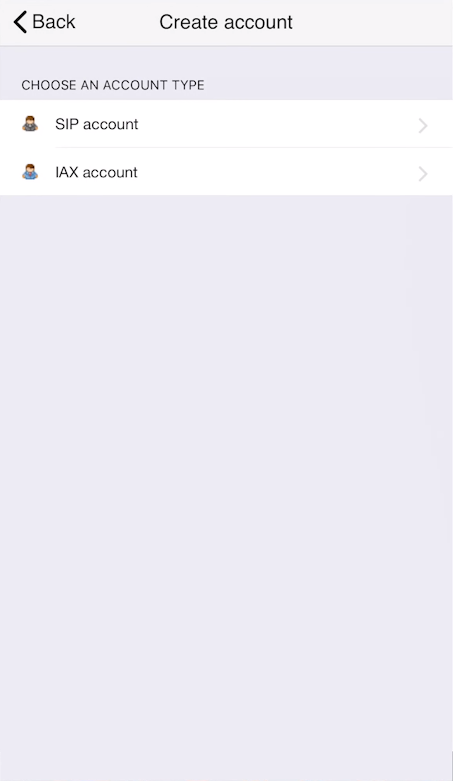
When choosing an account type, since you're going to be using a SIP endpoint, select SIP account:
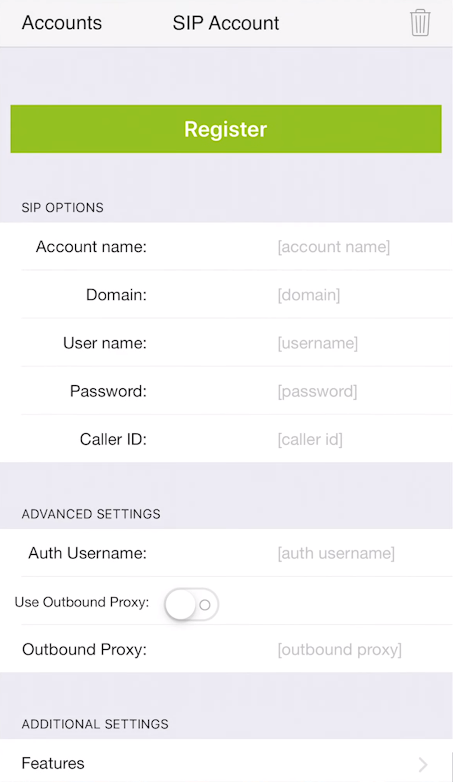
You're finally in the SIP account setup page, and here you'll need to fill in the following fields:
Account name-> The label you'd like to give the account (so you know which one is which);Domain-> Your SIP endpoint domain, such asexample.sip.signalwire.com;User name-> Your SIP Endpoint username;Password-> Your SIP Endpoint password.
Once filled, tap on Register at the top of the screen and wait a few seconds. When you see Registration Status: OK, you can start going back to the main screen by tapping on Accounts in the top-left corner of the screen, and then on Settings.
That's all there is to it, and you can now start using Zoiper on iOS with SignalWire!
Due to recent changes on the iOS and Android operating systems, incoming calls on Zoiper may not work reliably in background.
To address this, we suggest taking advantage of Zoiper's Push Proxy feature.