Sending API Requests through Postman
Overview
Postman is a very popular tool for building, testing, using, and sharing APIs. With a few simple steps, Postman can easily be used to send all of your HTTP requests to SignalWire with ease! Follow the steps below to set up Postman in a way that is perfect for utilizing their services with SignalWire.
Setting up Postman Environments
Navigate to your SignalWire Space within the project you want and copy the Project ID, SignalWire Space, and Auth Token. These will be needed for every request. Check out our guide about navigating your Space if you do not know where to find your authentication variables.
From within Postman, select Environments on the left-hand sidebar. Environments allow you to create some set variables that can be used throughout all your requests without having to put the values directly in the request. This saves a LOT of time!
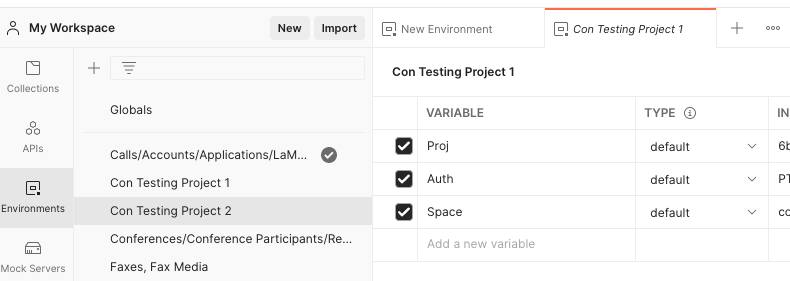
This example will show how to use the environment to handle authentication variables (API Token, Space URL, and Project ID), but you could also use this to create a variable for your From numbers, To numbers, caller IDs, video room session IDs, and much much more!
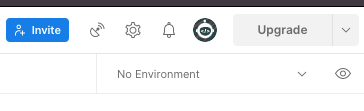
Click on the drop-down menu that says No Environment and choose the one you just created.
Each environment will contain one project ID, so it will only work for that one project! If you have multiple projects, create an environment for each so you can easily switch between them as needed without having to modify your requests.
Setting up a Postman Collection
Next, we will create a collection to store your requests which will allow you to authenticate once at the collection level instead of at the request level every time. Please note that if you prefer, you can use our curated Postman collections instead: they already include all our APIs.
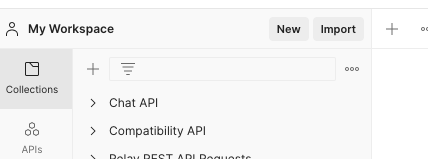
To create one yourself, click the New button to open a Create New submenu and select Collection.
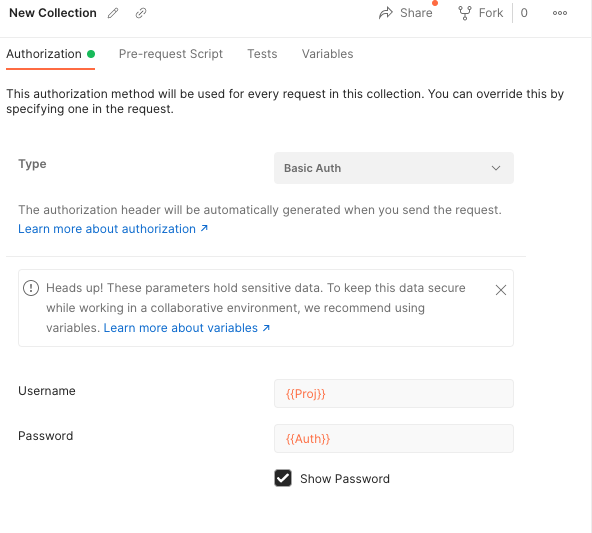
Go to the Authorization tab and choose Basic Auth from the dropdown menu. For Basic Auth, you will enter your Project ID as the username and your Auth Token as the password.
In the Environment example above, Proj was used for Project ID, Auth was used for API Token, and Space was used for Space URL. You don't have to use this same naming HOWEVER you MUST have the same variable names in your environments as you do in the collection, or it will not authenticate the requests. Make sure your naming is consistent!
Use your environment variable names in between two sets of curly braces as shown below to access the values stored within them securely. If the variables turn red instead of orange, check to make sure you have selected an environment at the top.
Hover over the collection on the left sidebar, and three dots appear. Click the three dots then click Add Request.

Now you can set up the request in accordance with the documentation in just a few seconds! Keep reading to the next section to see some real examples with our APIs.
Postman SignalWire API examples
We have shown several examples of different types of requests that Postman can simplify for you, but any of our API requests can be run on Postman! If you need additional parameters for a GET request, you can use the key-value pairs in the query params. If you need additional parameters for a POST request, you will use the Body tab with x-www-form-urlencoded key-value pairs or raw data with the type JSON.
This section will use the variable names shown above - Proj, Auth, and Space. If you did not use these, make sure to use your own version when you try the following examples!
List Video Room Sessions
Take a look at the documentation for listing all room sessions from the Video API.
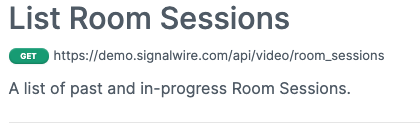
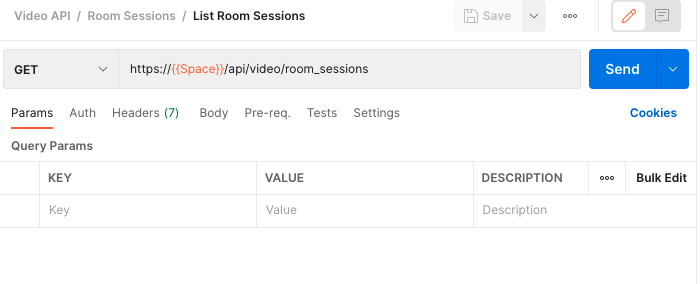
At the top, you can see that this request will use the GET method and has the URL https://<demo>.signalwire.com/api/video/room_sessions. Copy this URL and paste it directly into the request URL on Postman. Replace <demo>.signalwire.com with {{Space}} to invoke your environment variable, and press send!
Search for and Buy a Phone Number
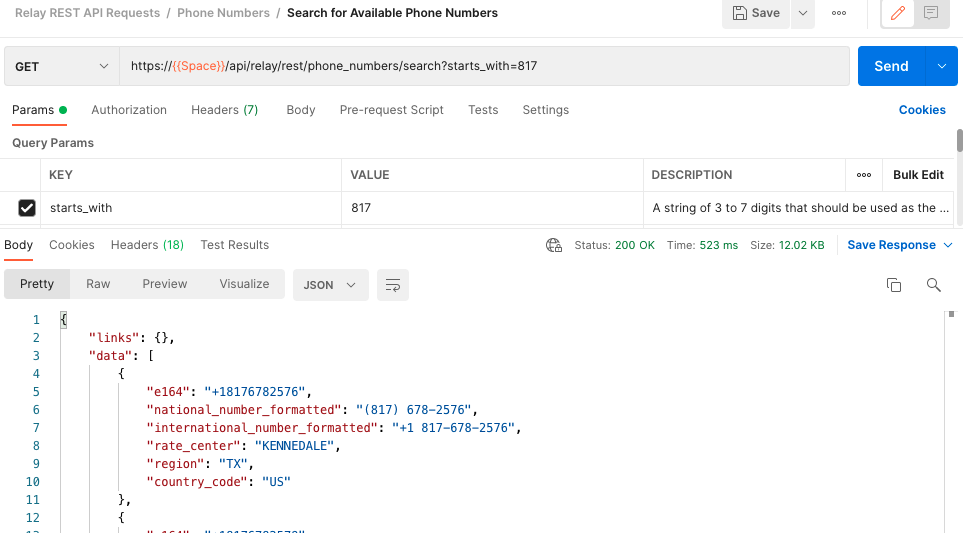
Postman makes searching for and purchasing numbers super simple! Copy the URL in the Number Search API along with any helpful parameters that you would like to use to help narrow down your search. In this example, we will use starts_with as the key and 817 as the value to only return numbers beginning with 817.
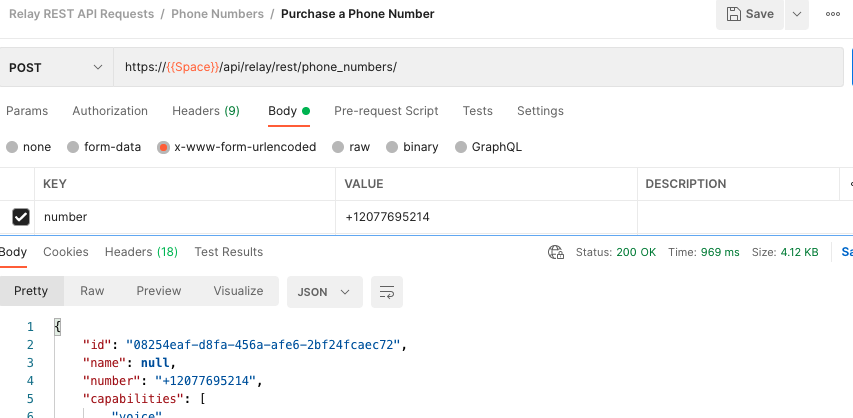
Copy the E164 number that you want to purchase and we'll move on to our next request, the Purchase Number API. Copy the Request URL and replace demo.signalwire.com with {{Space}}
Make sure to change the request type from GET (default) to POST. This also means that instead of using the Query Params section, we will instead select the Body section. You can select x-www-form-urlencoded to use the same key-value type format as before for whatever body parameters you'd like to use.
Press send to proceed with purchasing the number and view data about your newly purchased number!
Pulling All Calls within a Date Range
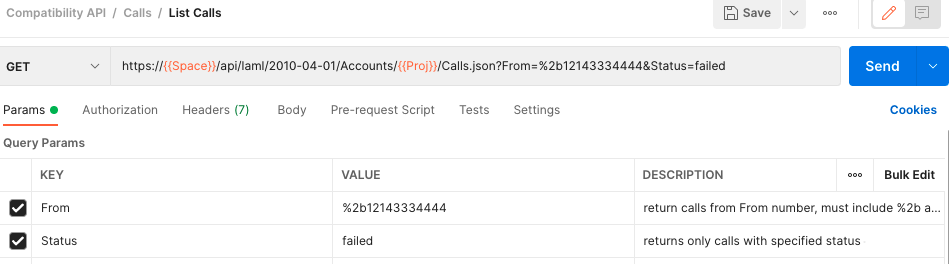
Next, take a look at the documentation for Listing Calls. This component is very useful for getting reports on calls by date range, number pairs, status, and more. This example will show how you can filter all the failed calls from a particular number!
This is a GET request, so we don't have to change the HTTP method type. Copy the Request URL and paste it into Postman, but notice that this time there is an Account SID parameter in the URL as well! Replace demo.signalwire.com with {{Space}} and AccountSID with {{Proj}}. Now, we will add two Query Params key-value pairs: From and Status. Make sure to encode the number with %2b in front of the number, and don't forget the country code! Now press send, and view your call logs easily formatted for you!
Create a Domain App
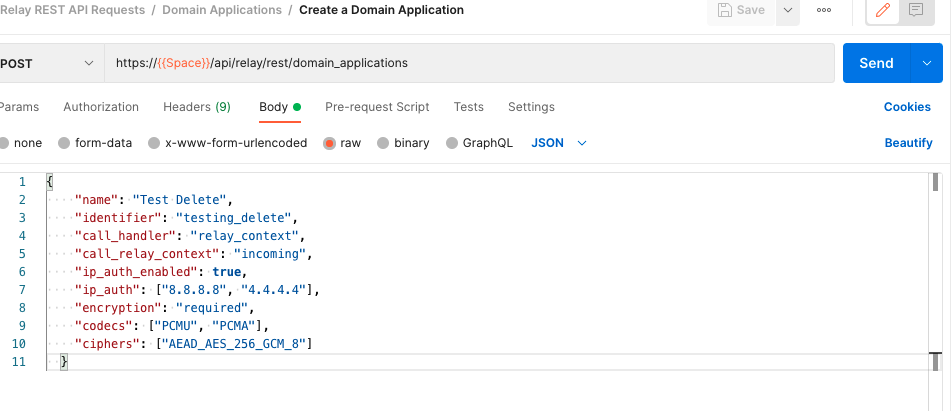
Our last example will show the other type of POST body parameters - raw JSON data. A good example of this is creating a domain application to handle inbound or outbound SIP traffic. Copy the request URL and make sure to replace demo.signalwire.com with {{Space}}.
Switch to POST and select the body tab, but this time select Raw data with the type JSON.
Enter the parameters you want in JSON format and press send, and your domain app is created!
Saving Results
When you send a request where the returned data is very important, you can also use Postman's Save Response feature to save it to a file. SignalWire API data is always returned in JSON format, so you can easily download and handle yourself with a database or your own applications!

Generating Code in cURL or other languages
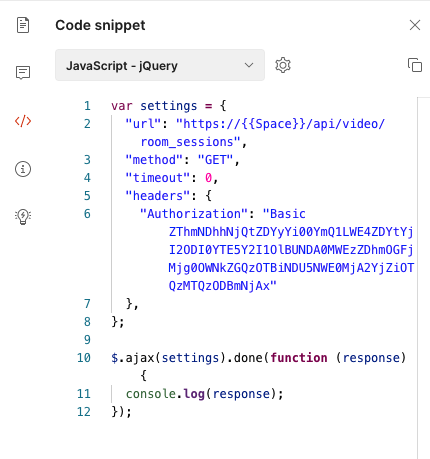
Once you have run a request successfully on Postman, you might want to save the cURL code for it or even replicate the same request in your application instead. Click the </> icon on the right next to Cookies to generate the curl code for your request or the same request in popular languages! This is the generated version of the request above in Javascript - jQuery.
Possible Encountered Errors
Although this is by no means an exhaustive list, here are a few errors we see pop up commonly with Postman!
| Error Name | Possible Error Cause | Steps to Try |
|---|---|---|
| Resource Not Found | The request is working, but the resource you are requesting does not exist. | Make sure the SIDs you are using match the environment that you are in, and that you are using the correct SID! |
| 404 Error | You are attempting to do something the API does not recognize as a real request. | Double-check to make sure the URL is correct with no extra or hidden characters. |
| Unauthorized | Your API credentials don't match. | Check to make sure your project ID, auth token, and Space URL are correct. Make sure to eliminate any whitespace or hidden characters. |
URL variables {{Space}} and {{Proj}} are red instead of orange. | Postman does not see any variables with this name. | Check to make sure there are no hidden characters or whitespace in your environment variable names. Ensure that you have an environment currently selected. Variable names are case sensitive! |