Your SignalWire SIP Space
Overview
If you are not already well-versed in the lingo of traditional telephony, you should get started with our guide What is SIP? for a full explanation of what SIP is and how you can leverage it best for your needs. In short, SIP transmits calls through the cloud, enabling Voice over IP (VoIP) and eliminating the need for physical phone lines. This page will guide you through using the tools in the SIP section of your Dashboard.
Endpoints
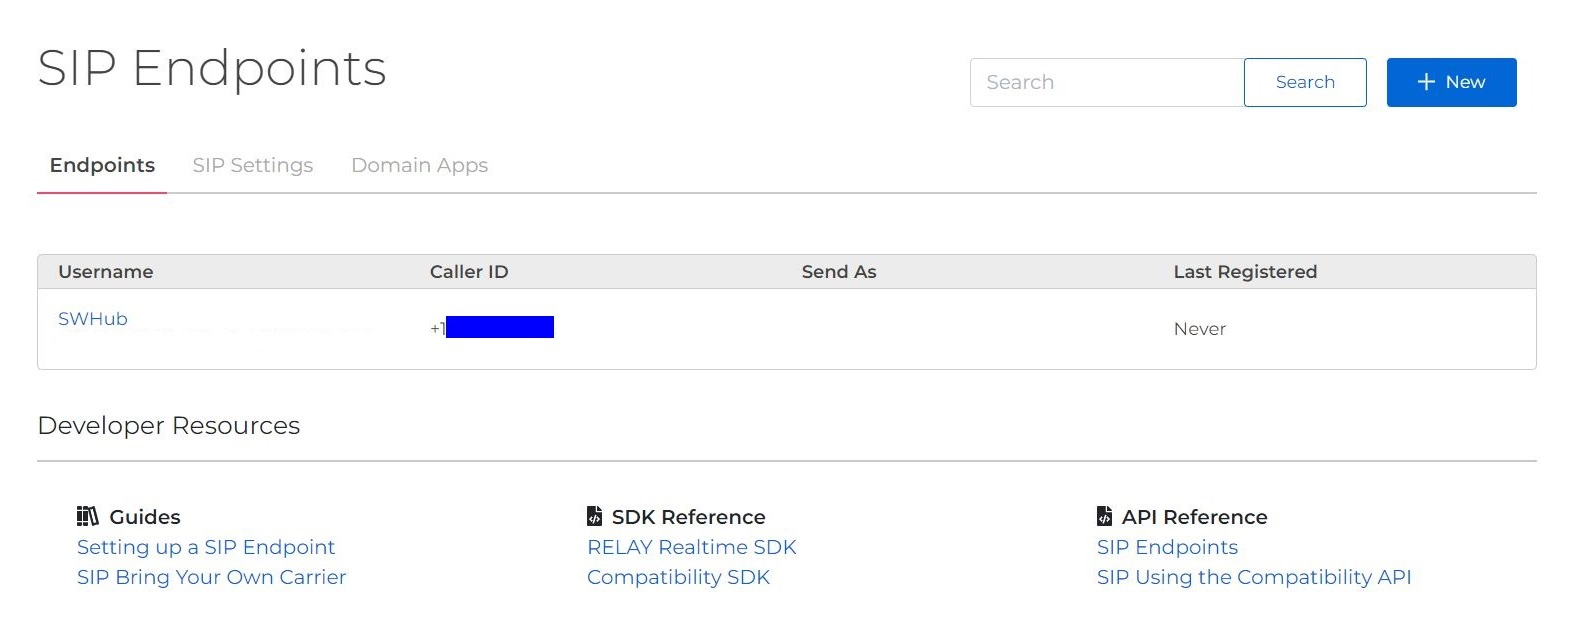
SIP endpoints are your system's connection to using SignalWire's SIP platform. It is where your PBX (the system you use to manage calls to and from your numbers) taps into a SIP trunk to connect to a PSTN (the network that routes your calls to the end user). Your Endpoints homepage will list your existing endpoints and a summary of their settings. If you have a lot of endpoints to manage, there is a search feature to help you easily find an endpoint to edit.
Creating a new Endpoint
Get started with your first endpoint by clicking the blue "Create a SIP Endpoint" button in the middle of the page. If you already have endpoints, you will create a new one with the blue "+ New" button on the top right. This will take you to a form where you will configure settings.
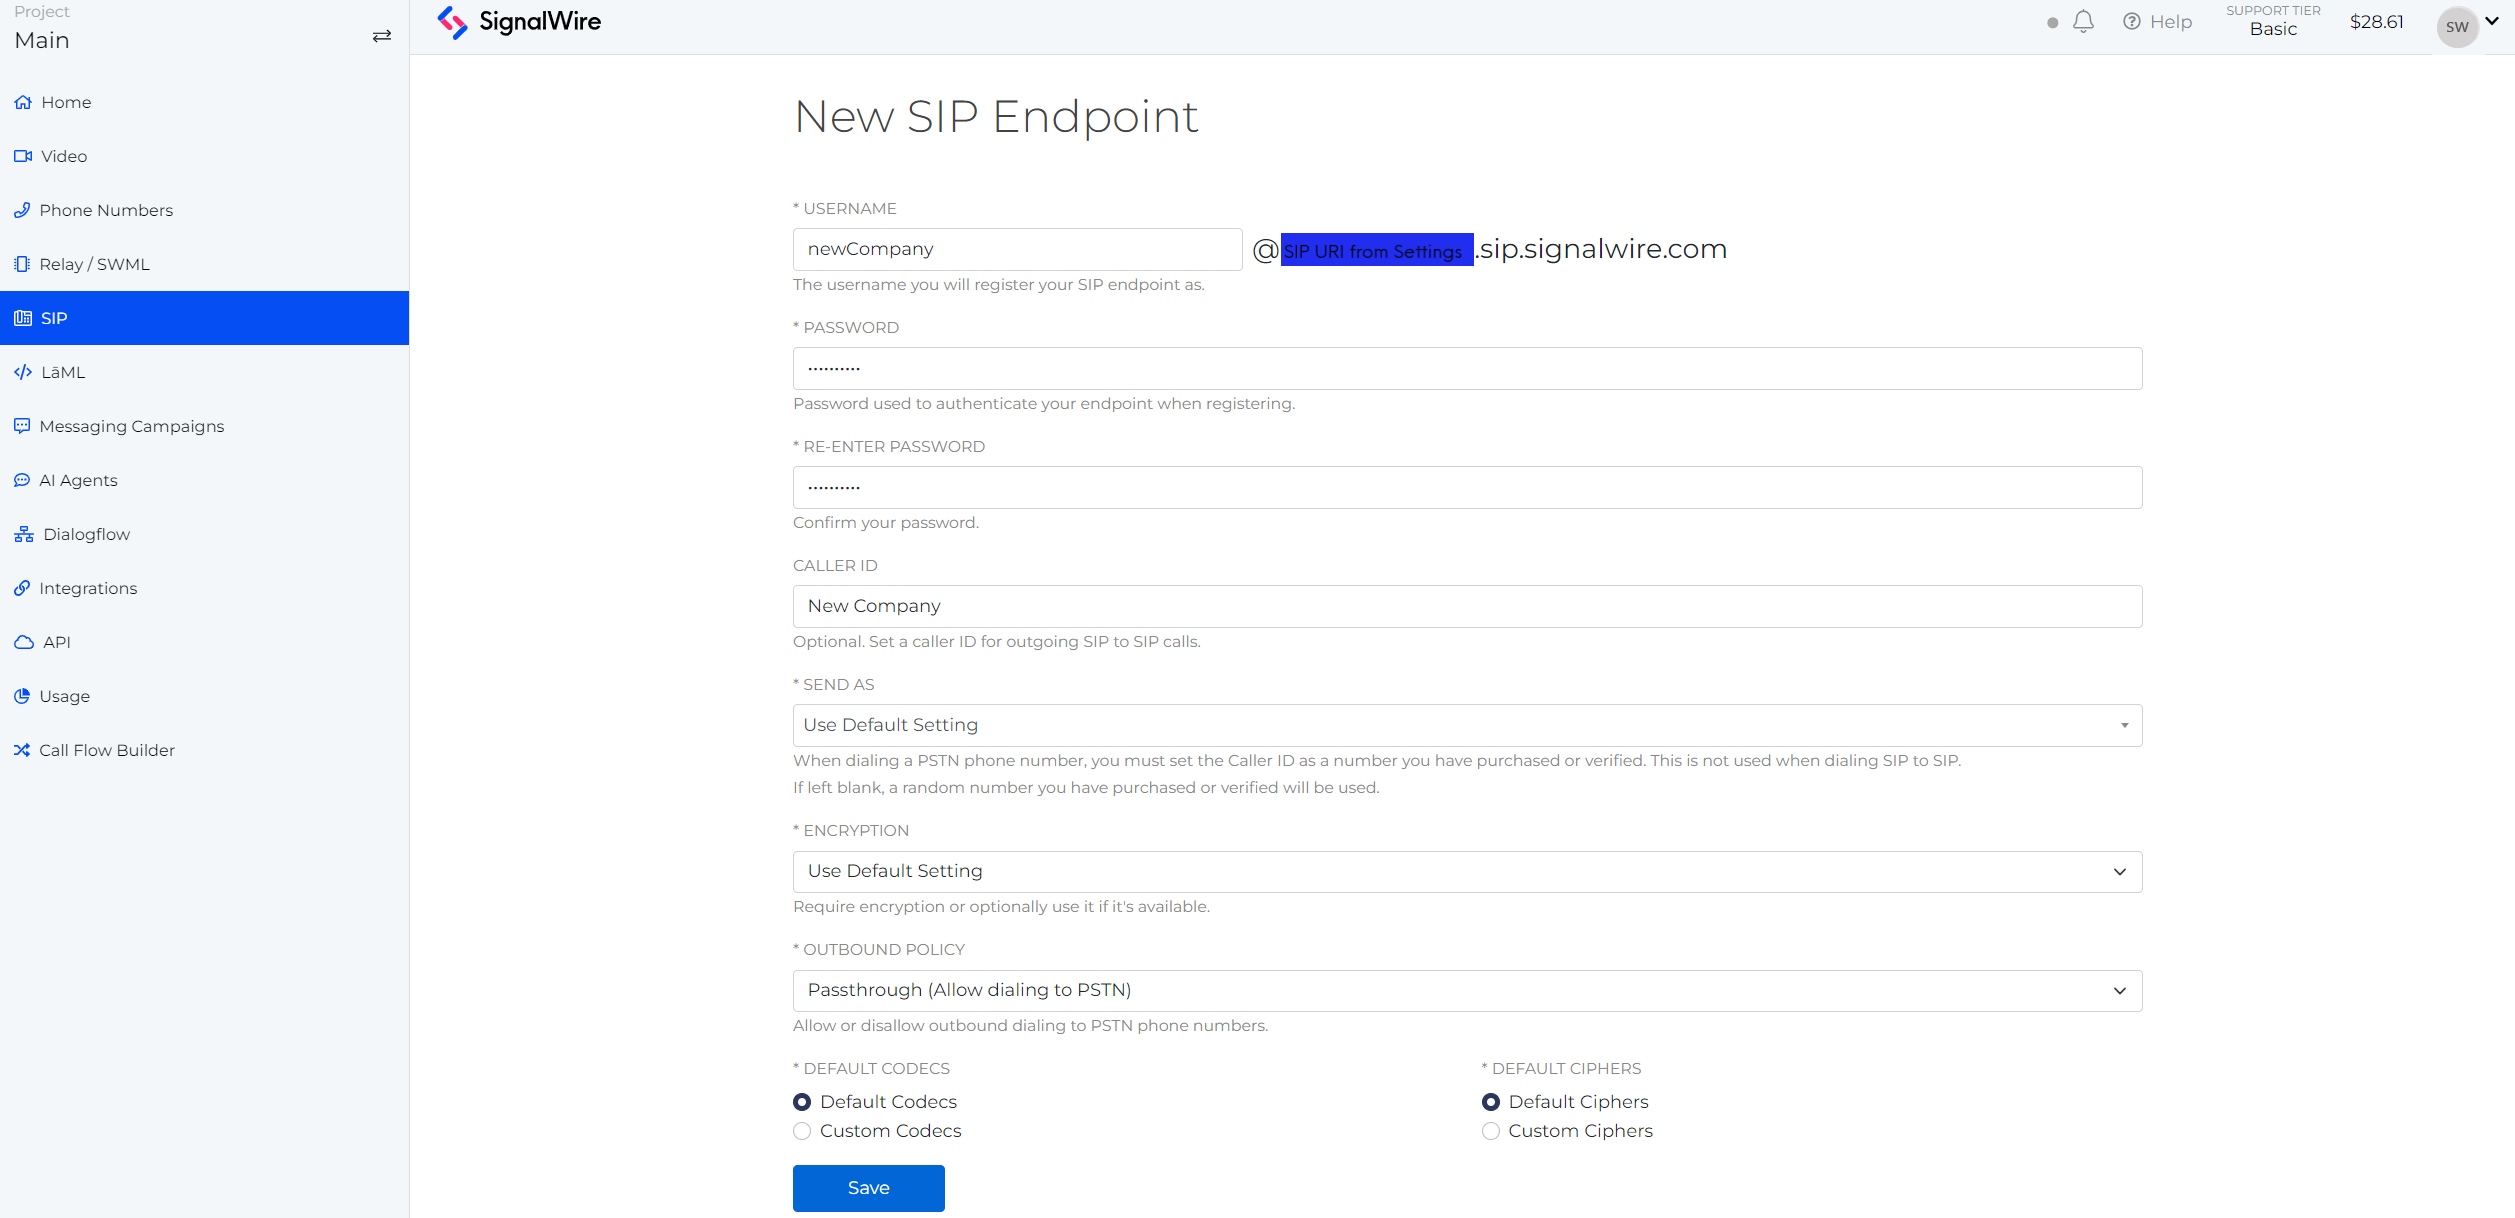
- The username is the beginning part of the SIP URL you will use to access this endpoint. Choose something concise and descriptive.
- The password will be used to authenticate your endpoint when registering it. For security, we recommend a unique password for each endpoint.
- The caller id is used when calling other SIP endpoints and is optional.
- Send as is the caller id used when calling a PSTN number. Choosing is optional and, if left blank, one of your SignalWire phone numbers will be randomly chosen for the caller id display. You also have the option to "Use Default Setting" which you will set in the SIP Settings tab.
- Encryption can be required, optional to be used only where available, or your default setting which is set in the SIP Settings tab.
- The outbound policy allows you to restrict outbound calling to just other SIP endpoints or to allow dialing PSTN numbers as well. You can also use the default setting set in the SIP Settings tab.
- You may set custom codecs and ciphers for your endpoint or use the default choices you set in the SIP Settings tab.
When you have finished with your settings, click "Save" to be returned to the Endpoints home screen.
Editing and Deleting Endpoints
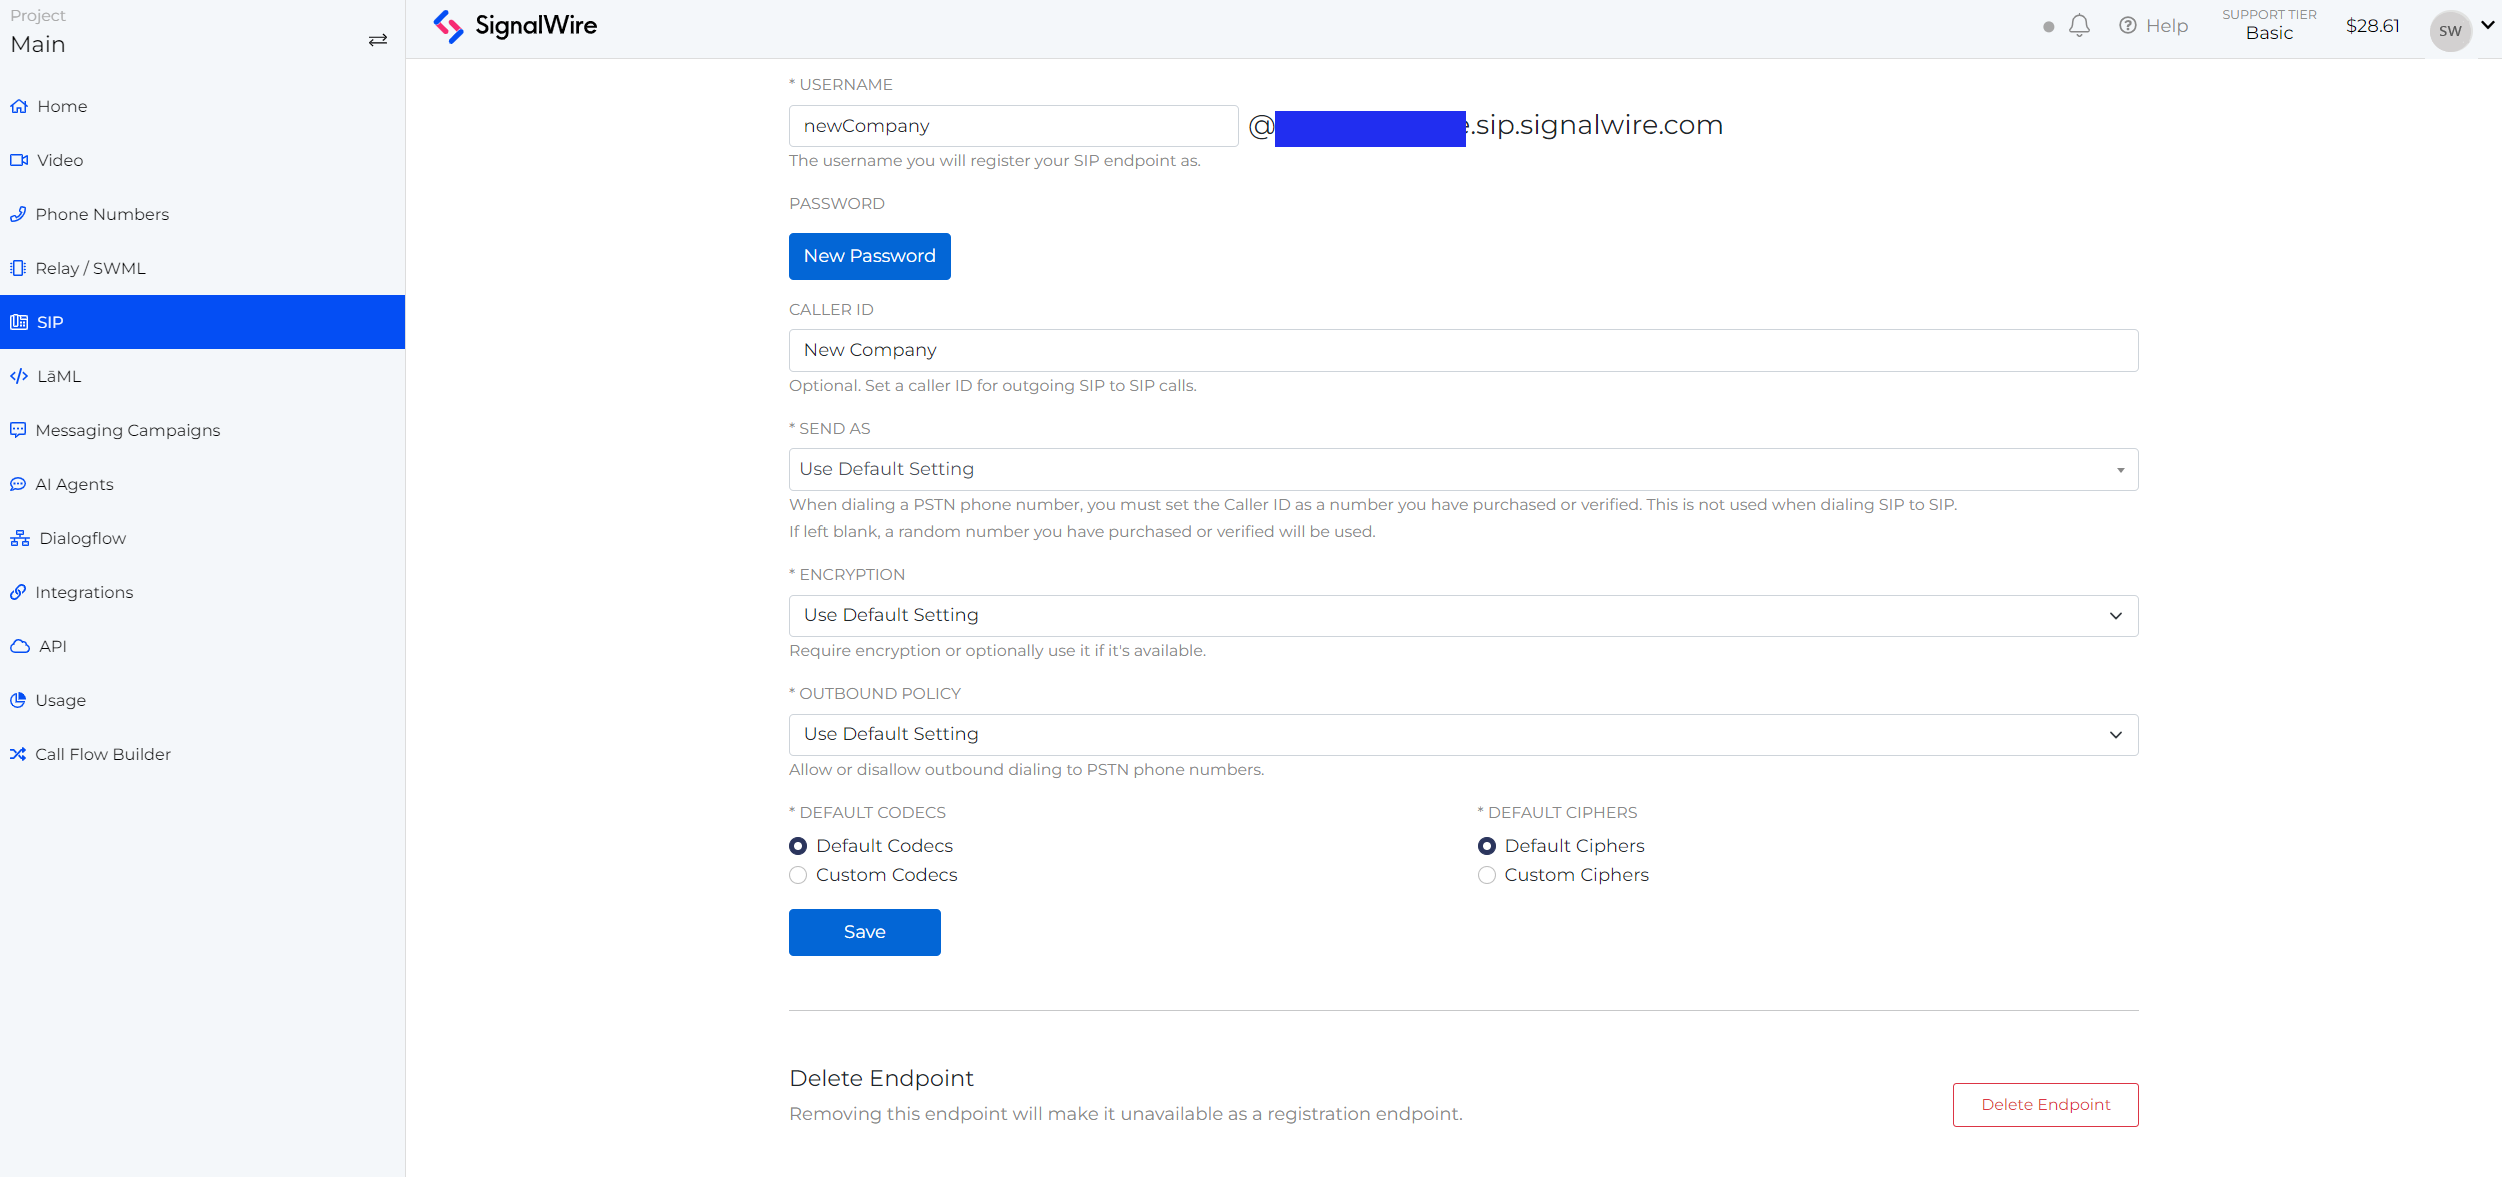
From the endpoints home page, you can click on the Endpoint username to view and edit settings using the same form you created the endpoint with. The edit screen also includes a button to delete the endpoint if you wish. When deleting an endpoint, make sure all instances calling that endpoint are pointed to another endpoint. This action can not be undone.
SIP Settings
This tab is where you will configure your general and default SIP settings.
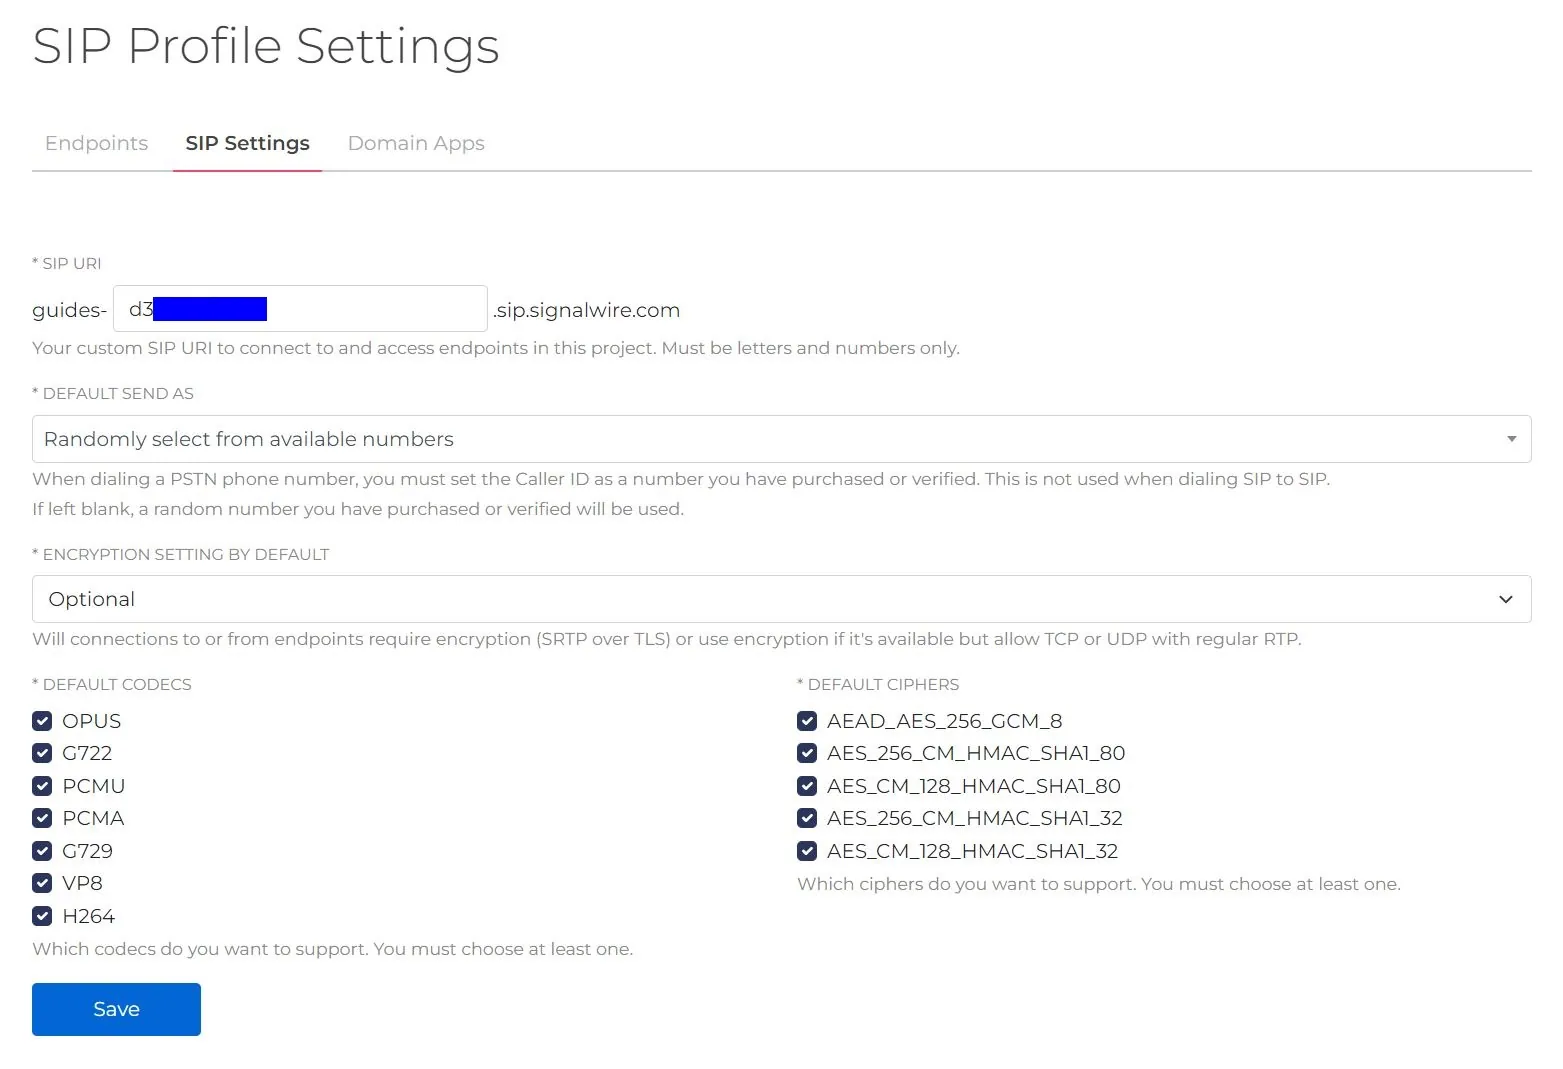
- The SPI URI is the overall profile accessor in your SIP URLs. You may choose any string with letters and/or numbers. Please note that changing your SIP URI after creating endpoints does change the URL for all of your endpoints.
- Default Send As sets a default for caller id when dialing a PSTN number. You may choose a specific SignalWire phone number to use or allow a random SignalWire phone number to be selected.
- Default Encryption can be set to optional or required. If set to optional, TCP or UDP with regular RTP will be allowed if encryption is not available.
- Default Outbound Policy can be set to passthrough or block to allow making outbound calls to PSTN numbers or not. This can be overwritten at the endpoint level.
- Default Codecs and Default Ciphers is where you can choose which of each you would like to support. You must choose at least one of each or you will not be able to save your settings.
Domain Apps
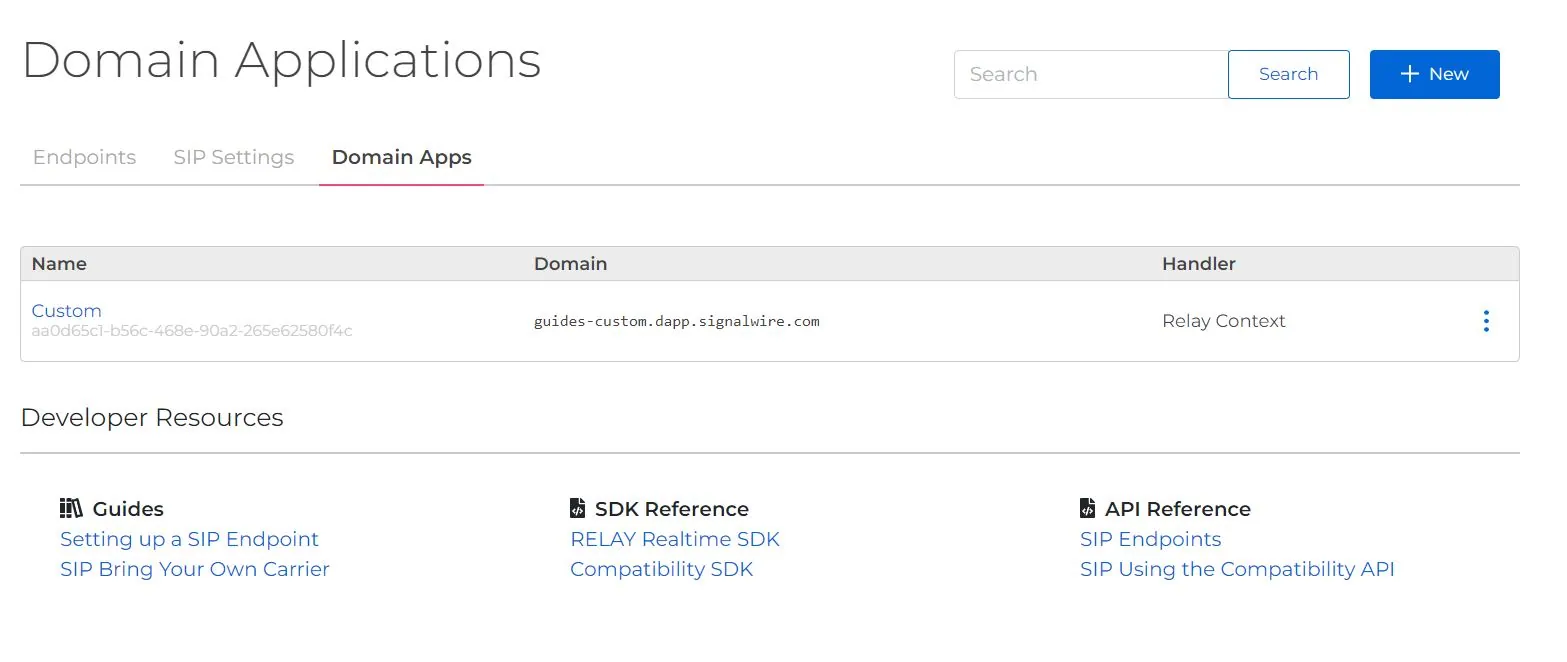
Domain Applications allow you to send SIP traffic to a custom domain and run SignalWire handlers like a RELAY Application, LaML, or even calling a video room to manage incoming requests. You may want to use a Domain App to SIP trunk to/from a SIP server or to use a carrier other than those partnered with SignalWire. For an excellent resource on this use case, see SIP BYOC.
Creating a new Domain Application
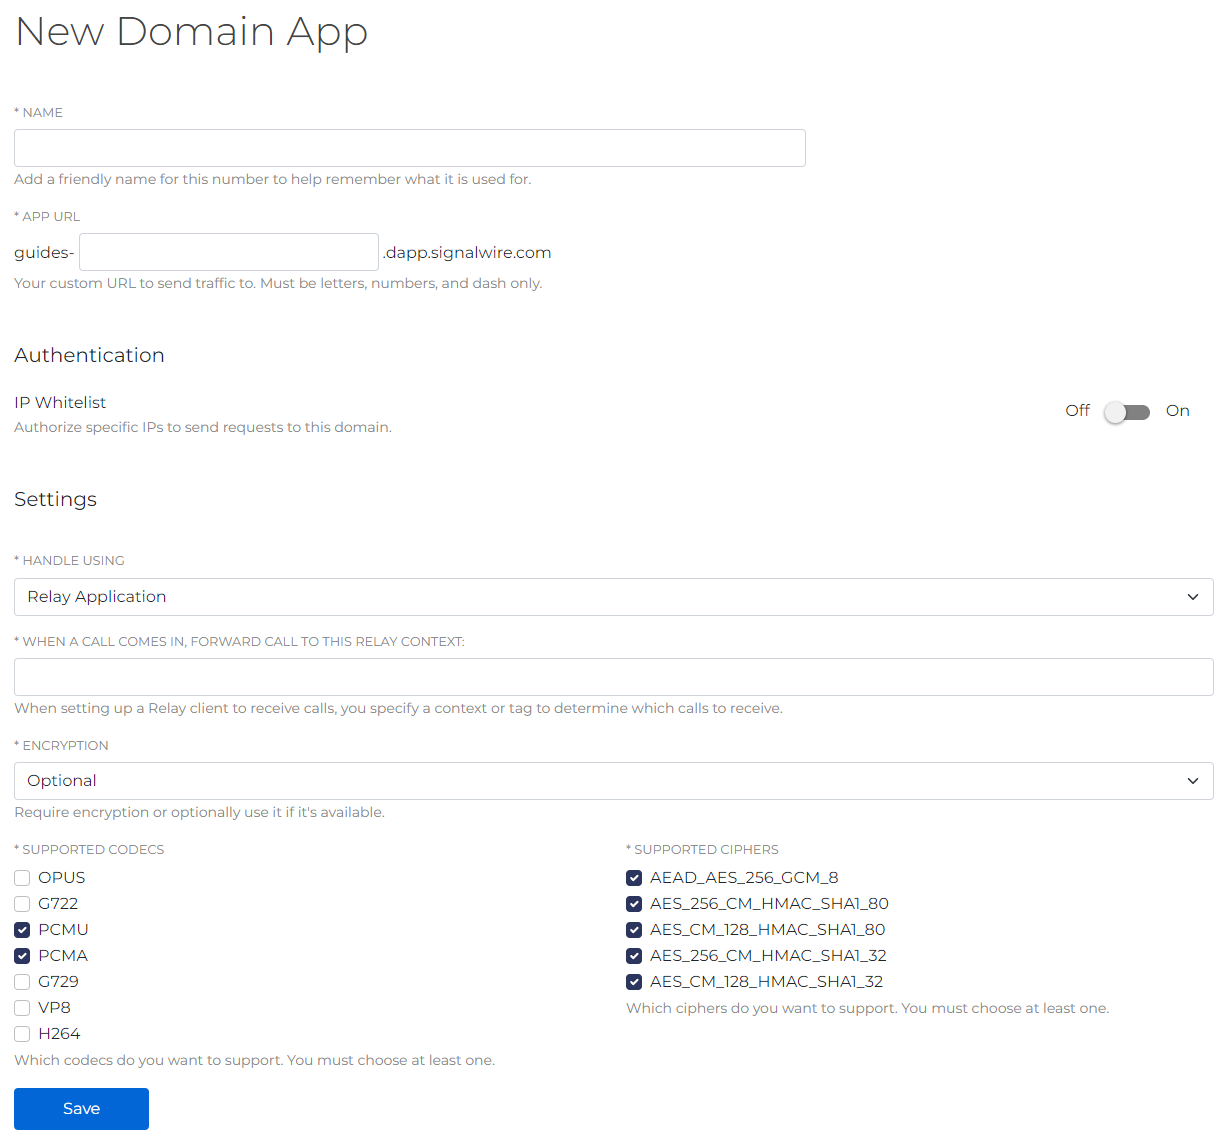
Get started with your first Domain App by clicking the blue "Create a Domain App" button in the middle of the page. If you already have Domain Applications, you will create a new one with the blue "+ New" button on the top right. This will take you to a form where you will configure settings. If you attempt to direct traffic to your domain app without configuring it, SignalWire will not pick up the call.
-
Name is a friendly name to identify your Domain App. Choose something concise and descriptive.
-
In App URL you can build your custom URL to access your Domain App. Note that it starts with your Space name then a string of your choice. You may only use letters, numbers, and dashes.
-
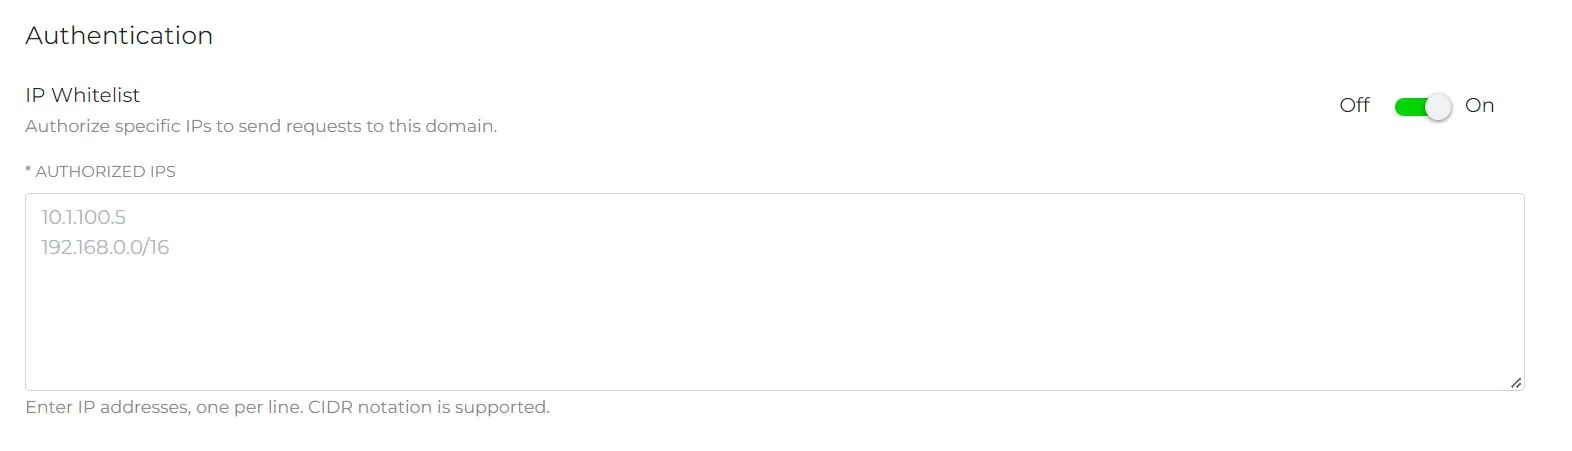
Authentication is where you can specify which IPs can send requests to your domain.
-
Handle Using is where you will tell your Domain App how to handle incoming calls. You may choose RELAY, LaML, or a video room.
- If using a RELAY Application, you will need to specify a context for your RELAY client to listen for. Explore what you can do with RELAY in our RELAY Realtime SDK reference.
- If using LaML webhooks, you will need to specify the path to your XML bin. Find more information in our guide to XML bins and the XML technical reference.
- If using LaML application, specify which application to use. LaML applications can be built in the LaML section of your Dashboard.
- If using a Video room, specify which of your video rooms to connect the call to. The caller will join the video conference as an audio participant.
-
Encryption can be set to optional or required. If set to optional, TCP or UDP with regular RTP will be allowed if encryption is not available.
It's very important to whitelist the IPs that you want to allow through - if you do not select this option, anyone who has the URL could send traffic to your custom domain app.
Editing and Deleting Domain Applications
The same settings form can be edited at any time by clicking on the Domain Application name on the Domain Apps home screen or using the ⋮ menu at the end of the desired application's row.
A Domain Application can be deleted from the ⋮ menu. Of course, that action cannot be undone.