FreePBX
Using FreePBX and taking advantage of SignalWire’s disruptive pricing on DIDs and voice minutes is almost too easy.
Creating a SIP Endpoint
If you don't have a SIP endpoint set up already, the first step is to create a SIP Endpoint and connect it to a phone number.
Editing the Signalwire SIP Endpoint for FreePBX
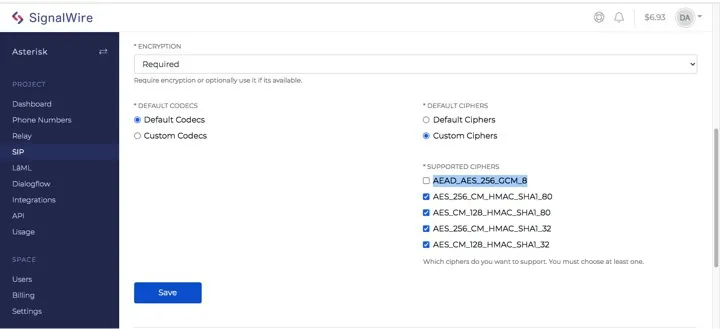
There are a couple of settings we need to change on the SIP Endpoint we have created in SignalWire to get good interworking with FreePBX:
- Set Encryption to ‘Required’
- Disable the Encryption option for AEAD_AES_256_GCM_8 as Asterisk is not currently supported and will cause a warning on the Asterisk Command Line (though calls would still work).
Configuring Asterisk
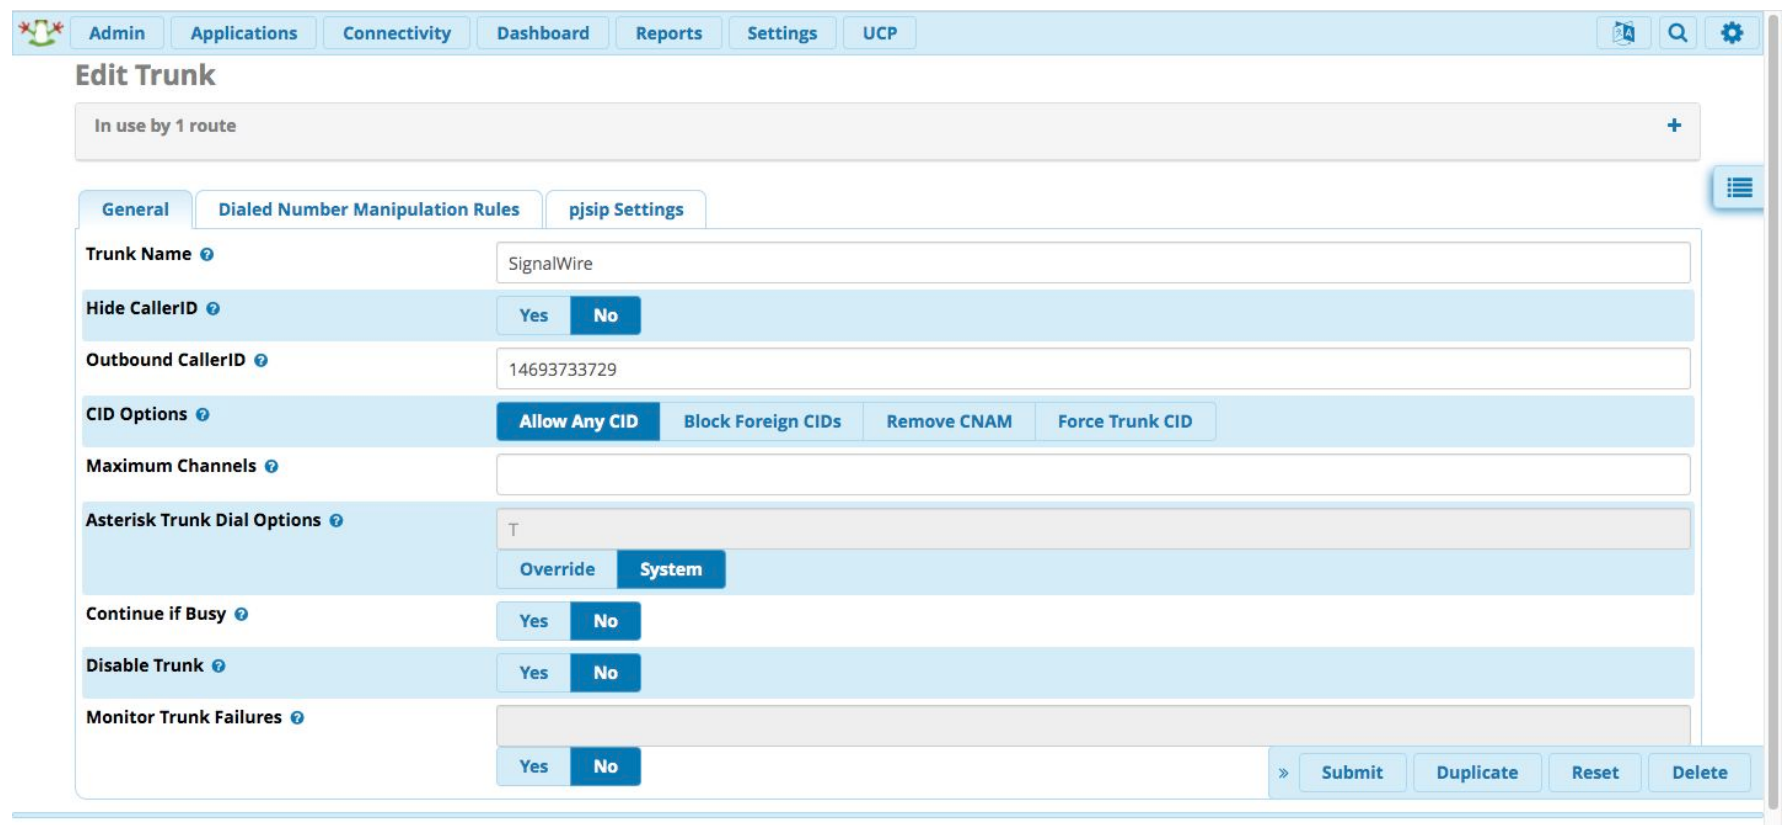
Add a SIP (PJSIP) trunk, and on the General tab enter the following:
Trunk Name: SignalWire (Can be anything you want)
Outbound CallerID: 1-469-FREEPBX (the DID you purchased)
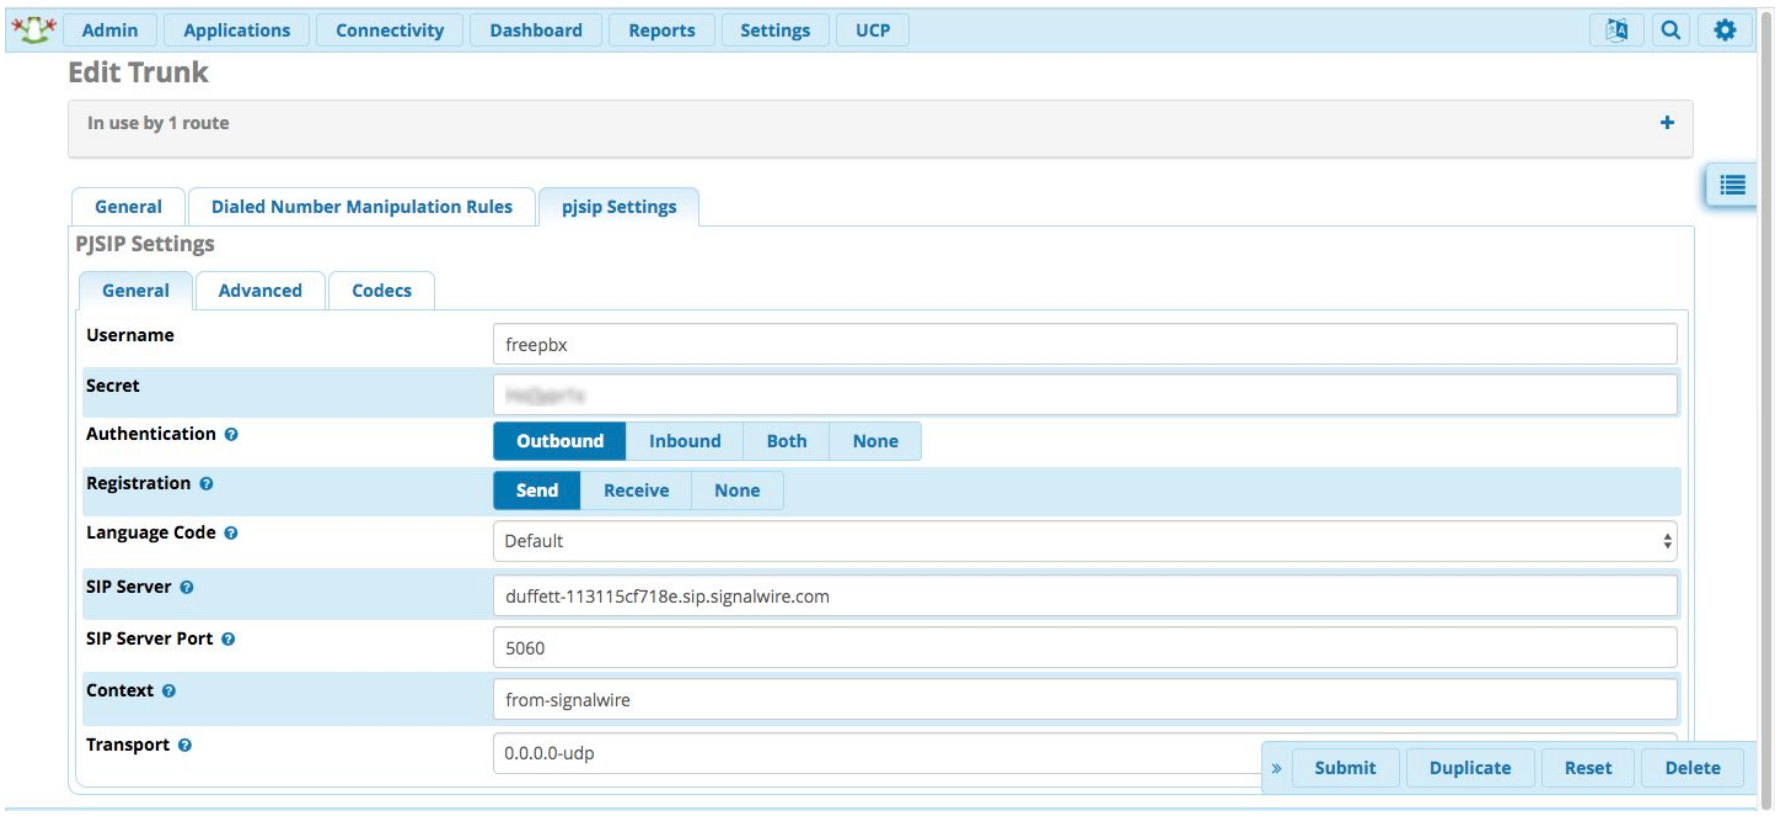
Then, on the PJSIP Settings tab and the General sub-tab, enter the following:
Username: freepbx (the name you gave the SIP endpoint)
Secret: (the password you gave the SIP endpoint)
SIP Server: YOURSPACE-123456abc.sip.signalwire.com (your space URI)
SIP Server Port: 5060 (standard SIP port)
Context: from-signalwire (default is ‘from-pstn’, but you must change it)
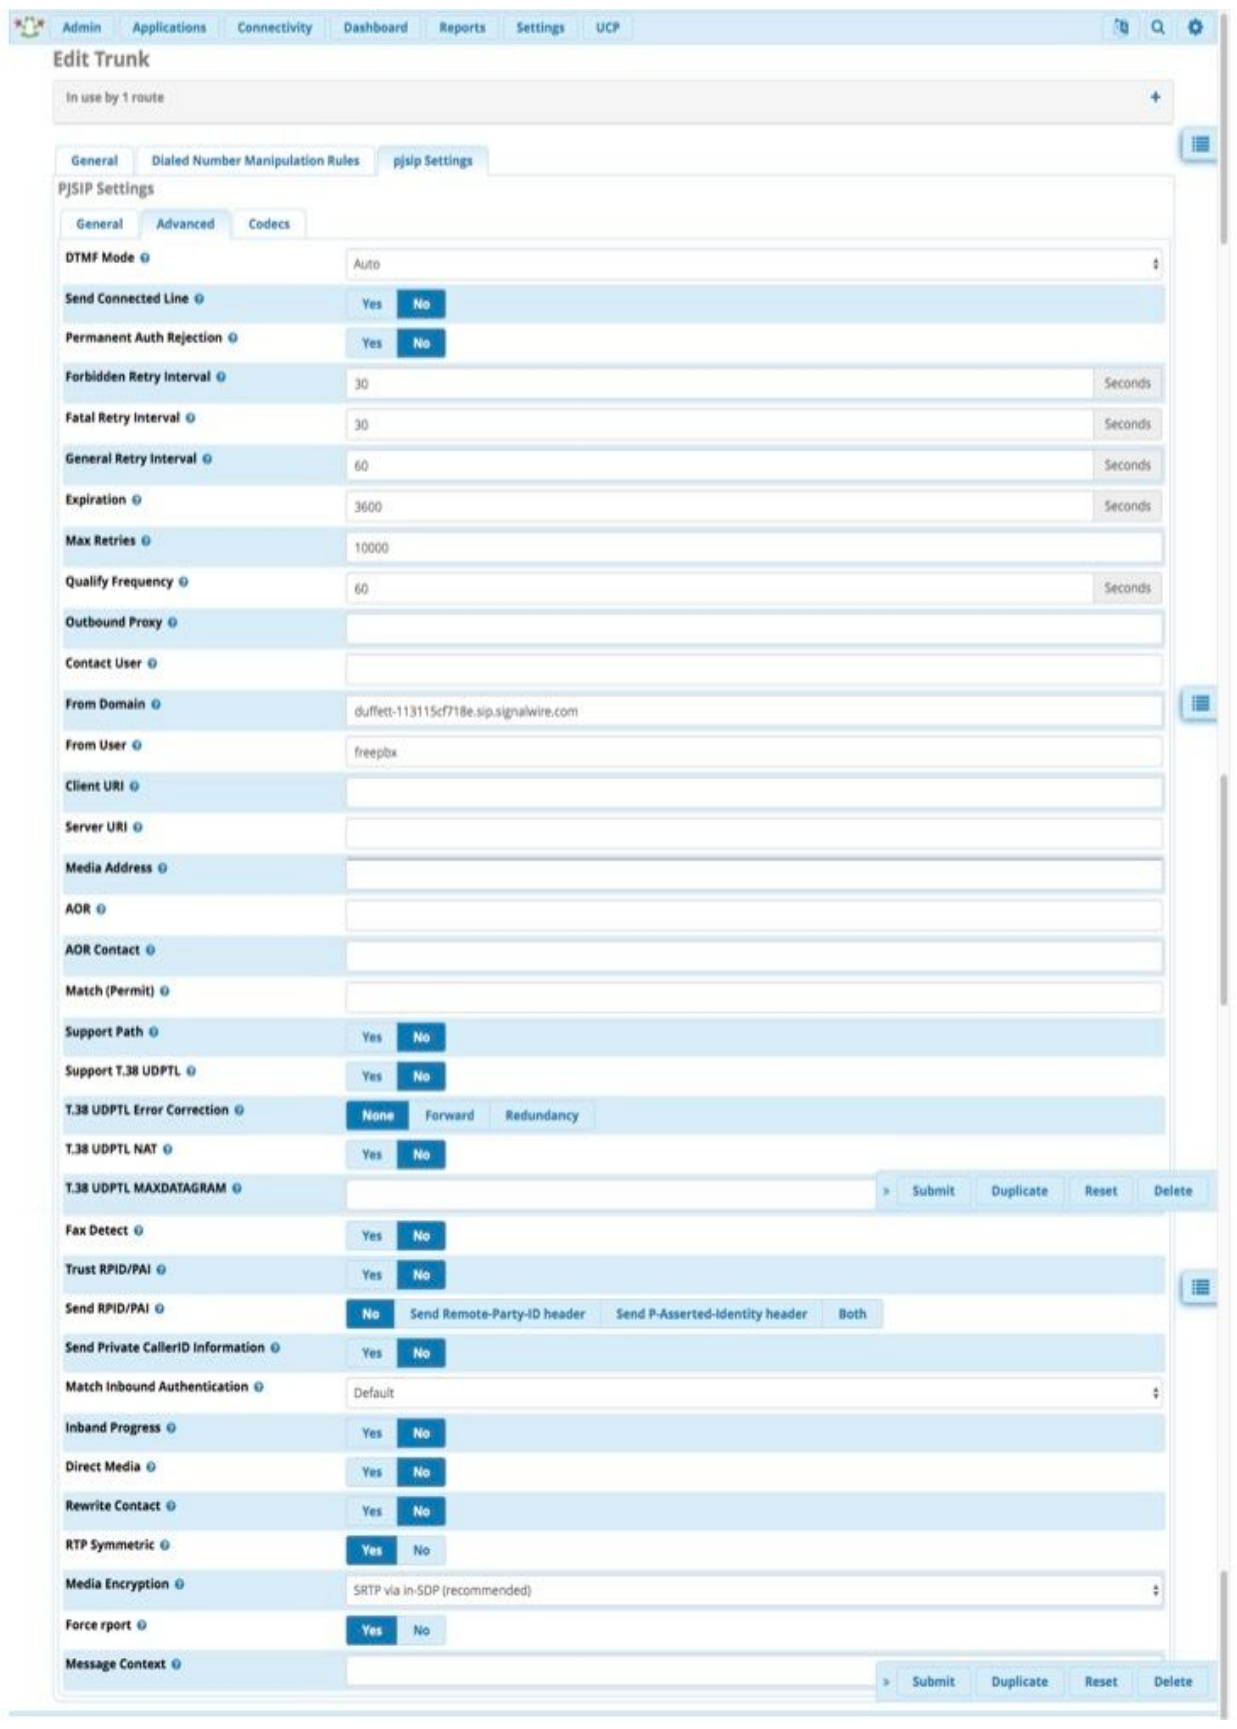
As the last step on this screen, on the PJSIP Settings tab and the Advanced sub-tab, the following three settings:
From Domain: YOURSPACE-123456abc.sip.signalwire.com (your space URI)
From User: freepbx (the name you gave the SIP endpoint)
Media Encryption: SRTP via in-SDP (select from drop-down)
Now your trunk is all set up!
Setting up the Dial Plan
There is a small amount of dialplan script to add (which we will place in a context called "from-signalwire" - remember, we set this in the above steps), in order to extract the dialed number from the SIP Header, before passing the call to FreePBX for normal processing.
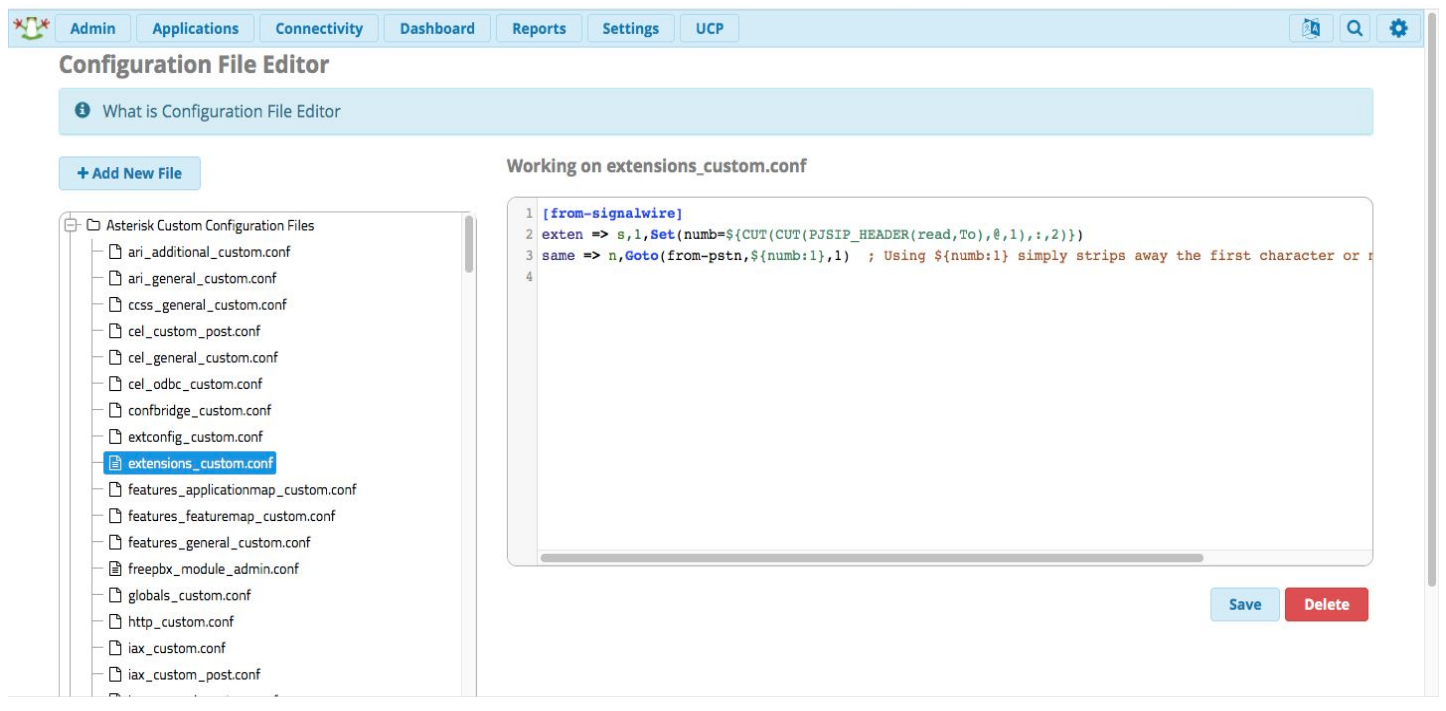
We do this by entering the following lines in a file called extensions_custom.conf (which may be empty) using the inbuilt config editor in the Admin menu:
[from-signalwire]
exten => s,1,Set(numb=${CUT(CUT(PJSIP_HEADER(read,To),@,1),:,2)})
same => n,Goto(from-pstn,${numb:1},1)
The editor is at Admin > Config Edit > extensions_custom.conf:
Now just set up your inbound routing (the DID will be in the format 12223334444) and your outbound routing as normal.
That's all there is to it! You should now be able to make outbound calls over your SignalWire SIP trunk and accept incoming calls to the number you purchased.