FreeSWITCH 1.6 Video
THIS PAGE IS BEING RETIRED, USE Debian 10 Buster (Obsolete) INSTEAD. MOST OF THESE STEPS HAVE ALREADY BEEN INTEGRATED INTO THE PACKAGES.
About
Detailed information on how to properly build and test the new FreeSWITCH™ 1.6 with awesome video conferencing support.
Introduction
FreeSWITCH™ 1.6 introduces new video features. See a working demonstration on the VoIP User Conference 539 of 1 May, 2015 putting the FreeSWITCH™ video conference through its paces.
What's new
FreeSWITCH™ now features video transcoding.
A few new modules were added with video codec support, such as mod_av, mod_vlc, mod_vpx, and others. Based on that, mod_conference can now do a video MCU, which introduces the new video layouts and group layouts. The video layouts feature allows you to set specific locations for the videos participants, floor holder and presenter.
Because FreeSWITCH™ core now supports video, you can do playback and record with video support, so you can do things like 'record' and stream to a live YouTube event over RTMP, etc. Also, mod_verto now adds the ability to select video settings like resolution, bandwidth, camera selection and desktop sharing, all these features are demonstrated in the Verto HTML Demo page.
For more info, check out mod_conference page. Let's get all these new features configured!
Installation
Setting up the repos
Debian Jessie is required for this setup. A clean installation would make things easier and if you just follow the following steps everything will work smoothly.
A new set of dependencies was added to support the new features. Some of these dependencies were developed by the FreeSWITCH™ core team and the packages were added to our repository.
Let's configure the Jessie repo:
Double click to select all commands, then copy and paste in your shell session.
Enable Debian Jessie repository
echo "deb http://files.freeswitch.org/repo/deb/freeswitch-1.6/ jessie main" > /etc/apt/sources.list.d/freeswitch.list
wget -O - http://files.freeswitch.org/repo/deb/freeswitch-1.6/key.gpg |apt-key add -
apt-get update
Get FreeSWITCH
Choose from the packages listed to complete your FreeSWITCH™ installation.
apt-cache search freeswitch | less
We suggest that you install the Vanilla meta package to get a basic running installation.
apt-get install freeswitch-all
If you desire other FreeSWITCH modules, run the apt-cache search command above and choose from those listed by running apt-get install <module_name>
You might get systemd errors. Replace freeswitch.service in /lib/systemd/system/ with this in that case:
freeswitch.service Unit File for FS Package
[Unit]
Description=freeswitch
After=syslog.target network.target local-fs.target

[Service]
; service
Type=forking
PIDFile=/run/freeswitch/freeswitch.pid
PermissionsStartOnly=true
ExecStart=/usr/bin/freeswitch -u freeswitch -g freeswitch -ncwait -nonat -rp
TimeoutSec=45s
Restart=on-failure
; exec
WorkingDirectory=/usr/bin
User=root
Group=daemon
LimitCORE=infinity
LimitNOFILE=100000
LimitNPROC=60000
;LimitSTACK=240
LimitRTPRIO=infinity
LimitRTTIME=7000000
IOSchedulingClass=realtime
IOSchedulingPriority=2
CPUSchedulingPolicy=rr
CPUSchedulingPriority=89
UMask=0007

[Install]
WantedBy=multi-user.target
After that do:
systemctl daemon-reload && systemctl start freeswitch
The packages might not set up the configuration in /etc/freeswitch, you then can copy the files manually:
cp -a /usr/share/freeswitch/conf/vanilla /etc/freeswitch
Installing from Source
Now that we have our repo configured, let's install the deps:
Dependencies
apt-get install -y --force-yes freeswitch-video-deps-most
Compiling
With all the dependencies installed, we can now properly build FreeSWITCH™ 1.6:
Checkout FreeSWITCH source
# because we're in a branch that will go through many rebases it's
# better to set this one, or you'll get CONFLICTS when pulling (update)
git config --global pull.rebase true

# then let's get the source
cd /usr/src/
git clone https://freeswitch.org/stash/scm/fs/freeswitch.git freeswitch.git
cd freeswitch.git
./bootstrap.sh -j
./configure
Enable mod_av:
Enabling optional modules
perl -i -pe 's/#applications\/mod_av/applications\/mod_av/g' modules.conf
Let's make and install the project:
Compiling the code
make
make install
make cd-sounds-install
make cd-moh-install
make samples
Configuring
Certificates
It's mandatory that you use valid certificates on this setup. If you're setting up your own CA we can't guarantee that it'll work and we can't help you.
You can set up your certs at http://www.startssl.com/ .
Let's create our directory to store the certificates that will be used by FreeSWITCH™ and Apache:
mkdir -p /usr/local/freeswitch/certs/
After creating the certs dir, we need to set our wss.pem, agent.pem and cafile.pem:
Certs files
# NOT NEEDED if you will use following section on SELF SIGNED certificates

/usr/local/freeswitch/certs/wss.pem # CERT, KEY AND CHAIN files separated by \n
/usr/local/freeswitch/certs/agent.pem # CERT file AND key file separated by \n
/usr/local/freeswitch/certs/cafile.pem # CHAIN file or root CA
Make sure you generate those files with proper layout, as described above, otherwise you'll get WS SETUP FAILED messages in FreeSWITCH™ console and things won't work.
Self-signed certificates
If you really really want to use your own self-signed certificates, knowing that we will not support it, follow these steps:
Certs files
# Create certificates:

export DOMAIN=self.bkw.org
wget http://files.freeswitch.org/downloads/ssl.ca-0.1.tar.gz
tar zxfv ssl.ca-0.1.tar.gz
cd ssl.ca-0.1/
perl -i -pe 's/md5/sha256/g' *.sh
perl -i -pe 's/1024/4096/g' *.sh
./new-root-ca.sh
./new-server-cert.sh $DOMAIN
./sign-server-cert.sh $DOMAIN
mkdir /usr/local/freeswitch/certs
cat $DOMAIN.crt $DOMAIN.key > /usr/local/freeswitch/certs/wss.pem

# Setup Sofia TLS:

cat $DOMAIN.crt $DOMAIN.key > /usr/local/freeswitch/certs/agent.pem
cat ca.crt > /usr/local/freeswitch/certs/cafile.pem


# vars.xml:

<X-PRE-PROCESS cmd="set" data="internal_ssl_enable=true"/>
<X-PRE-PROCESS cmd="set" data="external_ssl_enable=true"/>

# Restart FreeSWITCH.

## Now make sure your system has ca.crt imported so it will trust your new found hotness.


# Setup Apache:

# default-ssl:

SSLCertificateFile /usr/local/freeswitch/certs/wss.pem
SSLCertificateKeyFile /usr/local/freeswitch/certs/wss.pem
SSLCertificateChainFile /usr/local/freeswitch/certs/wss.pem


# TEST:

openssl s_client -connect $DOMAIN:443
openssl s_client -connect $DOMAIN:5061
openssl s_client -connect $DOMAIN:5081
openssl s_client -connect $DOMAIN:8082


# Depending on what you've setup you'll see:

subject=/C=US/ST=Oklahoma/L=McAlester/O=Tonka Truck/OU=Secure Web Server/CN=self.bkw.org/emailAddress=brian@bkw.org
issuer=/C=US/ST=Oklahoma/L=McAlester/O=Whizzzzzzy Bang Bang/OU=Certification Services Division/CN=WBB Root CA/emailAddress=brian@bkw.org

# Or there abouts.

# IMPORT THE CA.CRT CERTIFICATE INTO BROWSER !
# BE SURE YOU SET "domain" to self.bkw.org in vars.xml !
WS SETUP FAILED with Self-signed certificates
You cannot login, and FreeSWITCH is reporting (in debug) WS SETUP FAILED : this is because you have not imported your new self-signed certification authority in the browser. It will fail forever.
Import the self signed CA in browser, or visit with the browser the same address and port you will use as wss. Eg: if you have wss://192.168.1.34 then visit from same browser https://192.168.1.34 , then accept the certificate.
This (accept the certificate from https) is not the optimal solution, and can bring problems and failures to connect.
Optimal solution is to import into your browser your self signed Certification Authority.
Apache with SSL
Note that the HTML does not have to be served from the FreeSWITCH server, it can come from anywhere – the only requirement is that the SSL certificates on the FreeSWITCH server must be trusted.
Enable required Apache modules:
Apache Required Modules
a2enmod ssl
a2enmod rewrite
a2ensite default-ssl
Copy the CHAIN, CERT and KEY files to /etc/ssl/private:
Copy cert files to /etc/ssl/private
# NOT NEEDED if you made previous section SELF SIGNED certificates

cp chain.pem /etc/ssl/private/chain.pem
cp cert.pem /etc/ssl/private/cert.pem
cp key.pem /etc/ssl/private/key.pem
Setup Apache default SSL enabled host:
Apache SSL Configuration
# NOT NEEDED if you made previous section SELF SIGNED certificates

perl -i -pe 's/SSLCertificateFile.*/SSLCertificateFile \/etc\/ssl\/private\/cert.pem/g' /etc/apache2/sites-available/default-ssl.conf
perl -i -pe 's/SSLCertificateKeyFile.*/SSLCertificateKeyFile \/etc\/ssl\/private\/key.pem/g' /etc/apache2/sites-available/default-ssl.conf
perl -i -pe 's/#SSLCertificateChainFile.*/SSLCertificateChainFile \/etc\/ssl\/private\/chain.pem/g' /etc/apache2/sites-available/default-ssl.conf
Rewrite HTTP to HTTPS access:
Rewrite HTTP to HTTPS
perl -i -pe 's/AllowOverride None/AllowOverride All/g' /etc/apache2/apache2.conf
printf "RewriteEngine On\nRewriteCond %%{SERVER_PORT} 80\nRewriteRule ^(.*)$ https://MY.DOMAIN.NAME/\$1 [R,L]" > /var/www/html/.htaccess
printf "\n\nRewriteCond %%{SERVER_PORT} 443\nRewriteRule ^$ https://MY.DOMAIN.NAME/verto [R,L]" >> /var/www/html/.htaccess
Make sure to replace MY.DOMAIN.NAME with your FQDN in the commands above.
Improving Apache SSL Security settings:
Apache SSL Tweaks
perl -i -pe 's/ServerSignature On/ServerSignature Off/g' /etc/apache2/conf-available/security.conf
perl -i -pe 's/ServerTokens OS/ServerTokens Prod/g' /etc/apache2/conf-available/security.conf
perl -i -pe 's/SSLProtocol(.*)/SSLProtocol All -SSLv2 -SSLv3/g' /etc/apache2/mods-available/ssl.conf
perl -i -pe 's/SSLCipherSuite(.*)/SSLCipherSuite AES128+EECDH:AES128+EDH/g' /etc/apache2/mods-available/ssl.conf
perl -i -pe 's/#SSLHonorCipherOrder on/SSLHonorCipherOrder on/g' /etc/apache2/mods-available/ssl.conf
Now restart Apache to reflect the new settings:
/etc/init.d/apache2 restart
Test Certificates
You can use the following script to test your certificate setup. Create a file called test_tls.sh and paste this content:
Test TLS domain
#!/bin/bash

DOMAIN=MY.DOMAIN.NAME

echo 'x' | openssl s_client -connect $DOMAIN:443 > /dev/null 2>&1
if [ $? -ne 0 ]; then
	echo "$DOMAIN:443 TLS FAILED!"
fi
echo 'x' | openssl s_client -connect $DOMAIN:5061 > /dev/null 2>&1
if [ $? -ne 0 ]; then
	echo "$DOMAIN:5061 TLS FAILED!"
fi
echo 'x' | openssl s_client -connect $DOMAIN:5081 > /dev/null 2>&1
if [ $? -ne 0 ]; then
	echo "$DOMAIN:5081 TLS FAILED!"
fi
echo 'x' | openssl s_client -connect $DOMAIN:8082 > /dev/null 2>&1
if [ $? -ne 0 ]; then
	echo "$DOMAIN:8082 TLS FAILED!"
fi
Then you can run the script:
chmod +x test_tls.sh
./test_tls.sh
If one of the above tests fail you MUST stop now and try to fix the issue before continuing this guide.
Demo Files
Verto demo pages uses some videos to demonstrate the new video features. Let's get this environment set up:
ln -s /usr/src/freeswitch.git/html5/verto/video_demo /var/www/html/verto
mkdir -p /var/www/html/sounds/
Dialplan:
cp -f /usr/src/freeswitch.git/html5/verto/video_demo/dp/dp.xml /usr/local/freeswitch/conf/dialplan/default/0000_dp.xml
fs_cli -x 'reloadxml'
FreeSWITCH™ default dialplan checks if you're using the default password and warns you in the console about this security role, this extensions has an sleep of 10 seconds. Let's disable this for now so we don't have to wait 10 seconds each time we make a test call:
perl -i -pe 's/default_password/disabled_default_password_checking/g' /usr/local/freeswitch/conf/dialplan/default.xml
The proper way to fix this is by changing your default password to something more secure. Change it ASAP.
Bridging from WebRTC (mod_verto) to PSTN/ITSPs
WebRTC is slow to establish media. So we need to provide SDP asap.
We can do this by answering and sending some silent packets, instead of waiting for normal call setup:
Dialplan:
<extension name="itsp_send_call">
<condition field="destination_number" expression="^(\d+)$">
<action application="answer"/>
<action application="playback" data="silence_stream://2000"/>
<action application="set" data="effective_caller_id_number=333444555"/>
<action application="set" data="effective_caller_id_name=ciaociaociao"/>
<action application="bridge" data="{absolute_codec_string=pcmu}sofia/gateway/itsp/$1"/>
</condition>
</extension>
Starting FreeSWITCH
The default and preferred init system on Debian 8 (and CentOS 7) is Systemd. If you didn't revert to system V and you're compiling Freeswitch like you are, the building mechanism now recognises that you're using a Systemd based distribution and it will offer you a script that will create the required user and group and install the Systemd files, so you can just start Freeswitch. You can install it using:
build/startup/install_systemd.sh
If this works out for you, you can skip the following two sections (about owners/permissions and Systemd).
Set Owner and Permissions
Because you most likely built FreeSWITCH™ as root you must now create the user 'freeswitch' in group 'freeswitch' and change the FS files to owner = freeswitch and group = freeswitch and set the file mode appropriately. Execute the following commands as user root:
Set owner and permissions
# create user 'freeswitch'
# add it to group 'freeswitch'
# change owner and group of the freeswitch installation
cd /usr/local
groupadd freeswitch
adduser --disabled-password  --quiet --system --home /usr/local/freeswitch --gecos "FreeSWITCH open source softswitch" --ingroup freeswitch freeswitch
chown -R freeswitch:freeswitch /usr/local/freeswitch/
chmod -R ug=rwX,o= /usr/local/freeswitch/
chmod -R u=rwx,g=rx /usr/local/freeswitch/bin/*
systemd
systemd is the replacement service management system that replaces System V init. It is quite thorough and requires much simpler configuration scripts called Unit Files. systemd can start FreeSWITCH™ at boot time, monitor the application, restart it if it fails, and take other useful actions.
At the time of this writing (August 2015) the optimum systemd unit file is not certain, but the following have been proven to work on Debian 8.1 systems. If you have discovered a better approach, please update this section or submit a JIRA ticket so that we can capture this knowledge for the community. If you prefer to use the old sysvinit system, then use the instructions on the Debian 7 page.
The systemd unit file you're going to use should be something similar to this, this works fine when Freeswitch is installed using the methods above. The pre-compiled packages come with their own systemd files and scripts to install them, although you may certainly use this as a guide if you have trouble; but be sure to observe the correct file locations as they differ between compiled installations and package installations.
When troubleshooting systemd difficulties look for messages in /var/log/syslog and /var/log/daemon.log and grep for freeswitch messages.
The unit file start Freeswitch as root, so Freeswitch can setup priority, create some directories if needed, etc. Then it will continue running as user/group Freeswitch.
systemd unit file FreeSWITCH built from MASTER
; This file in installations built from Master can be found in
; /usr/src/freeswitch.git/debian
; or
; /usr/src/freeswitch/debian
[Unit]
Description=freeswitch
After=syslog.target network.target local-fs.target

[Service]
; service
Type=forking
PIDFile=/usr/local/freeswitch/run/freeswitch.pid
PermissionsStartOnly=true
ExecStart=/usr/local/freeswitch/bin/freeswitch -u freeswitch -g freeswitch -ncwait -nonat -rp
TimeoutSec=45s
Restart=on-failure
; exec
WorkingDirectory=/usr/local/freeswitch/bin
User=root
Group=daemon
LimitCORE=infinity
LimitNOFILE=100000
LimitNPROC=60000
;LimitSTACK=240
LimitRTPRIO=infinity
LimitRTTIME=7000000
IOSchedulingClass=realtime
IOSchedulingPriority=2
CPUSchedulingPolicy=rr
CPUSchedulingPriority=89
UMask=0007

[Install]
WantedBy=multi-user.target
Now that the systemd unit file has been set up, you can copy it to the /etc/systemd/system directory where systemd looks for local customized files that won't be overwritten by systemd updates. Linking is possible to, but will give you issues when enabling (https://bugzilla.redhat.com/show\_bug.cgi?id=955379)
cp /usr/src/freeswitch.git/debian/freeswitch-systemd.freeswitch.service /etc/systemd/system/freeswitch.service
Next, notify systemd to look for changes in its configuration:
systemctl daemon-reload
Now you are ready to start FreeSWITCH for the first time. Because FS is owned by user freeswitch it should create its databases and log files under that user (instead of root) so that those files will still be accessible to it under future runs.
systemctl start freeswitch
To stop FreeSWITCH:
systemctl stop freeswitch
To install FreeSWITCH to start at boot time:
systemctl enable freeswitch
Testing Video
At this time you have a fully functional FreeSWITCH™ 1.6 demo system. You can now point your RTC-enabled browser to https://MY.DOMAIN.NAME/verto and you'll see the Verto Demo Page.
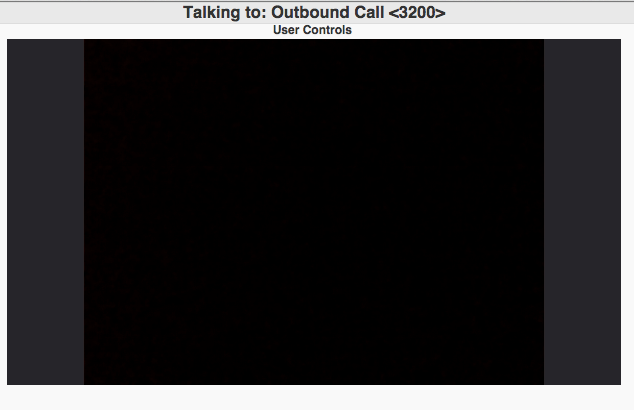
You can call for example extension 3500 to enter your first video conference. This is a conference with the video-mcu-stereo profile, that has the video features enabled by default.
After dialing to the conference, you'll hear that you are the only person in the conference and your video will appear on the screen:
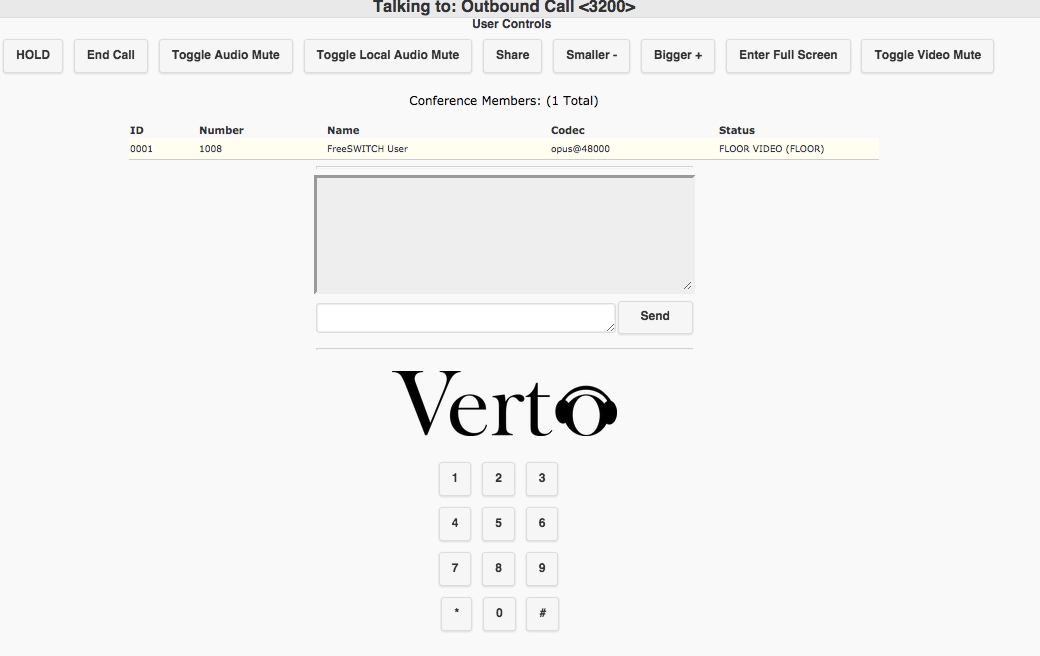
When you place your mouse closer to 'Outbound Call' you'll see your user controls:
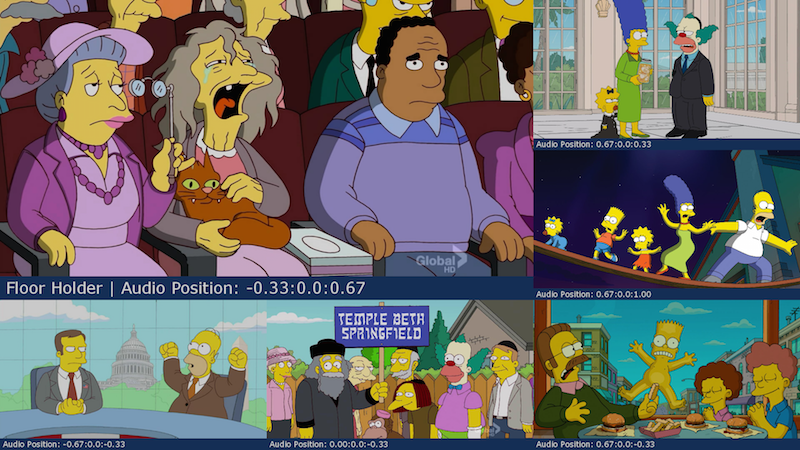
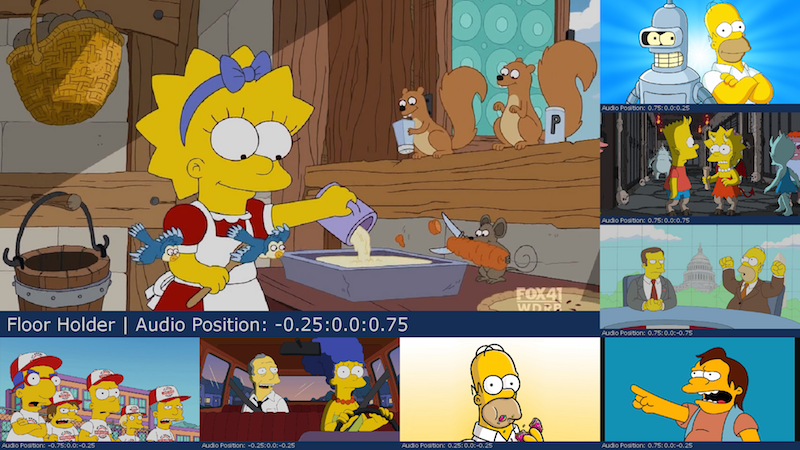
Now you can invite another caller and your video will be mixed together with the other caller video, and both video swill appear on the screen. The video disposition will behave according to the layout that was configured for this conference room.
FreeSWITCH™ 1.6 has a few layouts configured by default and you can change the video layout on the fly using the conference API, for example:
Video Layouts
freeswitch@internal> conference 3200-my.domain vid-layout
[      1up_top_left+5]	[      1up_top_left+7]	[      1up_top_left+9]	[                 1x1]
[                 1x2]	[        2up_bottom+8]	[        2up_middle+8]	[           2up_top+8]
[                 2x1]	[                 2x2]	[               3up+4]	[               3up+9]
[                 3x3]	[                 4x4]	[                 5x5]	[                 6x6]
[                 8x8]	[            overlaps]	[presenter-dual-horizontal]	[presenter-dual-vertical]
[presenter-overlap-large-bot-right]	[presenter-overlap-large-top-right]	[presenter-overlap-small-bot-right]	[presenter-overlap-small-top-right]


freeswitch@internal> conference 3200-video.evolux.net.br vid-layout 3up+4
Change to layout [3up+4]
freeswitch@internal>
Conference
All the new APIs and variables of FreeSWITCH™ 1.6 are already documented on mod_conference page.
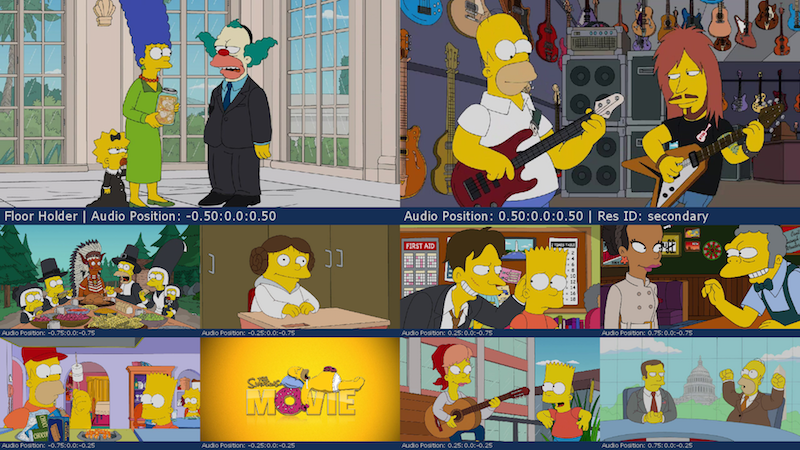
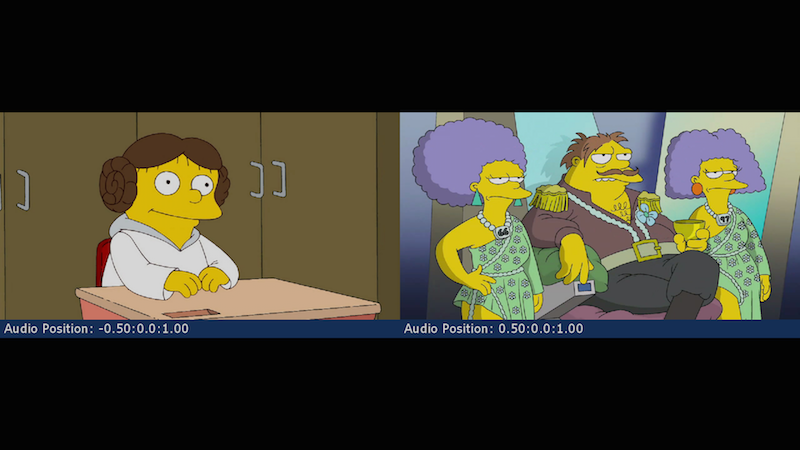
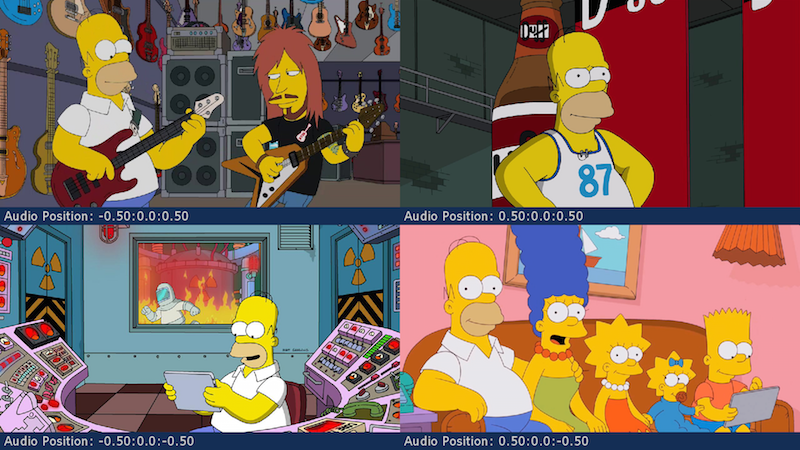
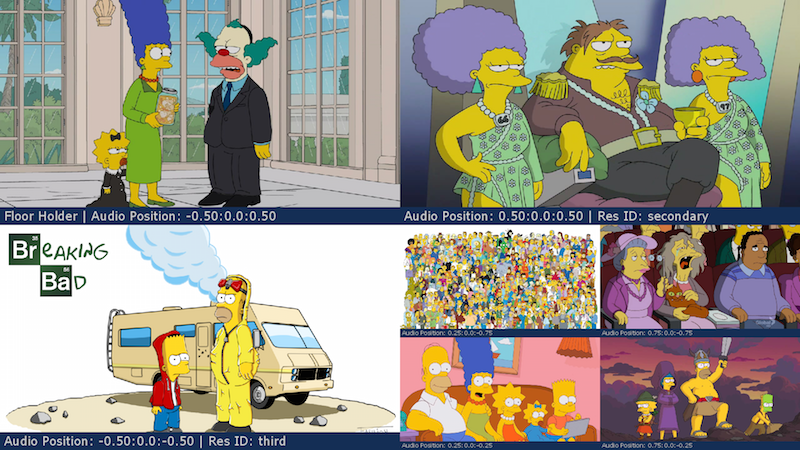
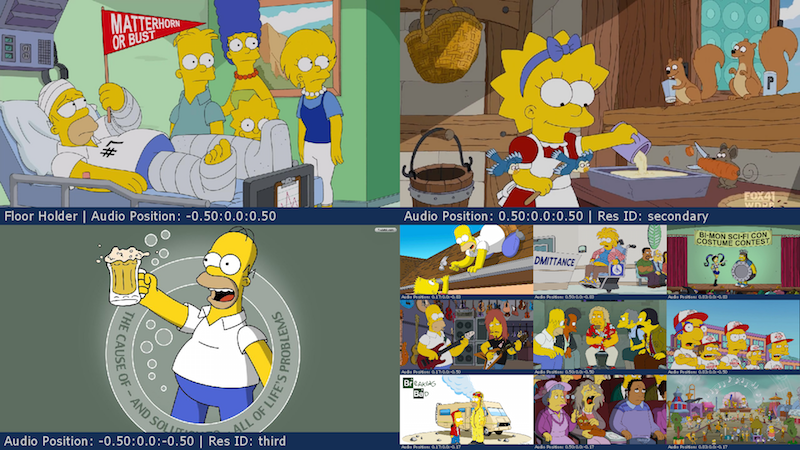
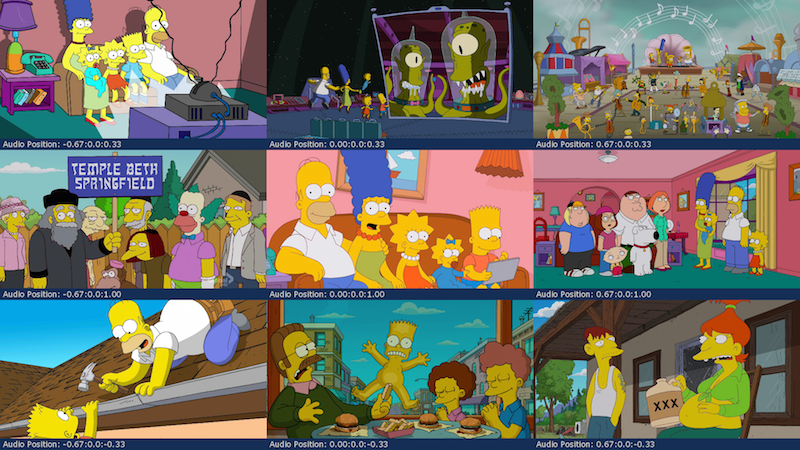
Layouts
Definition
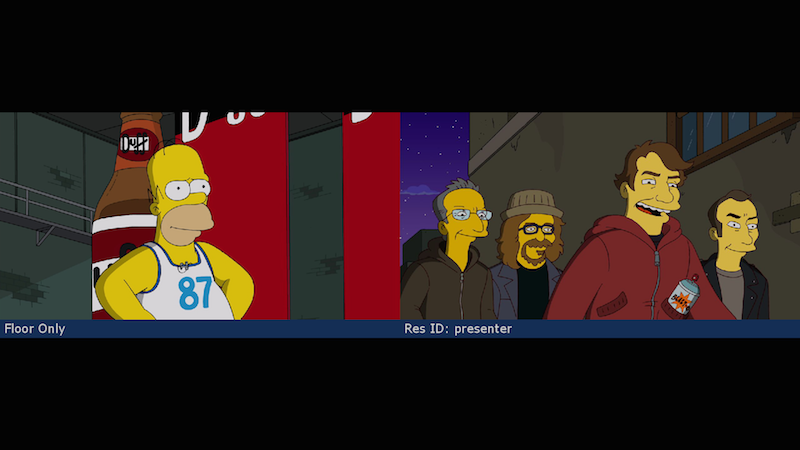
With video layouts you can configure specific video locations for your conference members, video floor holder and presenter. FreeSWITCH™ ships with many pre-defined examples and so you can start using the layouts right now.
For more information on how layouts work, check the mod_conference documentation about Custom Conference Layouts.
Examples
These are the pre-defined layouts that comes with FreeSWITCH™:
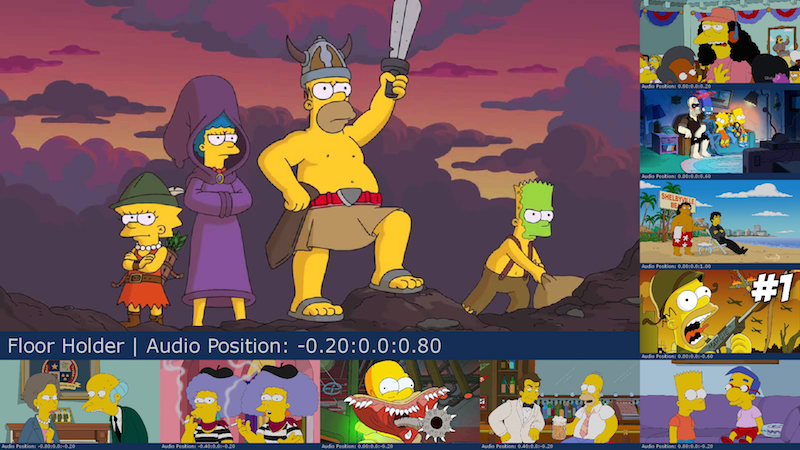
1up_top_left+5
1up_top_left+7
1up_top_left+9
1x1

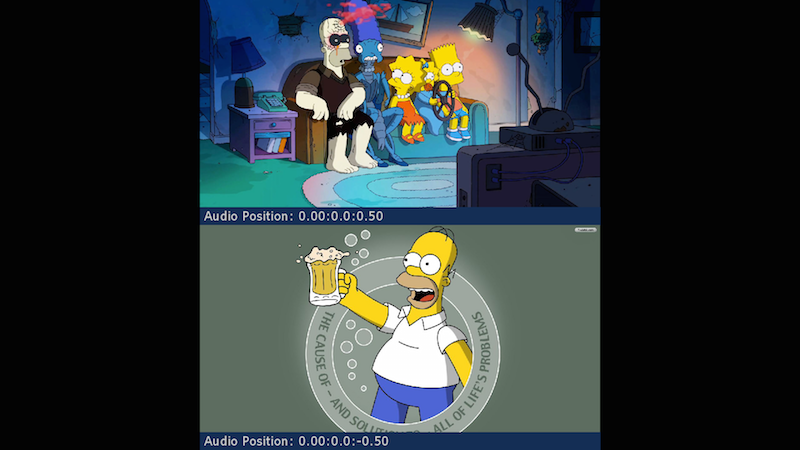
1x2
2up_bottom+8
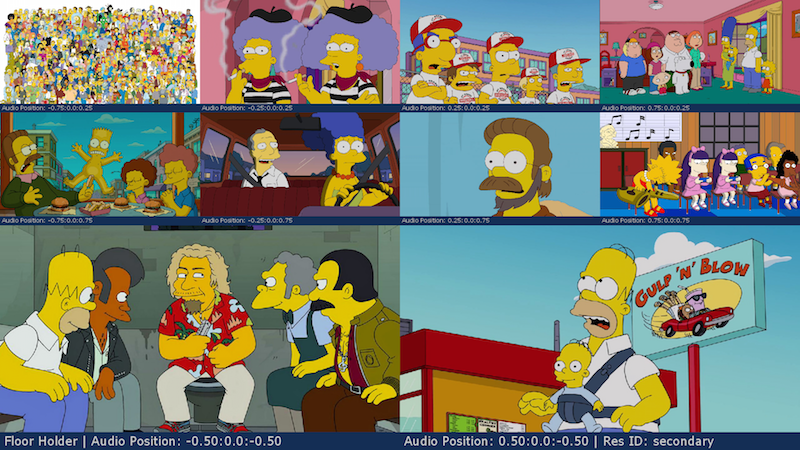
2up_middle+8
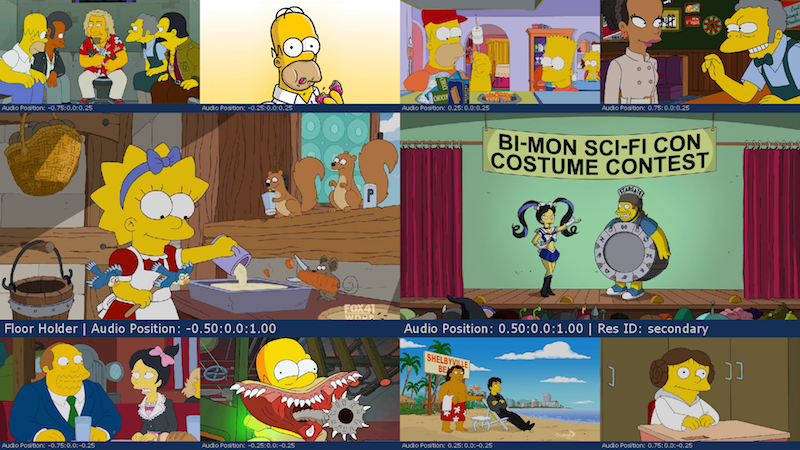
2up_top+8
2x1
2x2
3up+4
3up+9
3x3
4x4
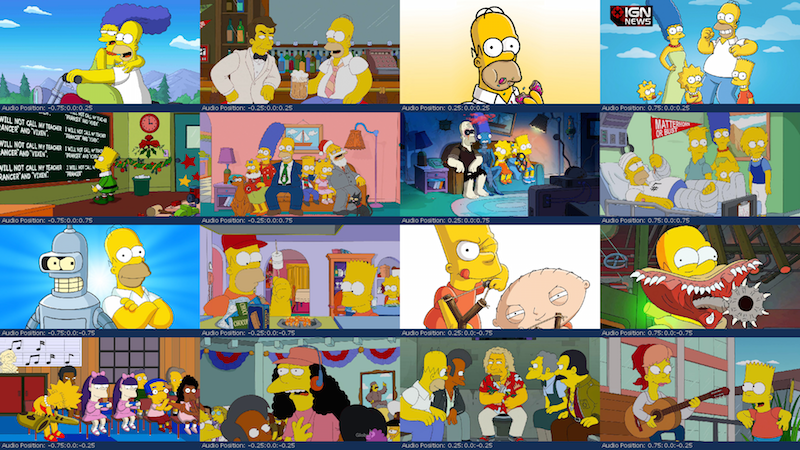
5x5

6x6
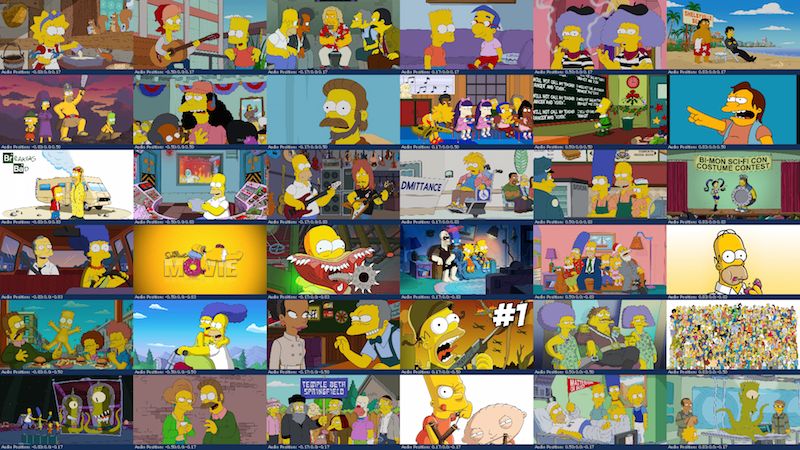
8x8

overlaps

presenter-dual-horizontal
presenter-dual-vertical

presenter-overlap-large-bot-right

presenter-overlap-large-top-right

presenter-overlap-small-bot-right

presenter-overlap-small-top-right

Attachments:
![]() FreeSWITCH_Verto™_Video_Transcoding_Demo.png (image/png)
FreeSWITCH_Verto™_Video_Transcoding_Demo.png (image/png)
![]() FreeSWITCH_Verto™_Video_Transcoding_Demo_conf_3200.png (image/png)
FreeSWITCH_Verto™_Video_Transcoding_Demo_conf_3200.png (image/png)
![]() FreeSWITCH_Verto™_Video_Transcoding_Demo_conf_3200_user_controls.png (image/png)
FreeSWITCH_Verto™_Video_Transcoding_Demo_conf_3200_user_controls.png (image/png)
![]() 1up_top_left+5.png (image/png)
1up_top_left+5.png (image/png)
![]() 1up_top_left+7.png (image/png)
1up_top_left+7.png (image/png)
![]() 1up_top_left+9.png (image/png)
1up_top_left+9.png (image/png)
![]() 1x1.png (image/png)
1x1.png (image/png)
![]() 1x2.png (image/png)
1x2.png (image/png)
![]() presenter-overlap-small-top-right.png (image/png)
presenter-overlap-small-top-right.png (image/png)
![]() presenter-overlap-small-bot-right.png (image/png)
presenter-overlap-small-bot-right.png (image/png)
![]() presenter-overlap-large-top-right.png (image/png)
presenter-overlap-large-top-right.png (image/png)
![]() presenter-overlap-large-bot-right.png (image/png)
presenter-overlap-large-bot-right.png (image/png)
![]() presenter-dual-vertical.png (image/png)
presenter-dual-vertical.png (image/png)
![]() presenter-dual-horizontal.png (image/png)
presenter-dual-horizontal.png (image/png)
![]() overlaps.png (image/png)
overlaps.png (image/png)
![]() 8x8.png (image/png)
8x8.png (image/png)
![]() 6x6.png (image/png)
6x6.png (image/png)
![]() 5x5.png (image/png)
5x5.png (image/png)
![]() 4x4.png (image/png)
4x4.png (image/png)
![]() 3x3.png (image/png)
3x3.png (image/png)
![]() 3up+9.png (image/png)
3up+9.png (image/png)
![]() 3up+4.png (image/png)
3up+4.png (image/png)
![]() 2x2.png (image/png)
2x2.png (image/png)
![]() 2x1.png (image/png)
2x1.png (image/png)
![]() 2up_top+8.png (image/png)
2up_top+8.png (image/png)
![]() 2up_middle+8.png (image/png)
2up_middle+8.png (image/png)
![]() 2up_bottom+8.png (image/png)
2up_bottom+8.png (image/png)