Sending SMS from Google Sheets
Do you store your customer’s information in an Excel or Google Sheets spreadsheet? Wouldn’t it be handy to be able to send SMS to your customers directly from Google Sheets? With this guide we’ll show you how to integrate SignalWire API with Google Sheets API to track and contact customers regarding payments that are due. We’ll be using Google’s version of Javascript which is called Apps Script. You can modify this code however you need to fit your particular use case.
Are you sending using 10DLC numbers? Register your SMS campaign before you begin sending!
If you're planning to send these SMS from a 10 digit long-code number you will need to register your messaging content with The Campaign Registry before you begin sending. If you're sending from a phone number that is not associated with a registered campaign you will see blocks on your messaging. Learn more by reading our Guide to The Campaign Registry.
What do you need to run this code?
You can find the full code on Github here.
Along with this code, you will also need the following:
- A Google Account
- A SignalWire Space
- A SignalWire phone number
- Your SignalWire API credentials (We’ll explain where to get these along the way)
How to Run Application
Create a Google Sheet
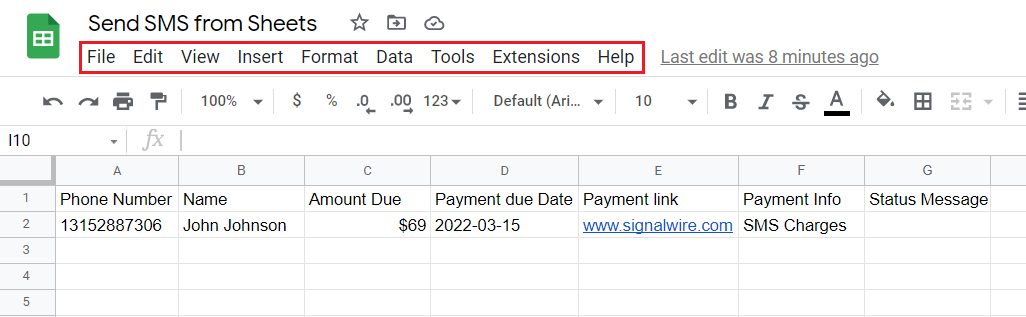
To begin, create a new Google Sheet. In the first row, create a column for each of the following:
- Customer phone number
- Customer name
- Amount Due
- Payment due date - must be formatted as yyyy-mm-dd such as 2022-03-15
- Payment link
- Payment info
- Status of message - our script will update this cell after it runs
Next, fill in a complete row with your own personal information so we can test the script when it’s done. Do not include any dashes, spaces or parentheses in your customer’s phone number. Enter it in any of these formats:
- 2223334444
- 12223334444
- +12223334444
Once completed, your spreadsheet should look similar to the below:

Define the Google Sheet's columns as variables
With our columns created, we now need to create variables in the code that will reference the information we input into these columns. To begin editing the code, go to the Extensions tab at the top of the page and select Apps Script.

Once you’re in the Apps Script editor, delete this placeholder code.
function myFunction() {}
After that has been deleted, you should be looking at a completely empty box of code. Now you can define the columns as variables by copying and pasting the following code.
var CUSTOMER_PHONE_NUMBER = 0;
var CUSTOMER_NAME = 1;
var AMOUNT_DUE = 2;
var PAYMENT_DUE_DATE = 3;
var PAYMENT_LINK = 4; // A URL where the payment can be made
var PAYMENT_INFO = 5; // Details of the service or product
var MESSAGE_STATUS = 6; // Whether the SMS was sent or not
You’ll see the variables are defined according to the column number using a zero-based index. This means your first column for your customer’s phone number is associated with 0 while the second column is associated with 1 and so on.
Securely save your SignalWire credentials
Whenever you’re using SignalWire’s API, you’ll need to provide your Project ID, Auth Token and Space URL. You can access all 3 of these from the API menu on your SignalWire Dashboard. In this guide we are sending SMS so we also need a SignalWire phone number that you can send SMS from. If you don’t have a SignalWire phone number yet, please reference this guide on purchasing a number.
It is important that your SignalWire credentials are always kept private. If someone gets a hold of your credentials they’ll be able to use the SignalWire API to do almost anything to your SignalWire Space. Because of this, we’re not going to save our credentials inside the Apps Script editor but prompt you to enter this information with a custom menu. You’ll need to re-enter your credentials each time you open the sheet, but they will be safe and secure since they’re not saved directly in the code.
Create custom menus
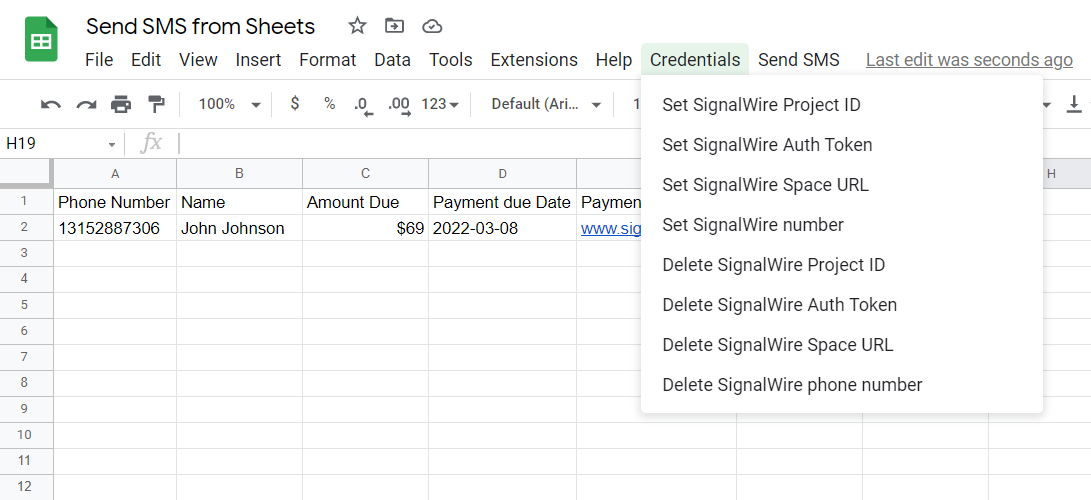
The custom menus we’re creating will appear on Google Sheet’s menu bar along with File, Edit, View, etc.
The name of our custom menus will be Credentials and Send SMS. The Credentials menu will include a dropdown menu where you can enter/remove your SignalWire Project ID, Auth token and Space URL. The Send SMS menu will allow you to send SMS to all numbers on your sheet, or to send to only specific numbers that fall between a given date range.
Copy the following code and paste it underneath the variables we already defined.
var SIGNALWIRE_PROJECT_ID = "placeholder";
var SIGNALWIRE_PHONE_NUMBER = "placeholder";
var SIGNALWIRE_AUTH_TOKEN = "placeholder";
var SIGNALWIRE_SPACE_URL = "placeholder";

var ui = SpreadsheetApp.getUi();
var userProperties = PropertiesService.getUserProperties();

function onOpen() {
  ui.createMenu("Credentials")
    .addItem("Set SignalWire Project ID", "setSignalWireProjectID")
    .addItem("Set SignalWire Auth Token", "setSignalWireAuthToken")
    .addItem("Set SignalWire Space URL", "setSignalWireURL")
    .addItem("Set SignalWire number", "setSignalWirePhoneNumber")
    .addItem("Delete SignalWire Project ID", "deleteSignalWireAccountSID")
    .addItem("Delete SignalWire Auth Token", "deleteSignalWireAuthToken")
    .addItem("Delete SignalWire Space URL", "deleteSignalWireURL")
    .addItem("Delete SignalWire phone number", "deleteSignalWirePhoneNumber")
    .addToUi();
  ui.createMenu("Send SMS")
    .addItem("Send to all", "sendSmsToAll")
    .addItem("Send to customers with due date 1st-15th", "sendSmsByDateFilter")
    .addToUi();
}
Because Apps Script will not allow us to enter a null value or empty string, we use the string value of ‘placeholder’ for each of our credentials. This placeholder will be replaced when we enter the correct information from our custom menu.
We define variables that represent the Google Sheets UI and UserProperties and use these variables in upcoming functions.
We then use the onOpen() function to run the code inside of it.
This is how we make our Credentials and Send SMS menus appear when we initially open the spreadsheet.
Create the functions for our SignalWire credentials menu
With what we have so far, a custom menu titled Credentials will now show up on your Google Sheet, but it doesn’t currently do anything. We need to add functionality to these menu options. Copy and paste the following code below all the existing code you’ve entered so far.
function setSignalWireProjectID() {
  var scriptValue = ui.prompt("Enter your SignalWire Project ID", ui.ButtonSet.OK);
  userProperties.setProperty("SIGNALWIRE_PROJECT_ID", scriptValue.getResponseText());
}

function setSignalWireAuthToken() {
  var scriptValue = ui.prompt("Enter your SignalWire Auth Token", ui.ButtonSet.OK);
  userProperties.setProperty("SIGNALWIRE_AUTH_TOKEN", scriptValue.getResponseText());
}

function setSignalWireURL() {
  var scriptValue = ui.prompt("Enter your SignalWire Space URL", ui.ButtonSet.OK);
  userProperties.setProperty("SIGNALWIRE_SPACE_URL", scriptValue.getResponseText());
}

function setSignalWirePhoneNumber() {
  var scriptValue = ui.prompt(
    "Enter your SignalWire phone number in this format: +12345678900",
    ui.ButtonSet.OK
  );
  userProperties.setProperty("SIGNALWIRE_PHONE_NUMBER", scriptValue.getResponseText());
}

function deleteSignalWireProjectID() {
  userProperties.deleteProperty("SIGNALWIRE_PROJECT_ID");
}

function deleteSignalWireAuthToken() {
  userProperties.deleteProperty("SIGNALWIRE_AUTH_TOKEN");
}

function deleteSignalWireURL() {
  userProperties.deleteProperty("SIGNALWIRE_SPACE_URL");
}

function deleteSignalWirePhoneNumber() {
  userProperties.deleteProperty("SIGNALWIRE_PHONE_NUMBER");
}
The first 4 functions prompt the user to enter the specified credential while the last 4 functions delete the specified credential.
Create a sendSms() function
Now that you have the UI options for sending SMS, let’s give them functionality. Copy and paste the following code beneath all the existing code you’ve entered so far.
function sendSms(
  customerPhoneNumber,
  amountDue,
  paymentLink,
  customerName,
  paymentInfo,
  paymentDueDate
) {
  var signalwireProjectID = userProperties.getProperty("SIGNALWIRE_PROJECT_ID");
  var signalwireAuthToken = userProperties.getProperty("SIGNALWIRE_AUTH_TOKEN");
  var signalwirePhoneNumber = userProperties.getProperty("SIGNALWIRE_PHONE_NUMBER");
  var signalwireURL = userProperties.getProperty("SIGNALWIRE_SPACE_URL");
  var signalwireSend =
    "https://" +
    signalwireURL +
    "/api/laml/2010-04-01/Accounts/" +
    signalwireProjectID +
    "/Messages.json";
  var authenticationString = signalwireProjectID + ":" + signalwireAuthToken;

  //Check to make sure the To number is in the correct E.164 format. If it's close, the script will fix it
  var tonumber = customerPhoneNumber.toString();
  if (tonumber.length == 11 && tonumber[0] == "1") {
    tonumber = "+" + tonumber;
  } else if (tonumber.length == 12 && tonumber[0] == "+") {
    tonumber = tonumber;
  } else if (tonumber.length == 10) {
    tonumber = "+1" + tonumber;
  } else {
    console.log("To number is invalid format.");
  }

  try {
    UrlFetchApp.fetch(signalwireSend, {
      method: "post",
      headers: {
        Authorization: "Basic " + Utilities.base64Encode(authenticationString),
      },
      payload: {
        To: tonumber,
        Body:
          "Hello, " +
          customerName +
          ", your payment of $" +
          amountDue +
          " is outstanding" +
          " for " +
          paymentInfo +
          ". It was due on " +
          paymentDueDate +
          "." +
          " Please visit " +
          paymentLink +
          " to pay your balance. If you have any questions, contact us at support@example.com. Thanks!",
        From: signalwirePhoneNumber, // Your SignalWire phone number
      },
    });
    return "sent: " + new Date();
  } catch (err) {
    return "error: " + err;
  }
}
This code will check your SignalWire credentials and if everything matches up, will make a POST request to SignalWire’s messaging API. If the request is successful, an SMS will be sent and the “Status Message” column will be updated displaying exactly when your message was sent. You’ll notice we also added conditional statements that check the format of your customer’s number and make necessary changes so that the format is recognized by SignalWire’s messaging API.
Create a sendSmsToAll() function
We’re going to build off of our sendSms() function to add the ability of sending SMS to all of our customers in the Google Sheet. Copy and paste the following code beneath all the existing code you’ve entered so far.
function sendSmsToAll() {
  var sheet = SpreadsheetApp.getActiveSheet();
  var rows = sheet.getDataRange().getValues();
  var headers = rows.shift();
  rows.forEach(function (row) {
    row[MESSAGE_STATUS] = sendSms(
      row[CUSTOMER_PHONE_NUMBER],
      row[AMOUNT_DUE],
      row[PAYMENT_LINK],
      row[CUSTOMER_NAME],
      row[PAYMENT_INFO],
      row[PAYMENT_DUE_DATE]
    );
  });
  sheet.getRange(2, 1, rows.length, headers.length).setValues(rows);
}
Send SMS based on a date range
You may not want to send SMS to all numbers on your Google Sheet so let’s add the ability to filter by date. Copy and paste the following code beneath all the existing code you’ve entered so far.
function sendSmsByDateFilter() {
  var sheet = SpreadsheetApp.getActiveSheet();
  var rows = sheet.getDataRange().getValues();
  var headers = rows.shift();

  rows.forEach(function (row) {
    var dueDate = new Date(row[PAYMENT_DUE_DATE]);
    var dateFormat = Utilities.formatDate(dueDate, "GMT-7", "MM/dd/yyyy");
    var dayDue = dateFormat.substring(3, 5);

    if (dayDue >= 1 && dayDue <= 15) {
      // Change the date range if desired
      row[MESSAGE_STATUS] = sendSms(
        row[CUSTOMER_PHONE_NUMBER],
        row[AMOUNT_DUE],
        row[PAYMENT_LINK],
        row[CUSTOMER_NAME],
        row[PAYMENT_INFO],
        row[PAYMENT_DUE_DATE]
      );
    }
  });
  sheet.getRange(2, 1, rows.length, headers.length).setValues(rows);
}
Currently, the date range is set up so it will message anyone with a due date between the 1st and the 15th. You can change this date range to anything you’d like. Check the comment in the code for where you can alter the date range.
Time for Testing!
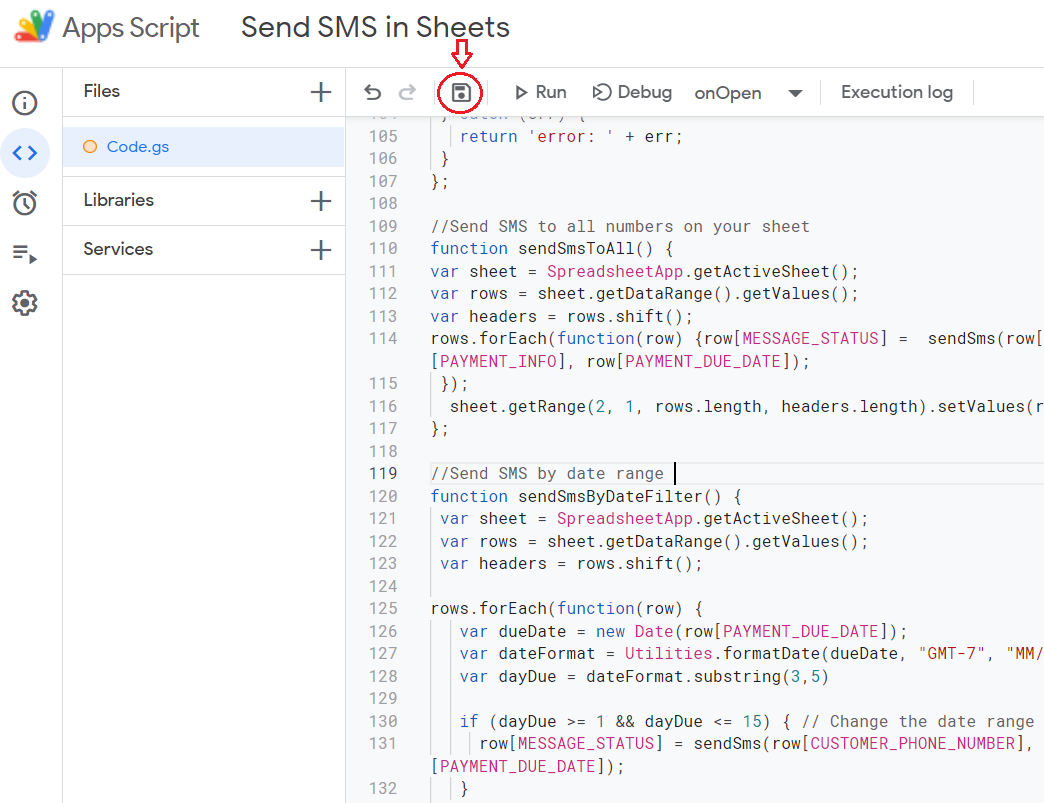
Before you exit the Apps Script editor, make sure you save all the changes you’ve made. Click on the floppy disk icon to save your project.
After you’ve saved your code, you’ll need to reload your Google Sheet. Close and re-open the page or click refresh and you should now see your new menu options at the top of the page. It may take a few seconds for those menu options to appear each time the Google Sheet is opened so if you don’t see them immediately, just wait a few seconds.
Go through your credentials’ steps and enter your Project ID, Auth Token, Space URL and the SignalWire number you’d like to send the SMS from. To find these credentials, log into your SignalWire Space and select API from your Dashboard. If you haven’t done so already, you’ll need to create an API token and for this example you’ll need to make sure that ‘Messaging’ is enabled for the token.
When you attempt to enter your first credential, you’ll be prompted by Google Sheets to authorize the script you entered. Follow the steps Google Sheets provides to give permission for running the script.
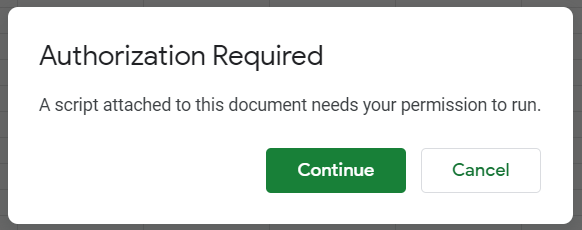
You need to allow Google Sheet to execute the script we created.
Our script will not check if your credentials are formatted correctly so make sure that you’re copying exactly what you see in the API section of your SignalWire Dashboard. Also make sure your SignalWire number is formatted in E.164 format (+12223334444).
Your SignalWire credentials will not be saved in Google Sheets so you will need to re-enter your credentials every time you reload or refresh the browser page with the Google Sheet.
You're done!
Congratulations! You’ve now connected the SignalWire API with the Google Sheets API and you can send SMS directly from within Google Sheets.
If you’re running into problems with this code, try checking the following:
- Double check that your SignalWire credentials are correct and that your number is in E.164 format (+12223334444).
- Check the Status Message column for any error messages you may receive.
- Review the code you entered in Apps Script editor and make sure it matches the provided examples.
- If you're receiving an error stating "From must belong to an active campaign" that means the number you're attempting to send from is not currently associated with an active SMS campaign. You can read more about The Campaign Registry and setting up your messaging campaigns here.
Additional resources:
Sign Up Here
If you would like to test this example out, create a SignalWire account and Space.
Please feel free to reach out to us on our Community Discord or create a Support ticket if you need guidance!