Using Hooks to Track Call State in React and React Native
This article follows either from Getting Started with Video API in React or Getting Started with Video API in React Native. Those articles will help you set up a basic "hello world" application in your platform of choice, so if you haven't got a project setup already, you should start there.
Your video call will need a UI, and it is important that the UI reflect the state of the call. For example, you'd only want to show the "Unmute" button if the microphone is currently muted. Similarly, you'd want the list of members to change as people come and go.
The RoomSession object allows you to subscribe to events. For example, RoomSession.on('memberList.updated', callback) would keep you informed
of the comings and goings of members.
The <Video> and the <VideoConference> components for React provide props like onMemberListUpdated or onRoomJoined, which will internally
subscribe to events in the RoomSession. They are used like this: <Video onMemberListUpdated={callback} token= ... />.
This provides a powerful way of tracking relevant changes to the room, but it gets tedious to maintain state this way, specially when used within React.
And so the library provides some React Hooks which internally subscribe to events and maintain state, so you can start laying out your UI right away.
Getting the RoomSession Object
We use the RoomSession object to stay informed about changes, and interact with the room. To access the RoomSession object, we would do something like this:
- PVC
- Video SDK
import { useState, useCallback } from "react";
import { VideoConference } from "@signalwire-community/react";

export default function DemoVideo() {
  const [roomSession, setRoomSession] = useState(null);
  const onRoomReady = useCallback((rs) => setRoomSession(rs), []);

  return <VideoConference token="PVC Token" onRoomReady={onRoomReady} />;
}
import { useState, useCallback } from "react";
import { Video } from "@signalwire-community/react";

export default function DemoVideo() {
  const [roomSession, setRoomSession] = useState(null);
  const onRoomReady = useCallback((rs) => setRoomSession(rs), []);

  return <Video token="Room Token" onRoomReady={onRoomReady} />;
}
Once you have safely stored the RoomSession object, no matter how you received it, you can start using
the hooks presented below. We will be using the Programmable Video component (<VideoConference />
from @signalwire-community/react) for React
code examples and the Video Component (<Video /> from @signalwire-community/react-native)
for the React Native code examples.
Using Hooks to populate UI
With the basic code set up, we can now start placing the UI components, and making them dynamic using
the data from the custom hooks in @signalwire-community/react.
The hooks will internally subscribe to relevant events and keep track of state to make sure the information is always up to date. They will trigger rerenders when necessary to make sure your UI never goes out of sync.
Rendering the Member List with useMembers
First, we will print out the list of members in the room. As members come and go, your UI will update accordingly.
- React
- React Native
import { useCallback, useState } from "react";
import { VideoConference, useMembers } from "@signalwire-community/react";

export default function DemoVideo() {
  const [roomSession, setRoomSession] = useState(null);
  const { members } = useMembers(roomSession);
  const onRoomReady = useCallback((rs) => setRoomSession(rs), []);

  return (
    <div style={{ maxWidth: 600 }}>
      <VideoConference token="PVC Token" onRoomReady={onRoomReady} />

      <b>Members: </b>
      <ul>
        {members.map((member) => (
          <li>{member.name}</li>
        ))}
      </ul>
    </div>
  );
}
import { useCallback, useState } from "react";
import { Video } from "@signalwire-community/react-native";
import { useMembers, useStatus, useLayouts } from "@signalwire-community/react";
import { SafeAreaView, View, Button, Text, ScrollView } from "react-native";

export default function DemoVideo() {
  const [roomSession, setRoomSession] = useState(null);
  const { members } = useMembers(roomSession);
  const onRoomReady = useCallback((rs) => setRoomSession(rs), []);

  return (
    <SafeAreaView>
      <Video token="Room Token" onRoomReady={onRoomReady} />

      <Text style={{ fontWeight: "bold" }}>Members:</Text>
      {members.map((member) => (
        <Text>{member.name}</Text>
      ))}
    </SafeAreaView>
  );
}
Each member in members has information about the member's current state and methods to change them.
For example, member.remove() would, if you have the required permissions, remove the user from the conference.
Now let's consider the following piece of code:
- React
- React Native
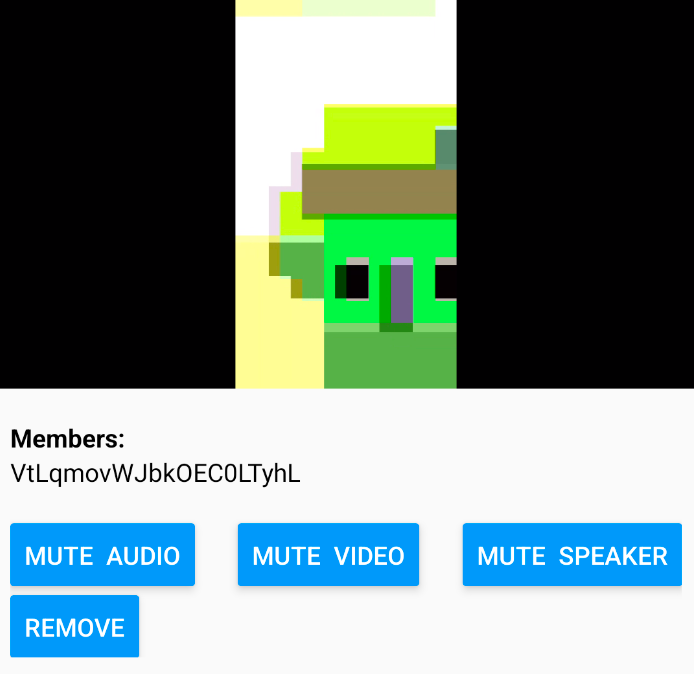
<b>Members: </b>
<ul>
  {members.map((member) => (
    <li>
      {member.name}
      {member.talking && "🗣"}

      {["audio", "video", "speaker"].map((io) => (
        <button onClick={member[io].toggle}>
          {member[io].muted ? "Unmute " : "Mute "} {io}
        </button>
      ))}
      <button onClick={member.remove}>Remove</button>
    </li>
  ))}
</ul>

Resulting UI: a list of members, each of which has a speaking indicator and control buttons.
<Text style={{ fontWeight: "bold" }}>Members:</Text>;
{
  members.map((member) => (
    <View>
      <Text>{member.name}</Text>
      <Text>{member.talking && "🗣"}</Text>

      <View style={{ flexDirection: "row", justifyContent: "space-between" }}>
        {["audio", "video", "speaker"].map((io) => (
          <Button
            onPress={member?.[io].toggle}
            title={`${member?.[io].muted ? "Unmute " : "Mute "} ${io}`}
          />
        ))}
      </View>
    </View>
  ));
}
Resulting UI: a list of members, each of which has a speaking indicator and control buttons.
There are a few things to note:
- The 🗣 emoji, conditioned on the
member.talkingproperty, only renders when that member is talking. - Similarly,
{member[io].muted ? "Unmute" : "Mute"}will automatically update to reflect current state of the member. member.audio,member.video, andmember.speakerall provide identical interfaces to control the inputs and outputs to the stream. For example,member.audio.mutedtells you if that member has their audio turned off.member.audio.mute()/member.audio.unmute()will turn the microphone on and off. And a simple helper methodmember.audio.toggle()will toggle between the states.
Providing Controls for the Current Member
Unless you were a moderator, you wouldn't need access to controls for other members, but you would still need to control your own stream.
For that purpose, useMembers gives you another property: self, which always references the current user within the members array.
We could use it like so:
- React
- React Native
const { self } = useMembers(roomSession);

return (
  <>
    {/* ... */}
    {["audio", "video", "speaker"].map((io) => (
      <button onClick={self?.[io].toggle}>
        {self?.[io].muted ? "Unmute " : "Mute "} {io}
      </button>
    ))}
    <button onClick={self?.remove}>Leave</button>
  </>
);
const { self } = useMembers(roomSession);

return (
  <>
    {/* ... */}
    <View style={{ flexDirection: "row", justifyContent: "space-between" }}>
      {["audio", "video", "speaker"].map((io) => (
        <Button
          onPress={self?.[io].toggle}
          title={`${self?.[io].muted ? "Unmute " : "Mute "} ${io}`}
        />
      ))}
    </View>
    <View style={{ marginTop: 5 }}>
      <Button onPress={self?.remove} title="Leave" style={{ width: 30 }} />
    </View>
  </>
);

That was straightforward. The symbol self is just a reference to the current member within the room, so you use it like any other member.
But notice the small addition: self**?.**[io].toggle(). We are
optionally chaining
properties to control self. That is because, before you have joined the room, there is nothing for self to point to, so
it points to null. That problem was not felt for the members array because mapping an empty array is safe, but
addressing null's properties is not.
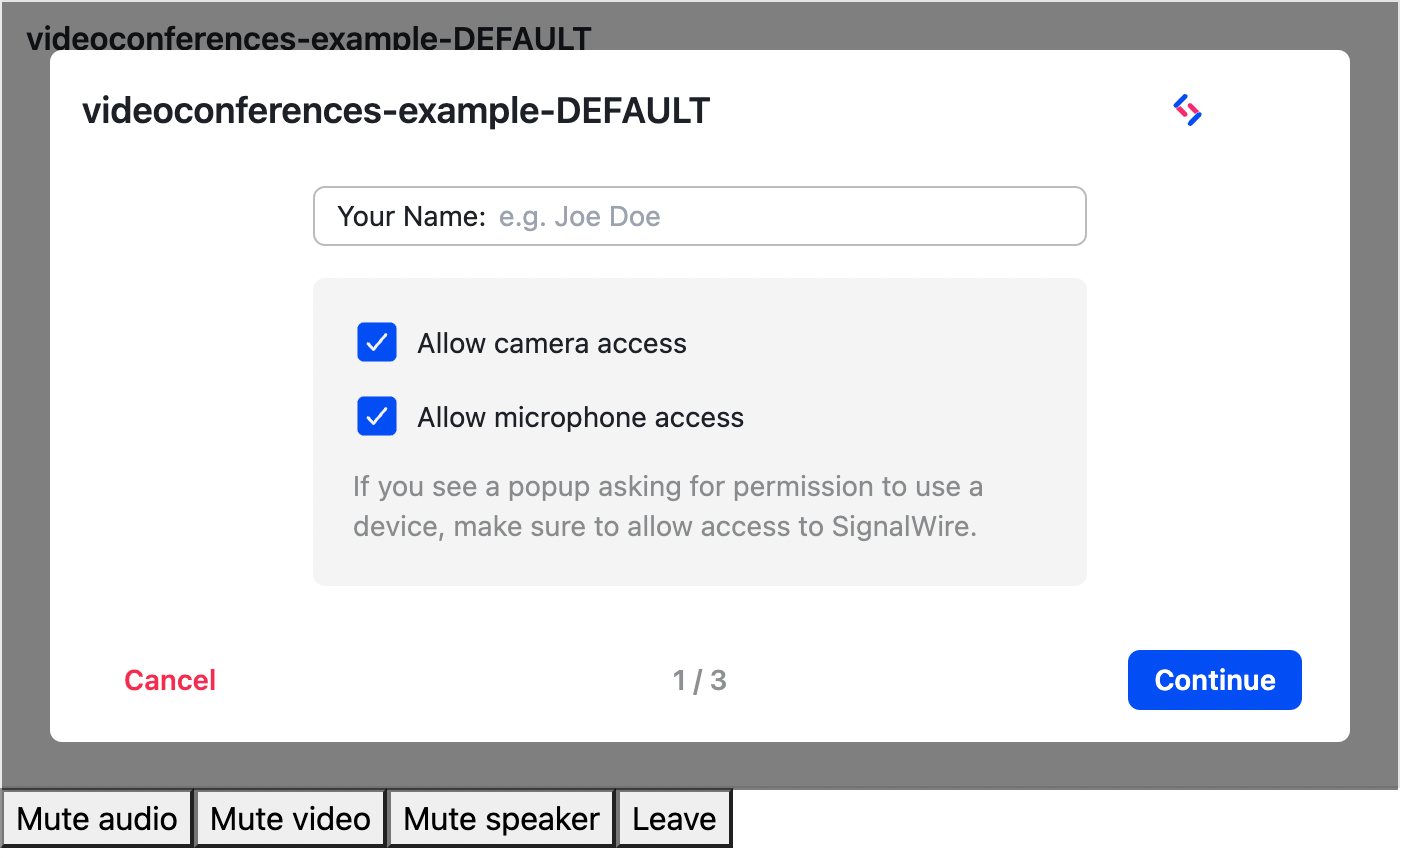
Thus, in the code example above, until you've joined the room, the buttons will do nothing when clicked. For better UX, it might be
better to hide or disable the buttons, to clearly indicate that those buttons are not functional yet. Which brings us to the next hook: useStatus.
Altering UI if Room Has Been Joined or Left Using useStatus
The useStatus hook simply returns an active property that is true if the room is active, and the current user is connected to it. We can use it
to solve the problem like so:
- React
- React Native
const { self } = useMembers(roomSession);
const { active } = useStatus(roomSession);

return (
  <>
    {/* ... */}
    {["audio", "video", "speaker"].map((io) => (
      <button onClick={() => self?.[io].toggle()} disabled={!active}>
        {self?.[io].muted ? "Unmute " : "Mute "} {io}
      </button>
    ))}
    <button onClick={() => self?.remove()} disabled={!active}>
      Leave
    </button>
  </>
);

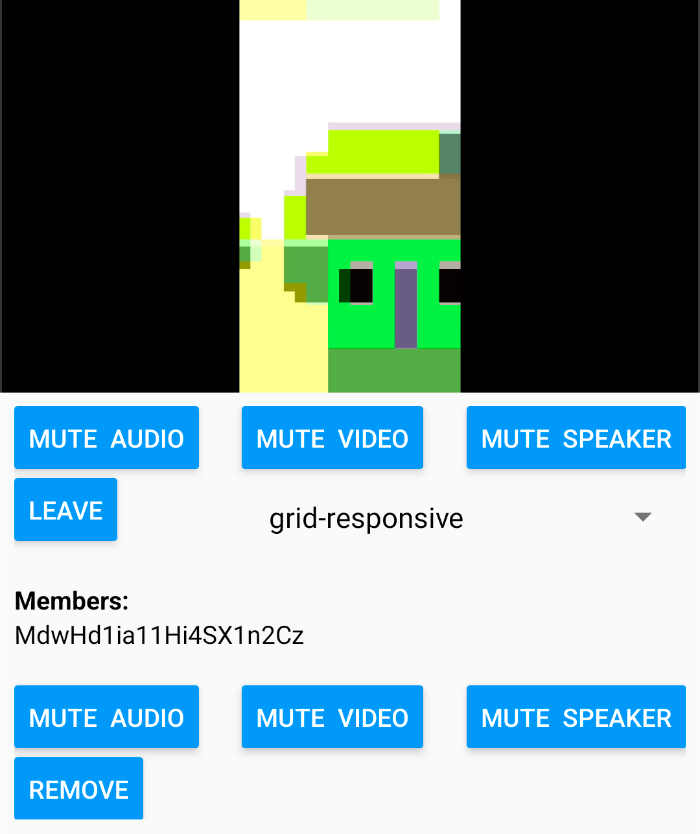
Resulting UI: the control buttons are disabled before room has been joined.
const { self } = useMembers(roomSession);
const { active } = useStatus(roomSession);

return (
  <>
    {/* ... */}
    <View style={{ flexDirection: "row", justifyContent: "space-between" }}>
      {["audio", "video", "speaker"].map((io) => (
        <Button
          onPress={self?.[io].toggle}
          title={`${self?.[io].muted ? "Unmute " : "Mute "} ${io}`}
          disabled={!active}
        />
      ))}
    </View>
    <View style={{ marginTop: 5 }}>
      <Button
        onPress={self?.remove}
        title="Leave"
        style={{ width: 30 }}
        disabled={!active}
      />
    </View>
  </>
);

Resulting UI: the control buttons are disabled before room has been joined.
Here we simply applied the disabled attribute for the buttons based on !active, but feel
free to make more complex UI decisions based on the useStatus hook.
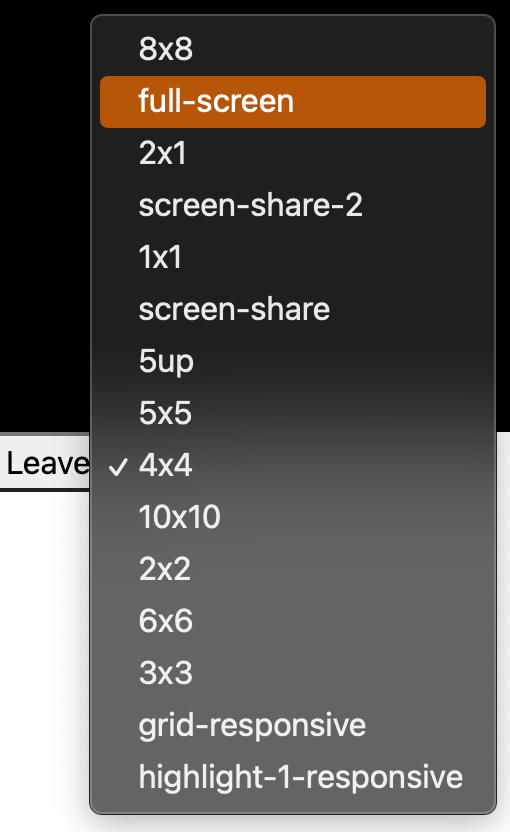
Working with layouts using useLayouts
At this point, the general pattern of usage should be apparent. With the same basic idea, we can control the layout of the video call.
- React
- React Native
const { layouts, setLayout, currentLayout } = useLayouts(roomSession);
const { active } = useStatus(roomSession);

if (!active) return null;

return (
  <select
    value={currentLayout}
    onChange={(e) => {
      setLayout({ name: e.target.value });
    }}
  >
    {layouts.map((l) => (
      <option value={l} key={l}>
        {l}
      </option>
    ))}
  </select>
);
const { layouts, setLayout, currentLayout } = useLayouts(roomSession);
const { active } = useStatus(roomSession);

if (!active) return null;

return (
  <Picker
    selectedValue={currentLayout}
    style={{ height: 50, width: 250 }}
    onValueChange={(itemValue) => setLayout({ name: itemValue })}
  >
    {layouts.map((layout) => (
      <Picker.Item label={layout} value={layout} />
    ))}
  </Picker>
);
<Picker> is not a basic React Native component (unlike <Select> in HTML, which is).
You'll want to install the picker with something like npm i @react-native-picker/picker,
and import it into your code with import {Picker} from "@react-native-picker/picker.
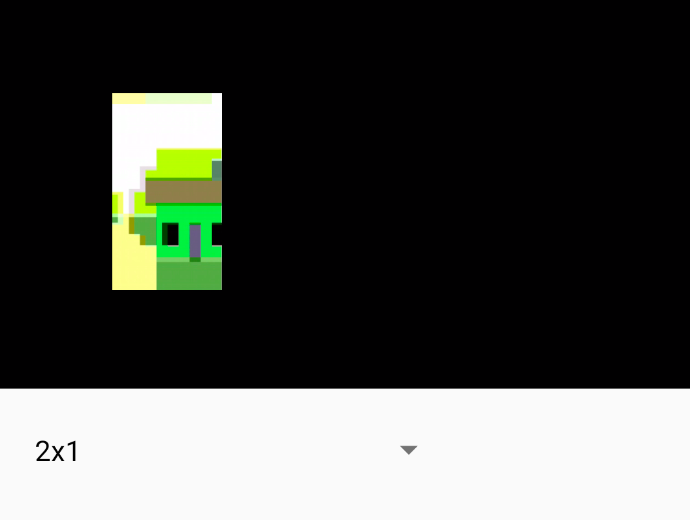
In this case, layouts contains an array of the layouts allowed in the room,
currentLayout always updates to the layout applied on the room, no matter who applies it,
and setLayout allows you to change it.
Enabling Screen Sharing with useScreenShare
- React
- React Native
Screen Sharing is equally simple in React.
const { active } = useStatus(roomSession);
const { toggle, active: screenShareActive } = useScreenShare(roomSession);

return (
  <button disabled={!active} onClick={toggle}>
    {screenShareActive ? "Stop screen share" : "Start screen share"}
  </button>
);
Here we are renaming the active property from useScreenShare to screenShareActive
so it doesn't collide with the other active property from useStatus. Now screenShareActive
is true when the user is sharing their screen.
Screen Sharing on React Native, specially on Expo, tends to be quite a bit involved, requiring at least some tinkering with the native code, and will be the subject of a separate article.
Putting It All Together
Once you get the hang of this pattern, it should be very easy to put it all together.
The full code for this guide may be accessed at the git repo
signalwire-community/examples.
- React
- React Native

Be sure to check back. We plan to add a lot more functionality for React here. And since this is a community supported repo, you are always welcome to contribute with your own code examples, features or fixes.
- React
- React Native