Campaign Service Providers (CSPs)
If you intend to only create a few Brands and Campaigns then you may choose to have SignalWire act as your CSP and submit your Messaging Campaign Applications on your behalf. If this describes your messaging intentions then you can learn about registering your Brand and Campaigns here.
Before digging too deep into acronyms and terms about The Campaign Registry, please reference the Campaign Registry - Everything You Need to Know guide for more background on the policies put into place for 10 Digit Long Code Messaging.
As an ISV (Independent Software Vendor), you have a customer base that each needs their own unique Brand and Campaign registration. As organizing your campaigns becomes increasingly complex, it may be time to look into managing your own campaigns by communicating with The Campaign Registry directly. A Campaign Service Provider has the ability to register or modify their own Brands and Campaigns without needing to involve SignalWire until it is time to associate the newly registered Brands and Campaigns.
How to become a CSP and Getting Started
The first step in becoming a Campaign Service Provider will be to Register with The Campaign Registry
Next, you will need to Create a Brand within the Campaign Registry CSP Portal. The initial step for Campaign Registration will be to create a Brand. The information entered will be submitted for Brand Identity Verification so it is important that each field is correctly filled out. This will save time and also save you from pulling your hair out later.
After creating a Brand, you will need to Create a Campaign. A Campaign is a specific use case of your Brand that gives more information on the content that is being sent.
Although the creation of a Brand and Campaign can be done through the CSP Campaign Registry Portal, you are also able to automate this process through the usage of the Campaign Registry APIs. These REST APIs can be easily incorporated into whatever environment your system is based in.
Associating your Brand and Campaigns with SignalWire
Once you have created your Brands and Campaigns via The Campaign Registry Dashboard or API, first you must select SignalWire as your upstream Connectivity Partner (CNP), and then you must send Brand and Campaign information directly to SignalWire so your phone numbers can be connected to the newly registered Campaigns. In summary, you provide specific information about the new Brand and Campaign either via Dashboard or API, we review and accept the connection request, and then our upstream Direct Connect Aggregator (DCA) vets and accepts the connection request. Once the DCA election is completed, you may begin assigning your SignalWire phone numbers to your new Campaign!
Associating your Brand and Campaigns with SignalWire via Dashboard
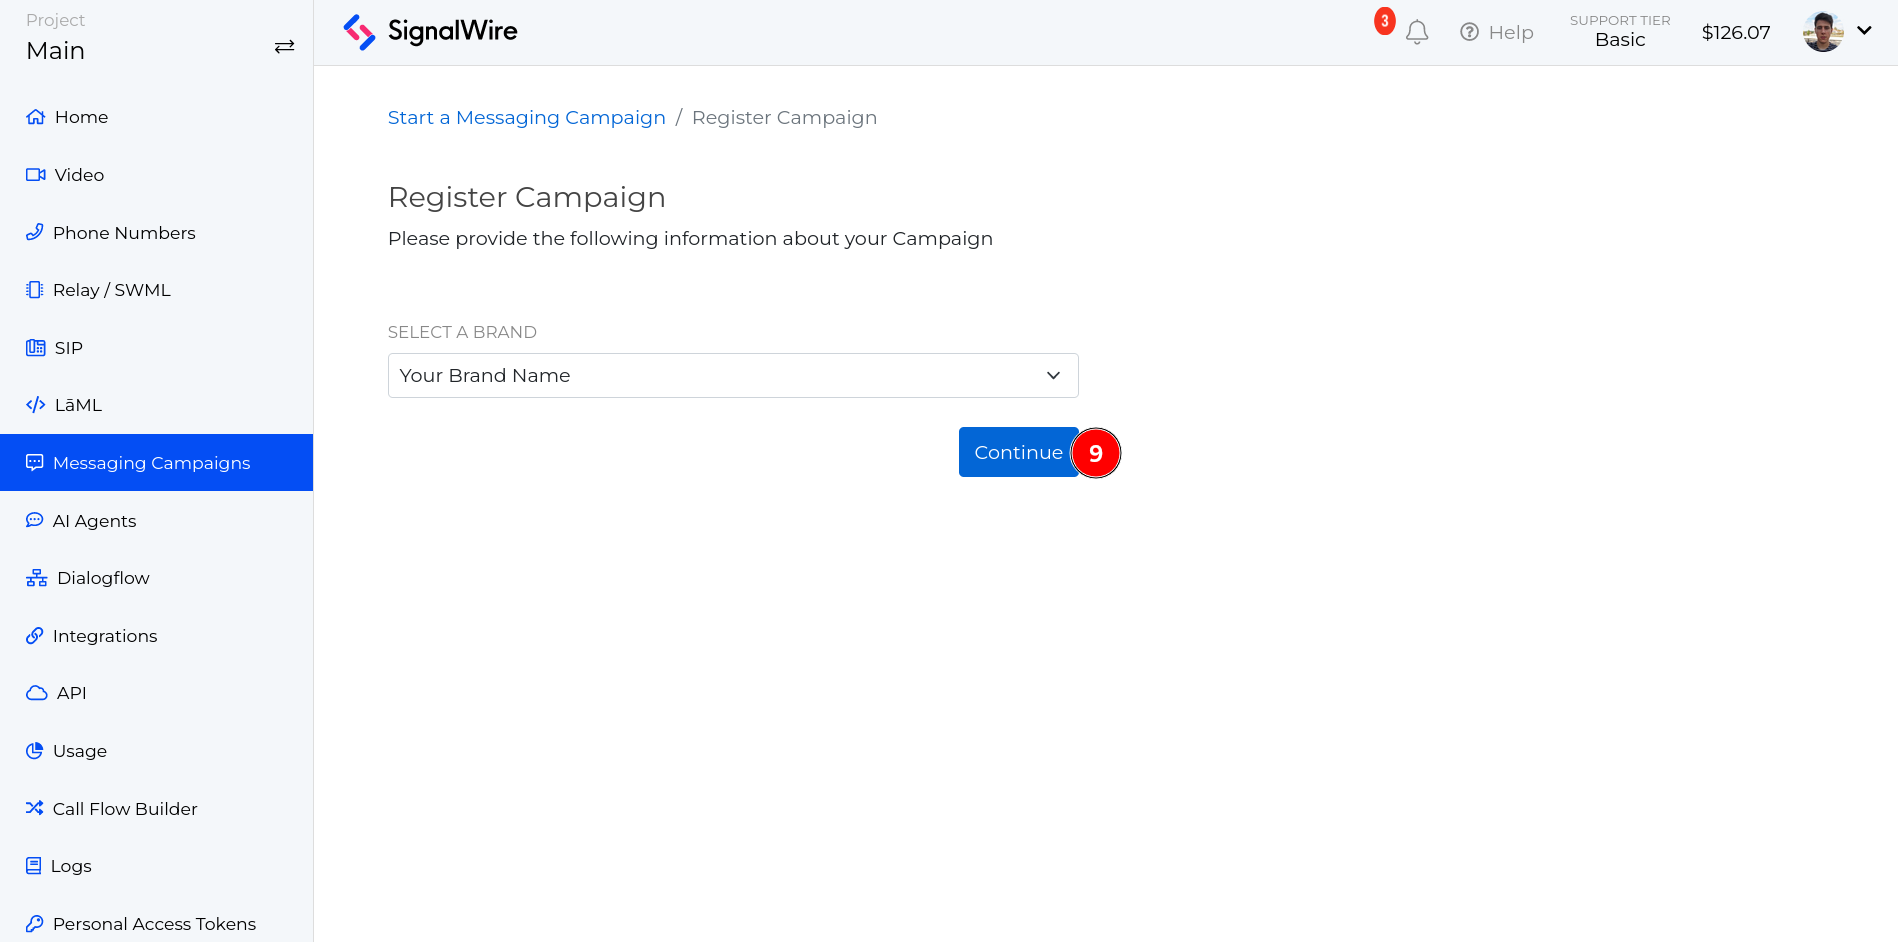
If you choose to do this through the Dashboard, you can navigate to Messaging Campaigns and then Create a partner brand. After entering in your name and CSP brand reference via API or Dashboard, you will see your Partner Brand appear in the Dashboard.
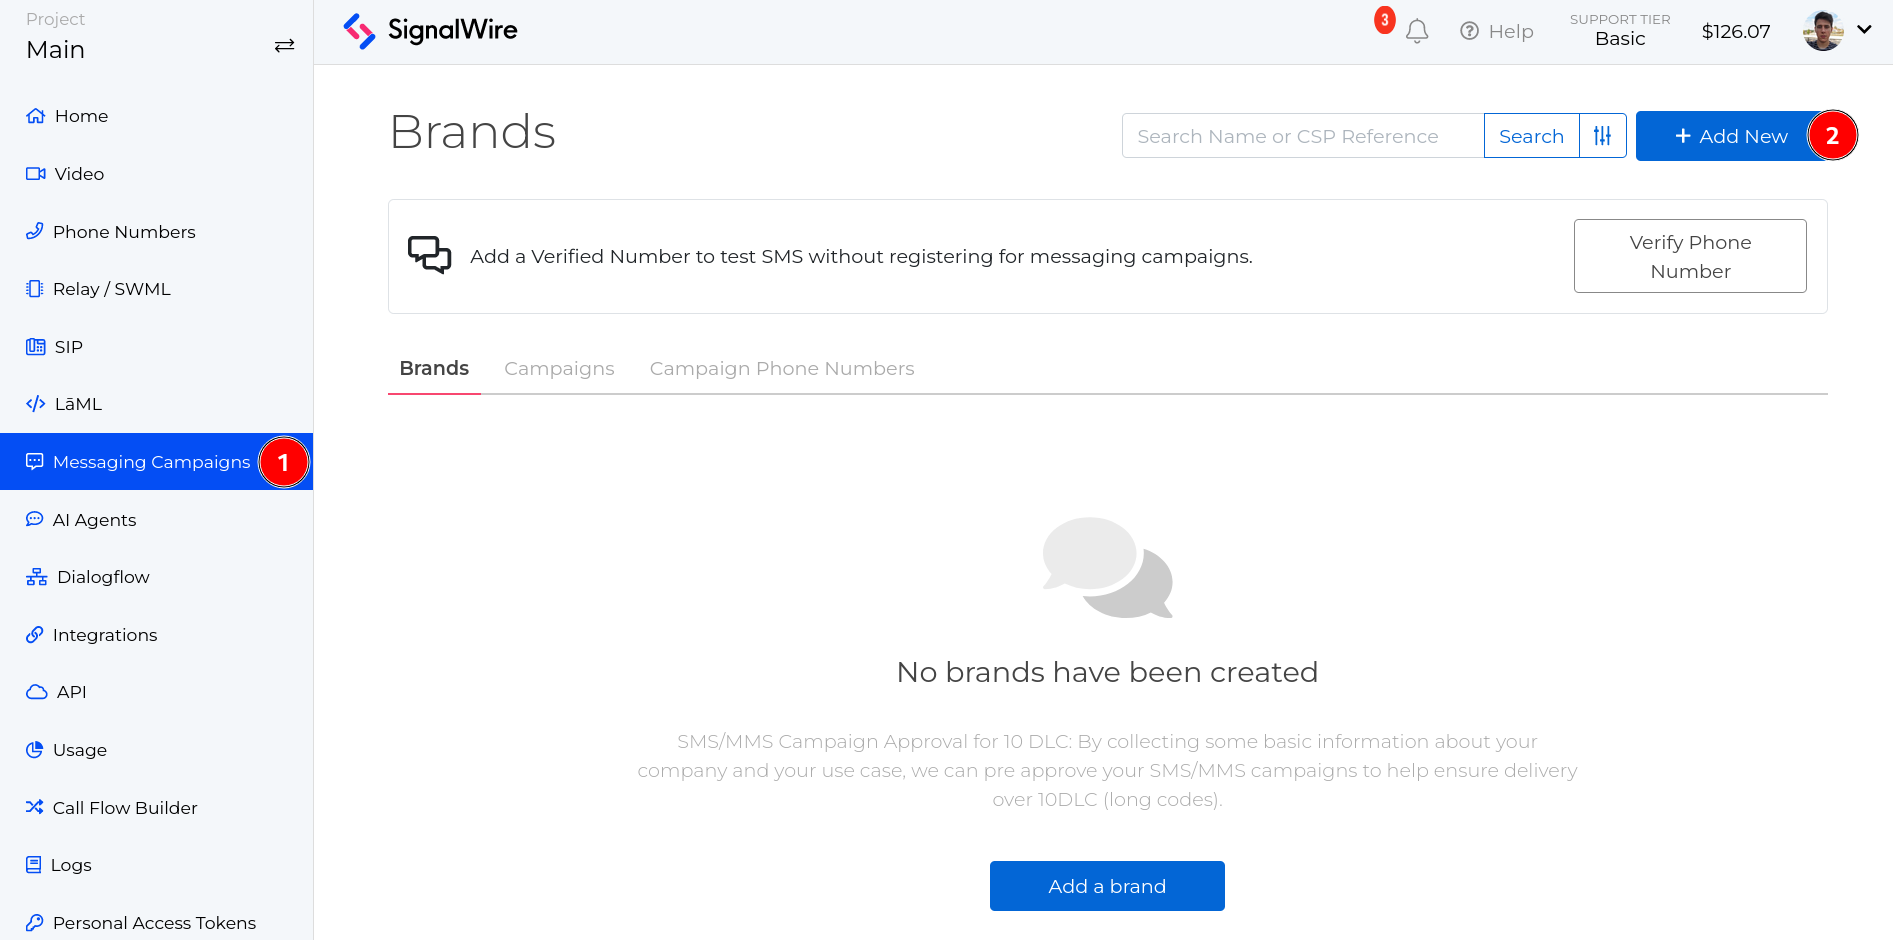
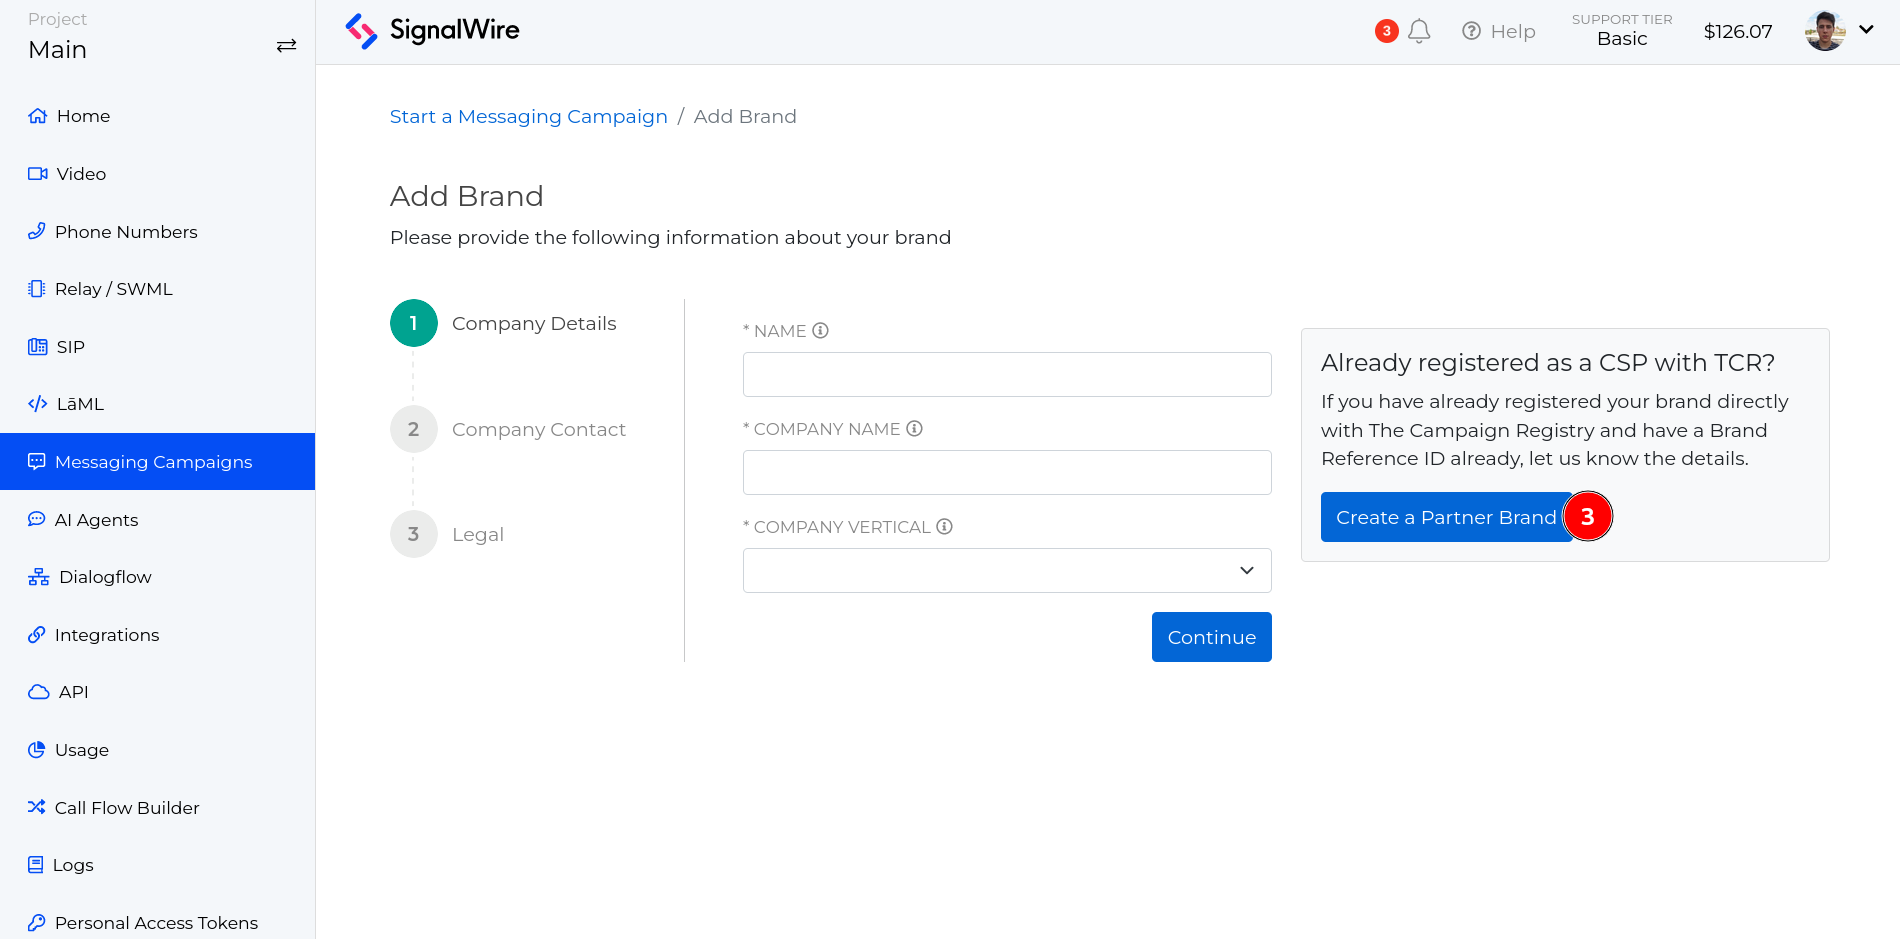
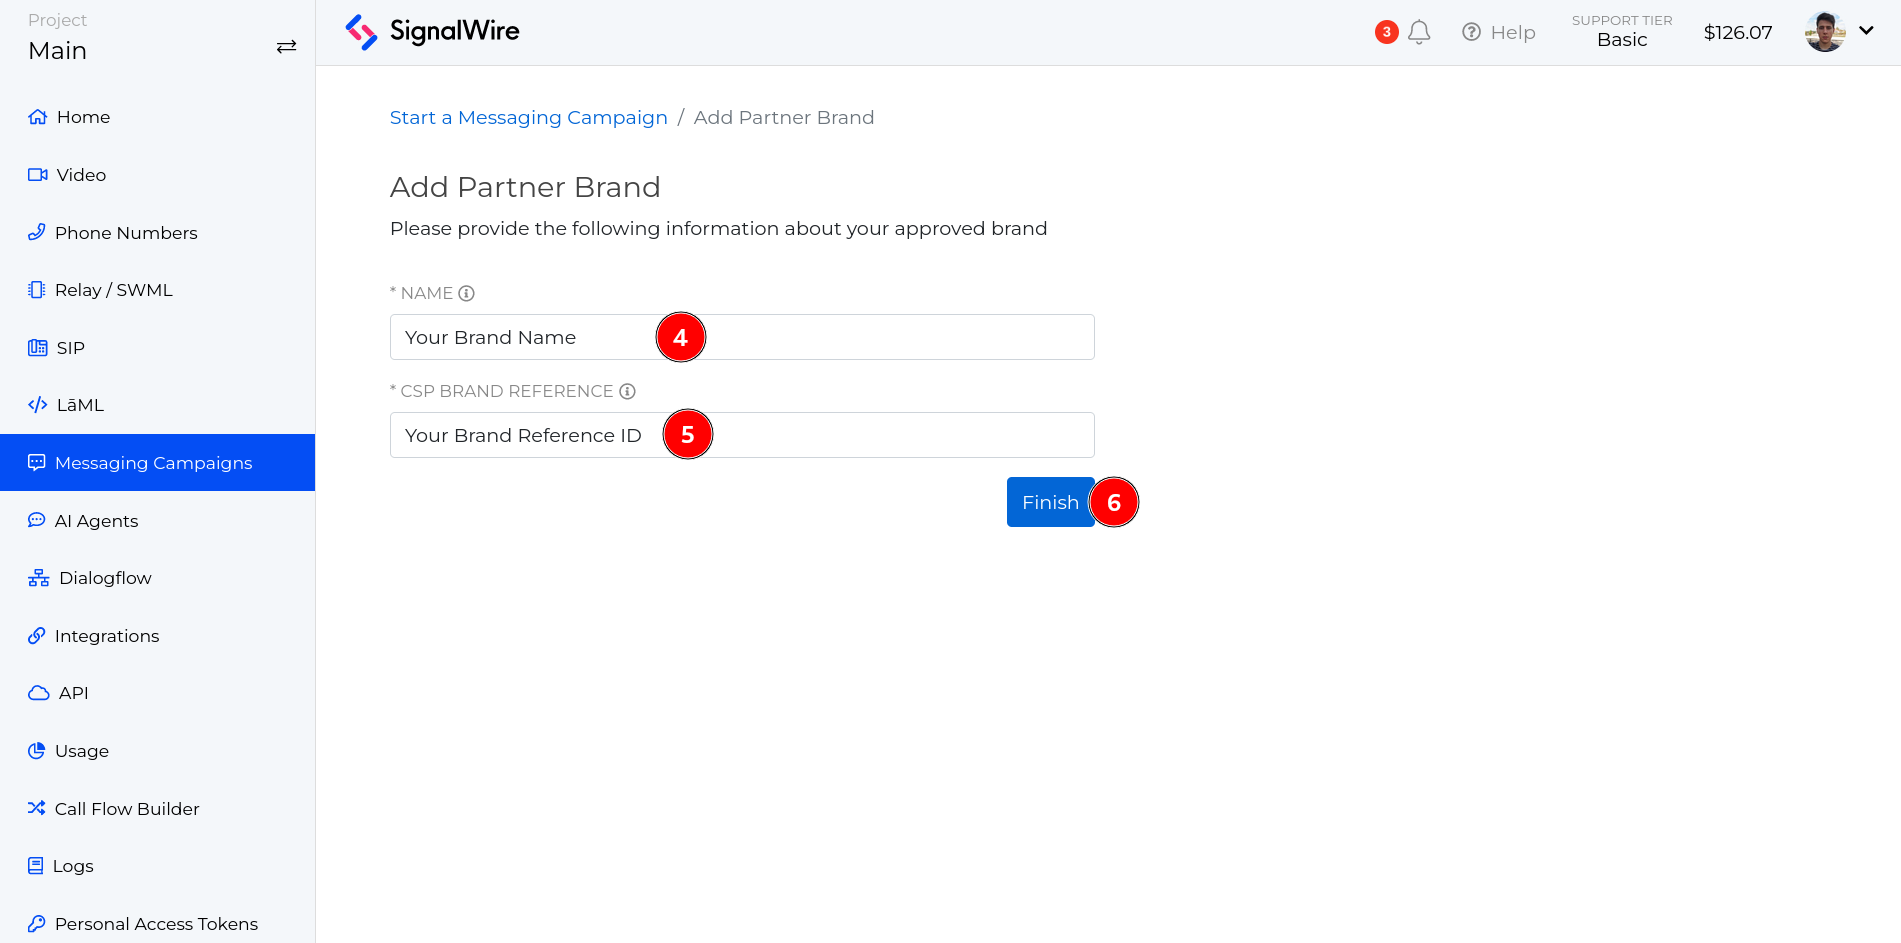
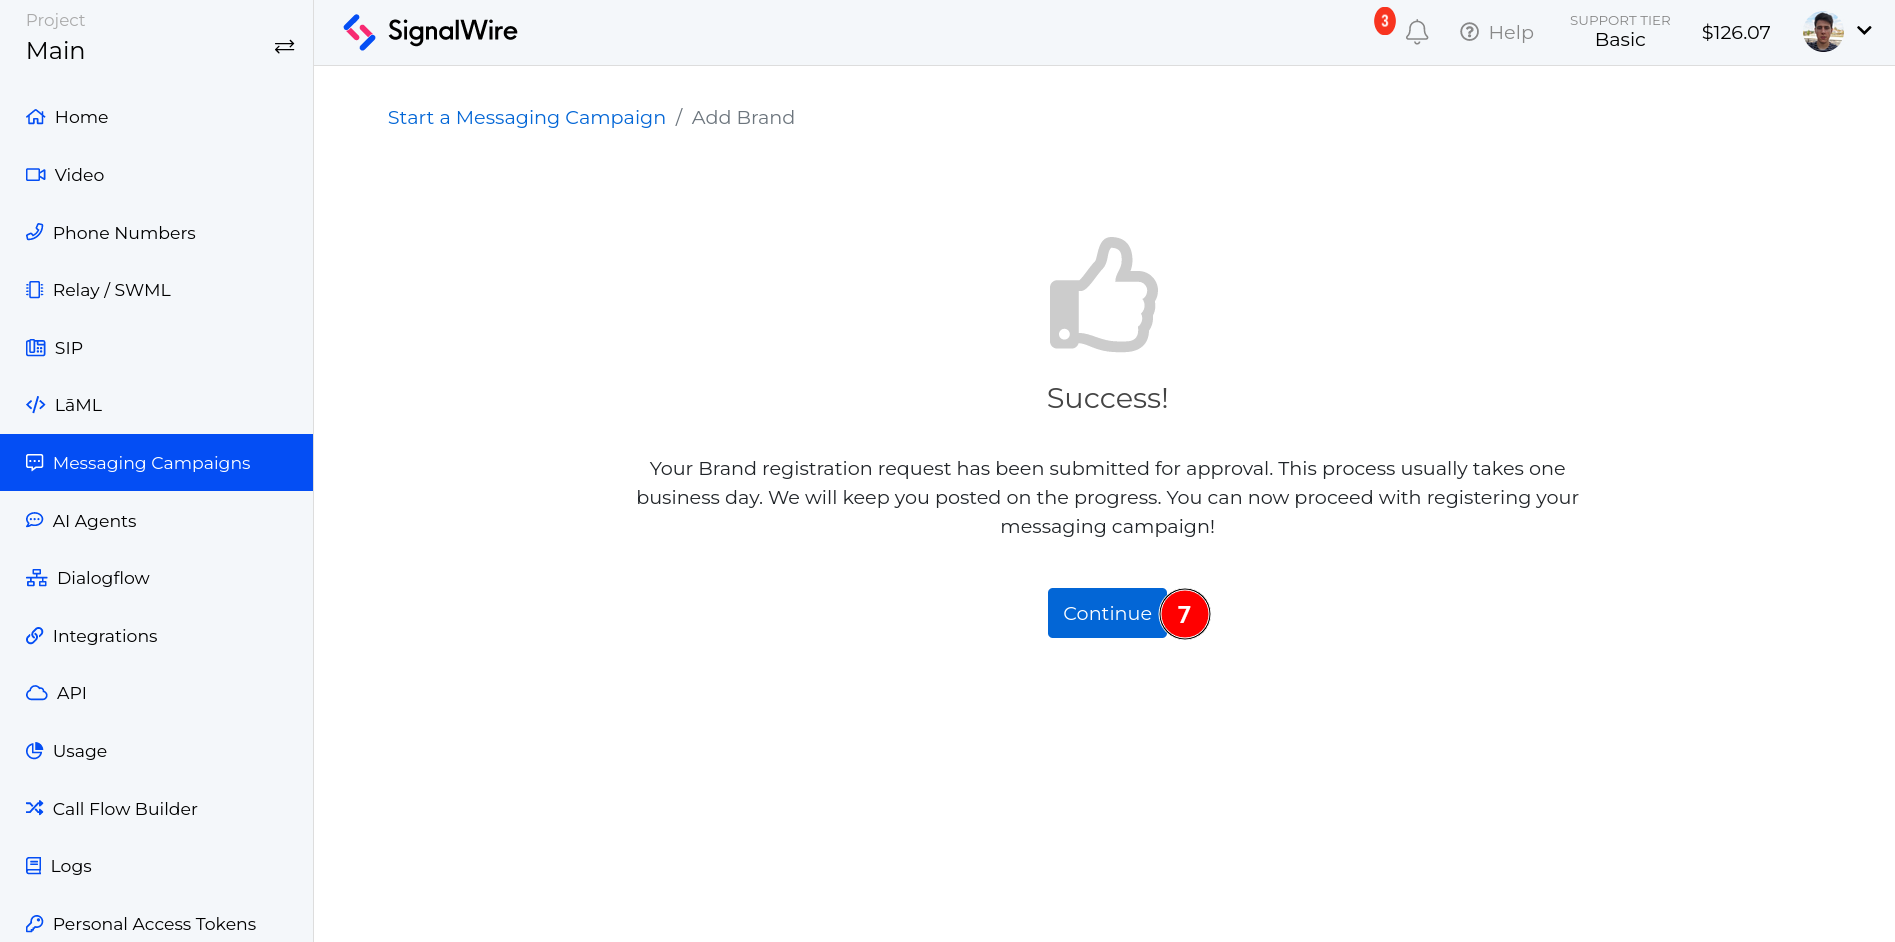
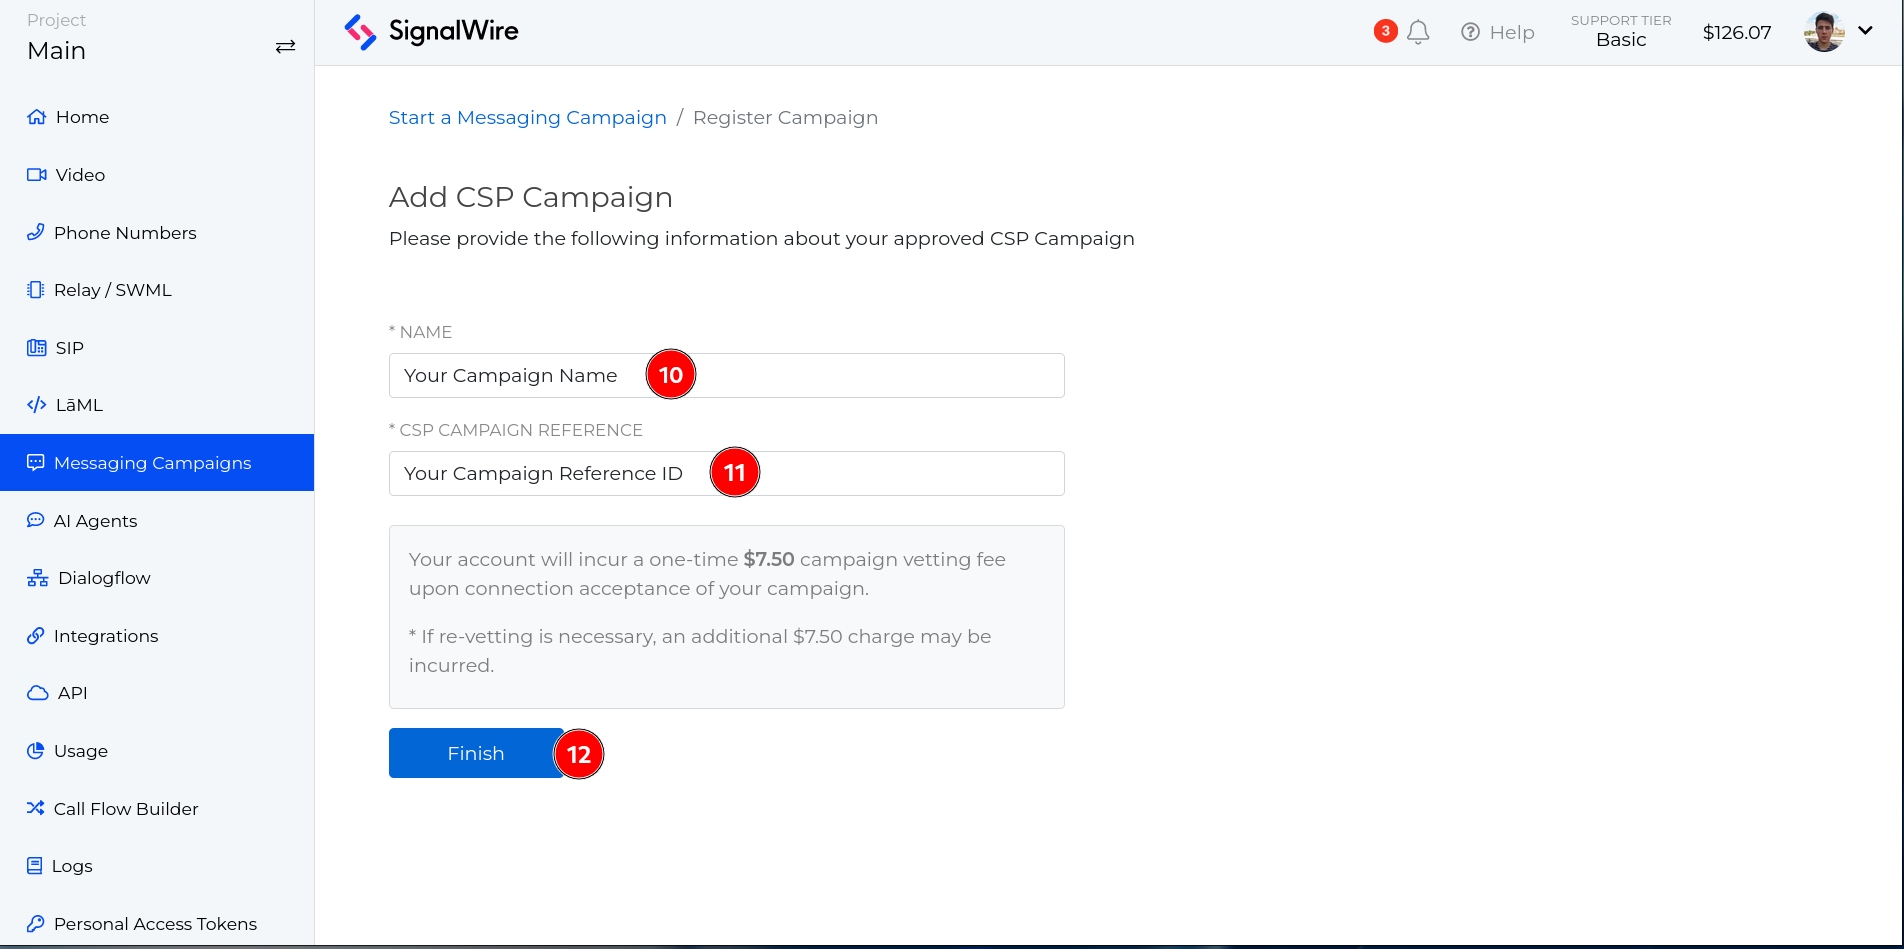
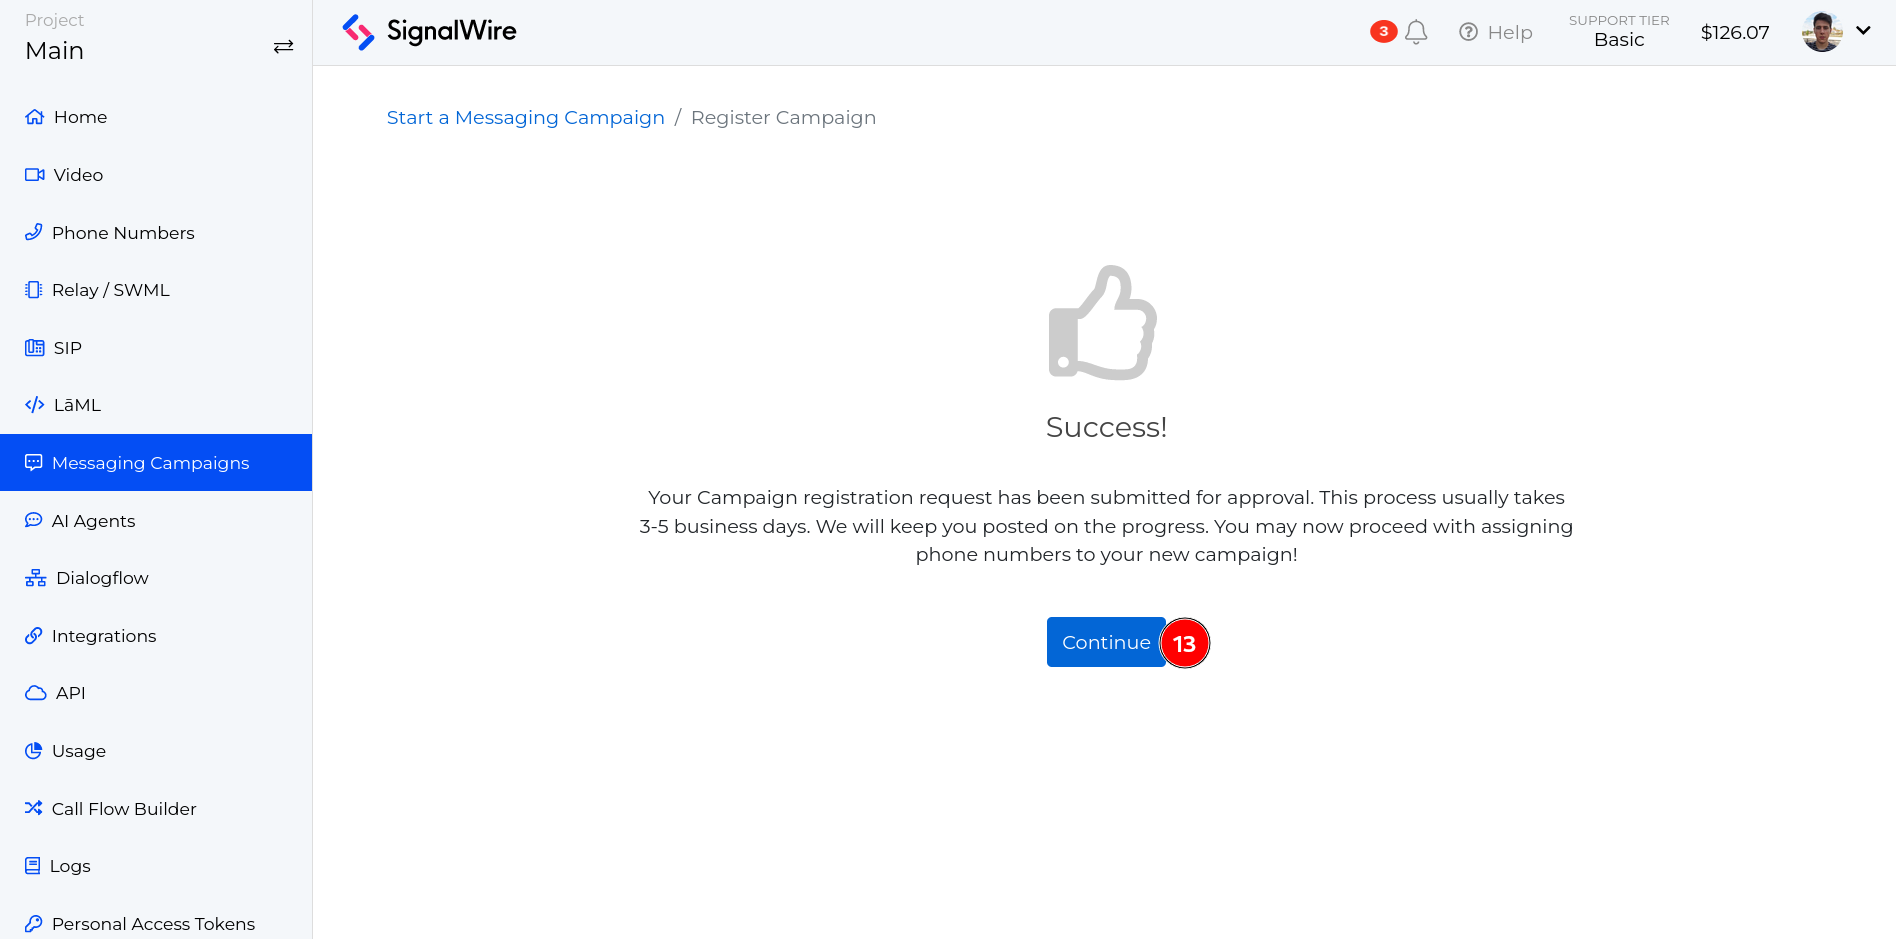
After associating your Brands, you must Create Self-Registered Campaigns underneath the Brands that you have created. Again, this can be done via API through the usage of REST APIs, or, can be done through the SignalWire Dashboard underneath the Messaging Campaigns tab.
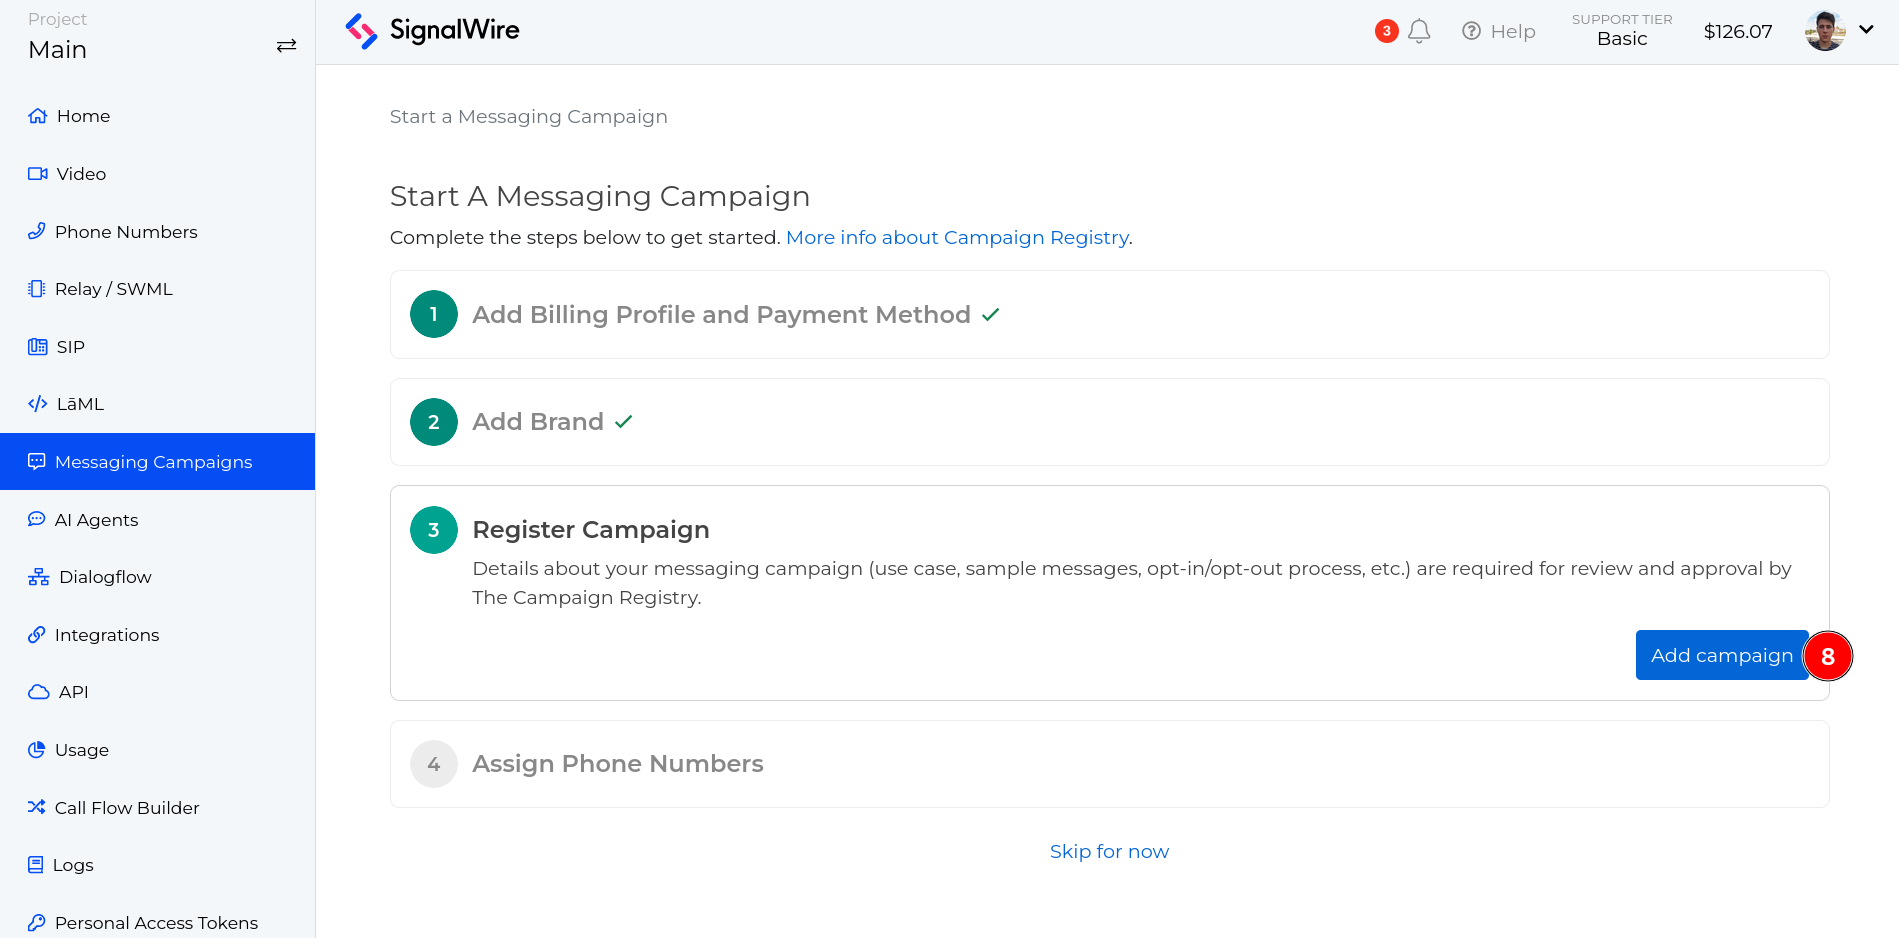
For the final step, you must Create a Phone Number Assignment to associate your Self-Registered Campaign to your SignalWire Phone number. Navigate to the Campaign Phone Numbers section of the Messaging Campaigns tab in your Dashboard to manually complete this process, or use our REST API.
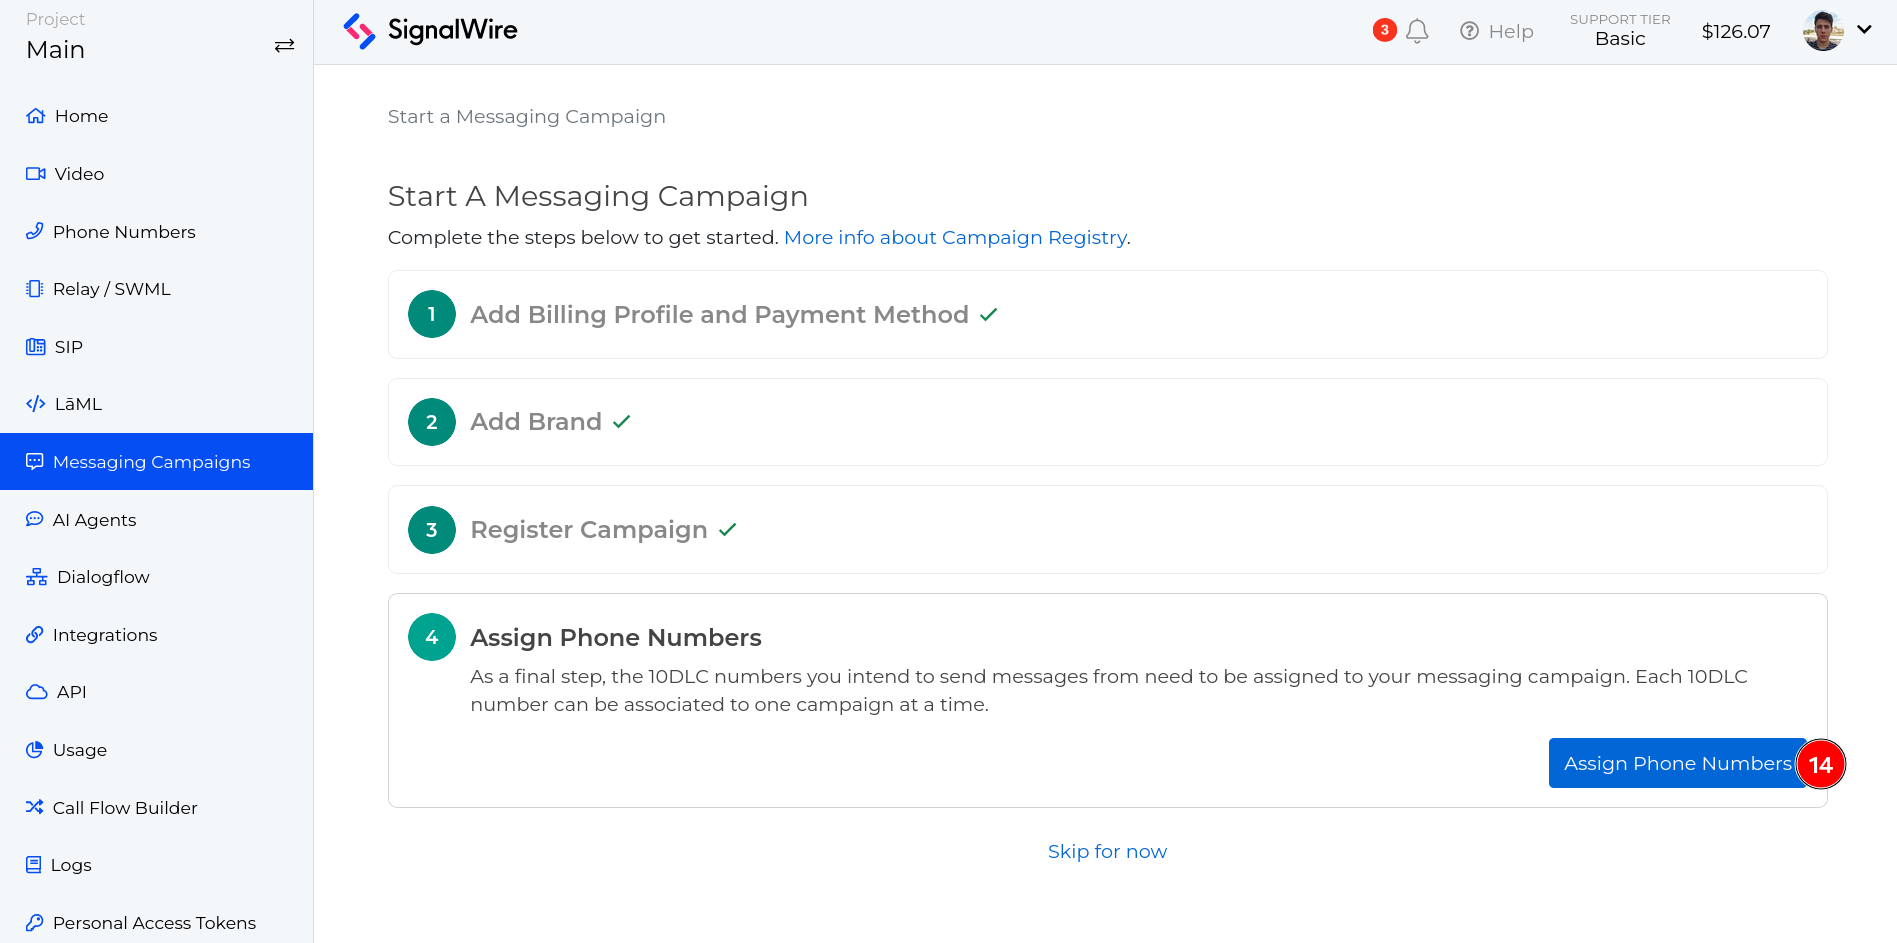
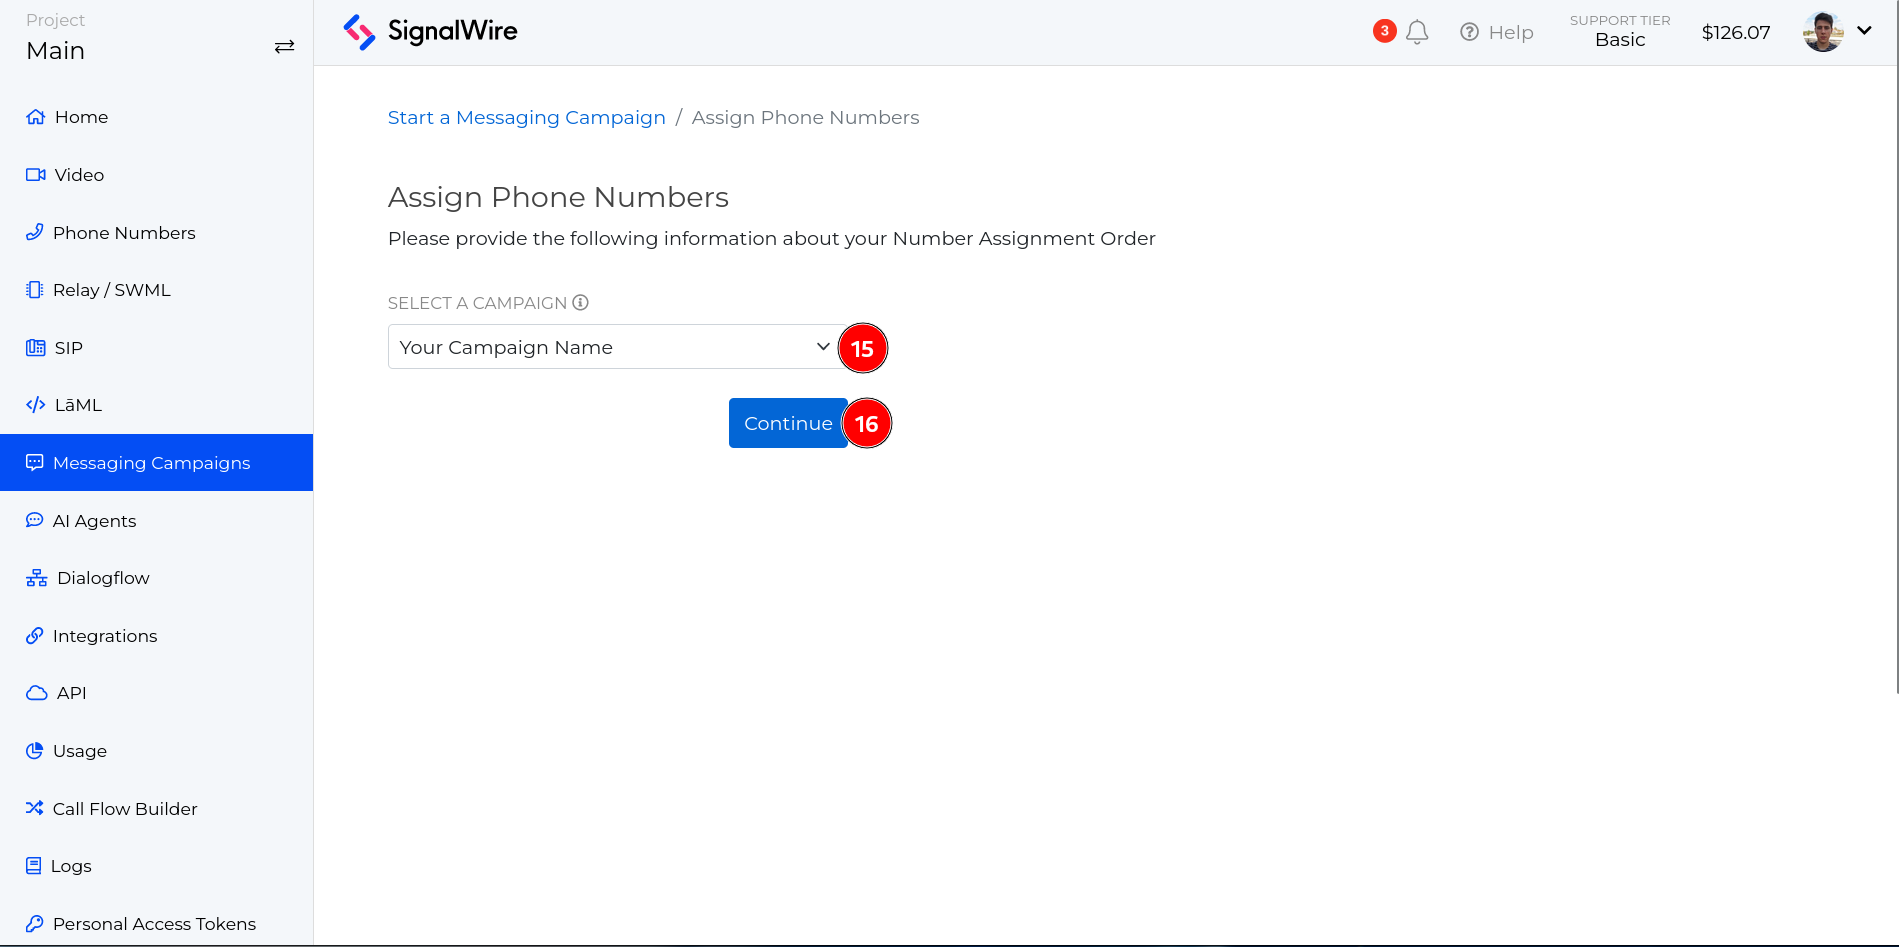
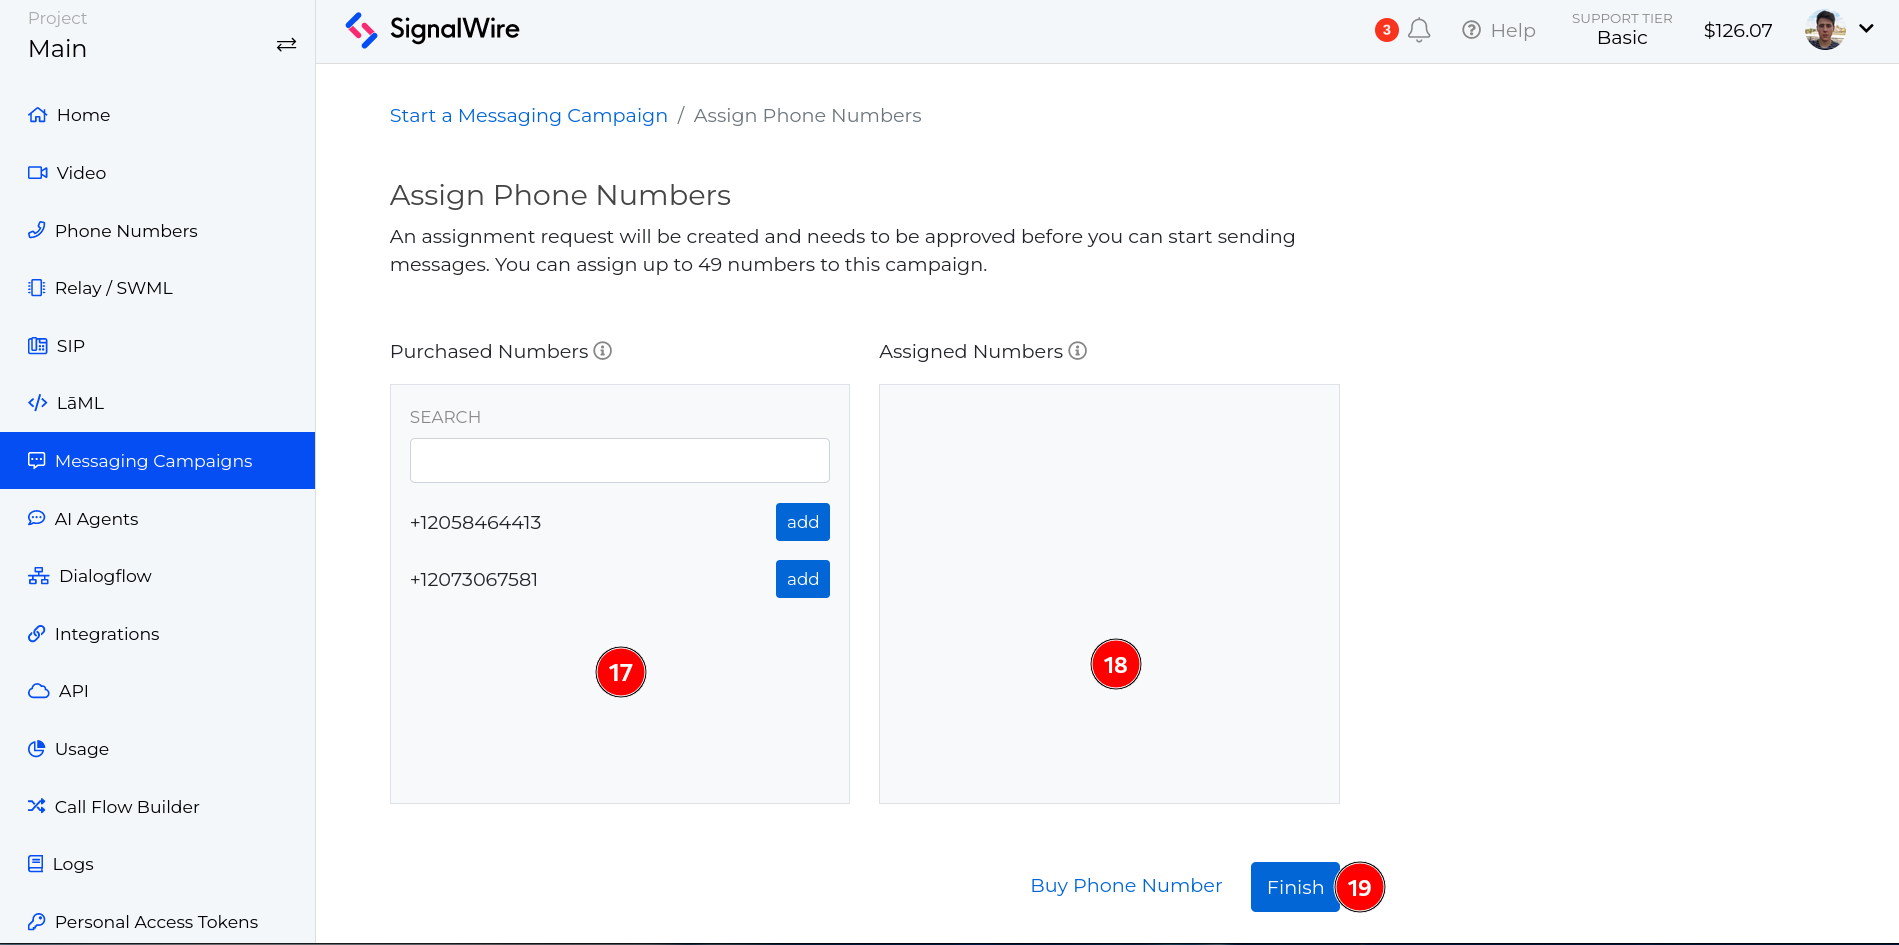
Please note that if the Brand and Campaign are not loaded into your SignalWire Space, phone numbers will not be able to associate with the Campaign and you will not be able to send messages.
Associating Your Brand and Campaigns with SignalWire via API
If you prefer to use the REST API to link your Brands and Campaigns with SignalWire, follow these detailed steps:
- Create a Brand via API
- Endpoint: Create Brand
- Method: POST
- Required Fields:
name: The name of your Brand.csp_brand_reference: The approved Brand ID you received from The Campaign Registry.csp_self_registered: Set this field totrueto indicate that this Brand is self-registered.
- Create a Campaign via API
- Endpoint: Create Campaign
- Method: POST
- Required Fields:
name: The name of your Campaign.csp_campaign_reference: The approved Campaign ID from The Campaign Registry.
- Share Campaign with SignalWire via API
- TCR API Documentation: TCR API - Share Campaign
- Method: PUT
- Endpoint:
/campaign/{campaignId}/sharing/{upstreamCnpId} - Parameters:
- Replace
{campaignId}with the 7-character Campaign ID (e.g., CXXXXXX). - Replace
{upstreamCnpId}with SignalWire’s CSP ID (SYU5YT8).
- Create a Phone Number Assignment
- Endpoint: Create Phone Number Assignment
- Method: POST
- Required Fields:
campaign_id: The ID of the Campaign you want to associate with the phone number.phone_numbers: A list of phone numbers to be assigned to the Campaign.
Additional Information
- API Documentation: Consult the linked API documentation for detailed guidelines on using these endpoints effectively.
- Error Handling: Ensure you handle possible errors and responses from API calls to troubleshoot any issues during the setup process.
By following these steps, you can seamlessly integrate your Brands and Campaigns with SignalWire via the REST API. For more detailed guidance or support, please refer to the linked documentation.
DCA Election: The Final Step
You, like many others, may think that you should be able to start sending messages immediately upon Campaign registration. However, something commonly overlooked is the fact that The Campaign Registry is simply a registration database that contains information for entities (such as mobile operators, DCA’s, CNP’s, and CSP’s) to reference.
What this means is that the information your customers provide in their Campaign registration will need to be validated and vetted. Since you can realistically input anything in a Campaign registration, it’s not only our duty (and the DCA’s duty) to ensure that each and every registration follows CTIA guidelines, but it is the duty of you as the ISV (Independent Software Vendor) to vet your own customers and the information they provide for the registrations.
You should know that our DCA is pretty strict with what they will and won’t allow on their platform. Their vetting practices are thorough, and we recommend that you take a look at our guide for Upstream Campaign Vetting. We also suggest reviewing our list of Explicitly Prohibited Content to ensure your customers’ use cases will be able to send messages through our platform.
DCA election can take an additional 24 hours or more after you initially connect your Campaign to your SignalWire Space. The sooner you load your Campaign into your Space, the better. SignalWire will not request DCA election until after we have been alerted that a new Campaign needs to be connected, and the Campaign has been loaded into the SignalWire Space.
During DCA election vetting, the DCA will be checking to ensure there is a valid website that showcases who exactly is sending messages, the quality of the registration itself, and if the registration follows CTIA guidelines. Rejections can occur if insufficient information has been provided, and a resubmission fee of $7.50 will be applied upon resubmission.
The Campaign Registry Fees
The movement to prevent unwanted messaging content involves a lot of engineering power and is quite costly. This pushes some of the cost down to the individual CSPs, as broken down in the table below. Luckily, SignalWire understands that these fees are enough of a burden for you, and we do not add on any other costs to associate with us. All of these fees will be handled between you and The Campaign Registry.
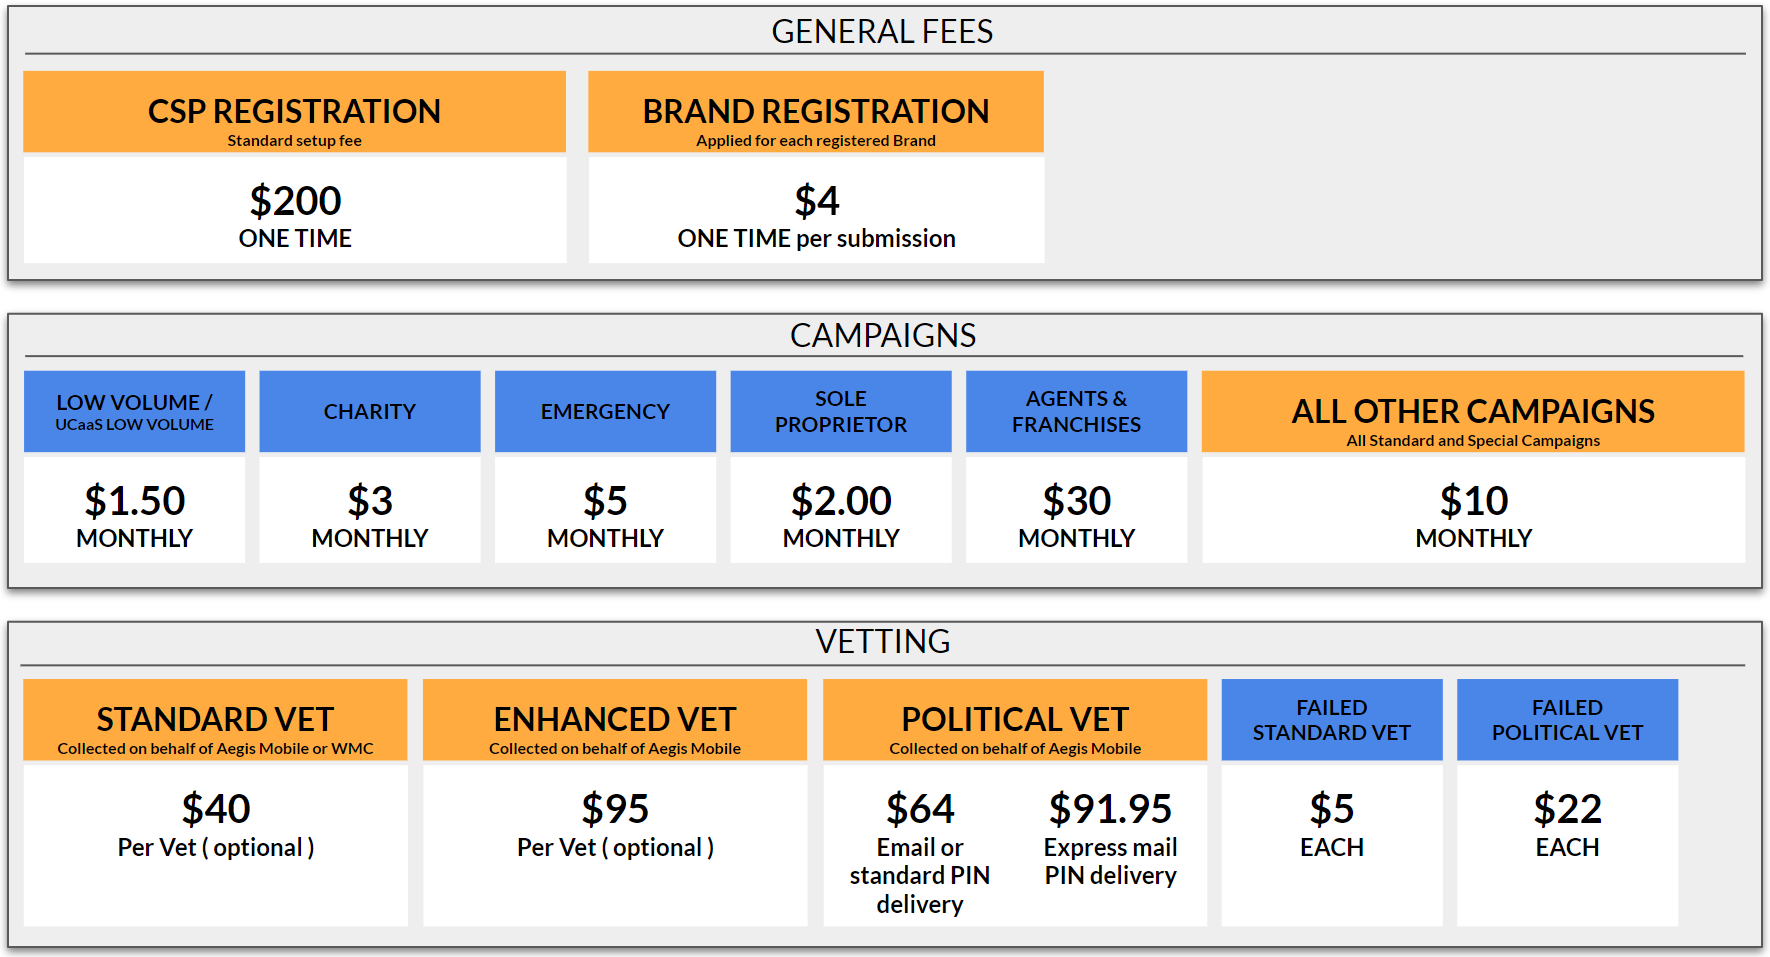
In addition to TCR's fees, our DCA (Direct Connect Aggregator, aka companies that provide direct connectivity to mobile carrier gateways for the purpose of delivering messages) has begun charging a $7.50 vetting fee to cover their costs of vetting each new Campaign when they receive a new Campaign connection request. This new vetting process has increased the registration turnaround time to a minimum of 48 hours. Providing insufficient information in the Campaign registration can cause significant delays. If our upstream partner requires additional information, another $7.50 re-vetting fee will be charged with each resubmission. You will be notified if re-vetting applies to your Campaign(s).
We suggest that sufficient information is provided when registering your Campaign(s). This includes a FULL, formal description, up to 5 messaging templates, and if registering directly through SignalWire, a full description of the subscriber opt-in/opt-out process.
For a detailed breakdown of fees associated with 10DLC Brands and Campaigns, including Network Passthrough fees, please review our Campaign Registry - Pricing page.
Unique Use Cases
Not all Messaging use cases are as cookie-cutter as The Campaign Registry would like them to be. That is alright; there are avenues created to address this.
If your campaign cannot be accurately placed in any specific use case, there are two solutions to allow unique use cases through either a Mixed use case or a Low Volume Mixed use case. The low volume mixed use case only costs $1.50 per month. It works great if you do not exceed 15,000 messages/ month and do not exceed 75 transactions per minute.
Organizing your Brands and Campaigns is not always as simple as it seems, that is where we come in to help.
If you ever have any questions about how to register or simplify this process, please reach out to the SignalWire Support Team by creating a support ticket using the ? icon in the top right of your account’s Dashboard.
Additionally, you can also join our Community Discord to pose questions to SignalWire (or to the community of users) and stay updated on all the changes in the telecommunications world!