Integrating with Dialogflow Agents
Dialogflow agents allow you to use and build engaging, conversational interfaces powered by Google's Dialogflow AI. You can import Dialogflow agents in your SignalWire Space and connect them to your numbers.
Follow this guide to learn how to connect a Dialogflow agent.
Linking Dialogflow
To begin, Navigate to the Dialogflow tab in your SignalWire Dashboard. Once you are there, click on the "Import" or "Add" button.
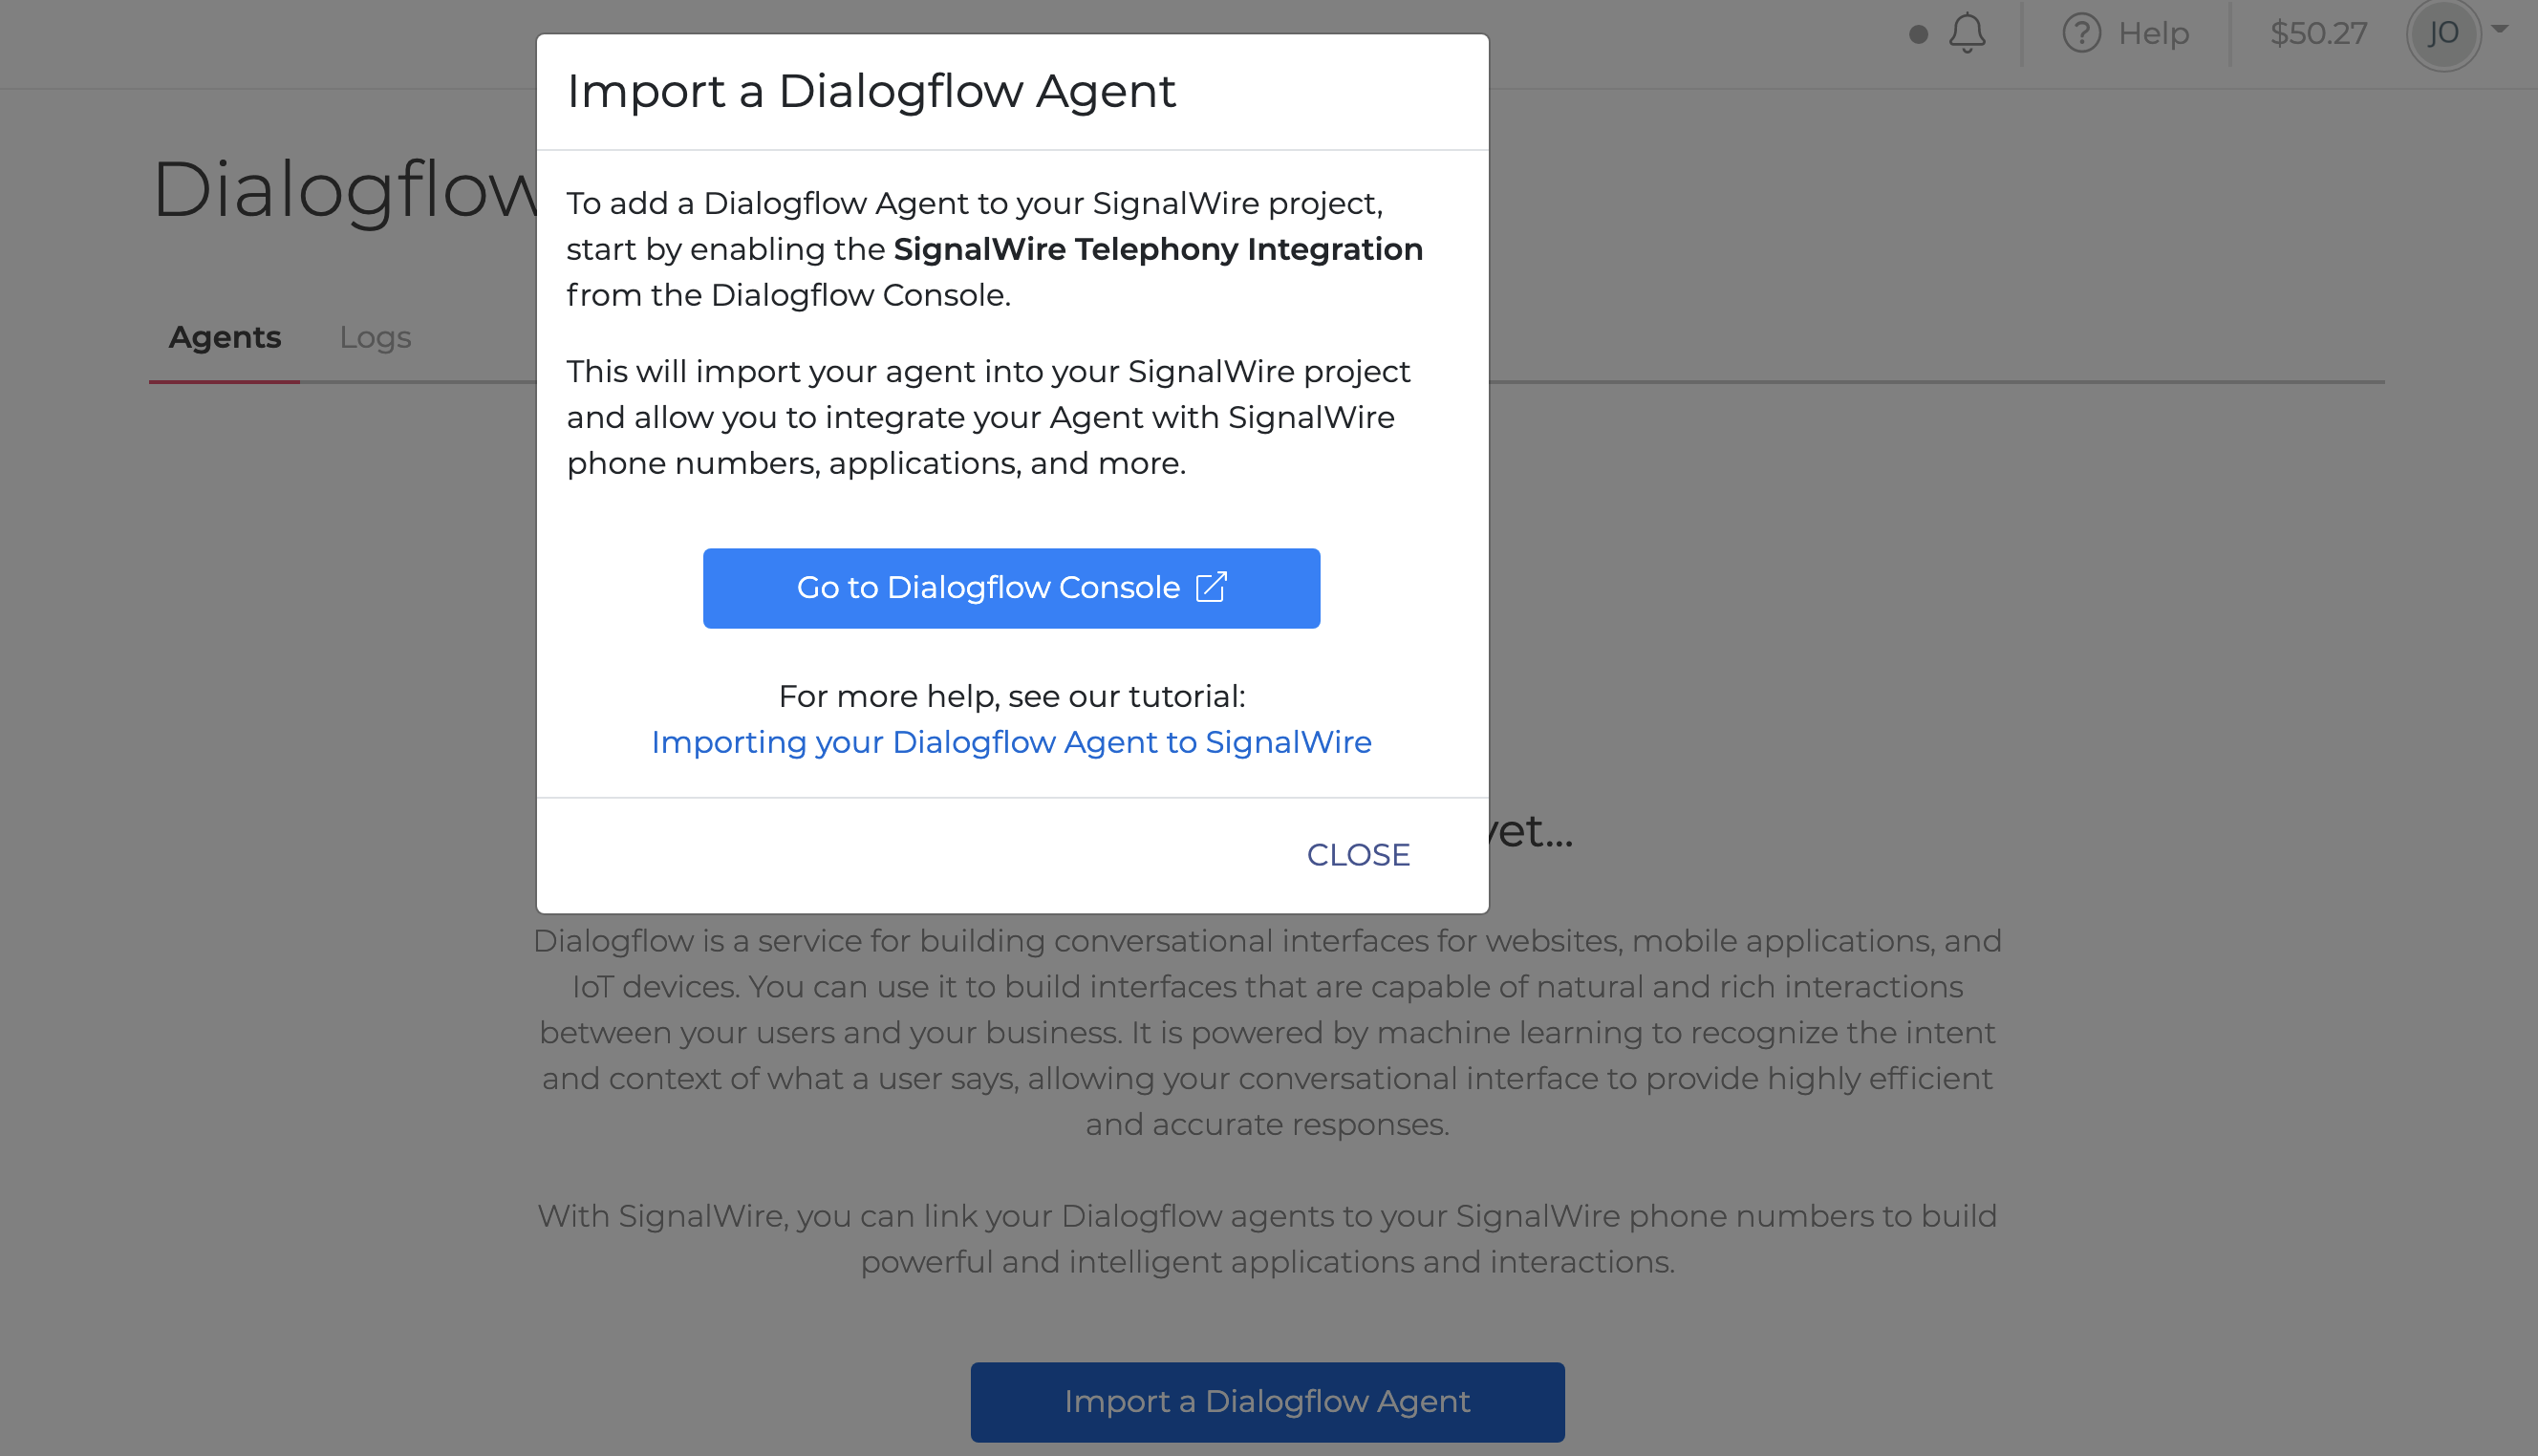
The popup that opens after clicking on the "Import" or "Add" button in the Dialogflow tab.
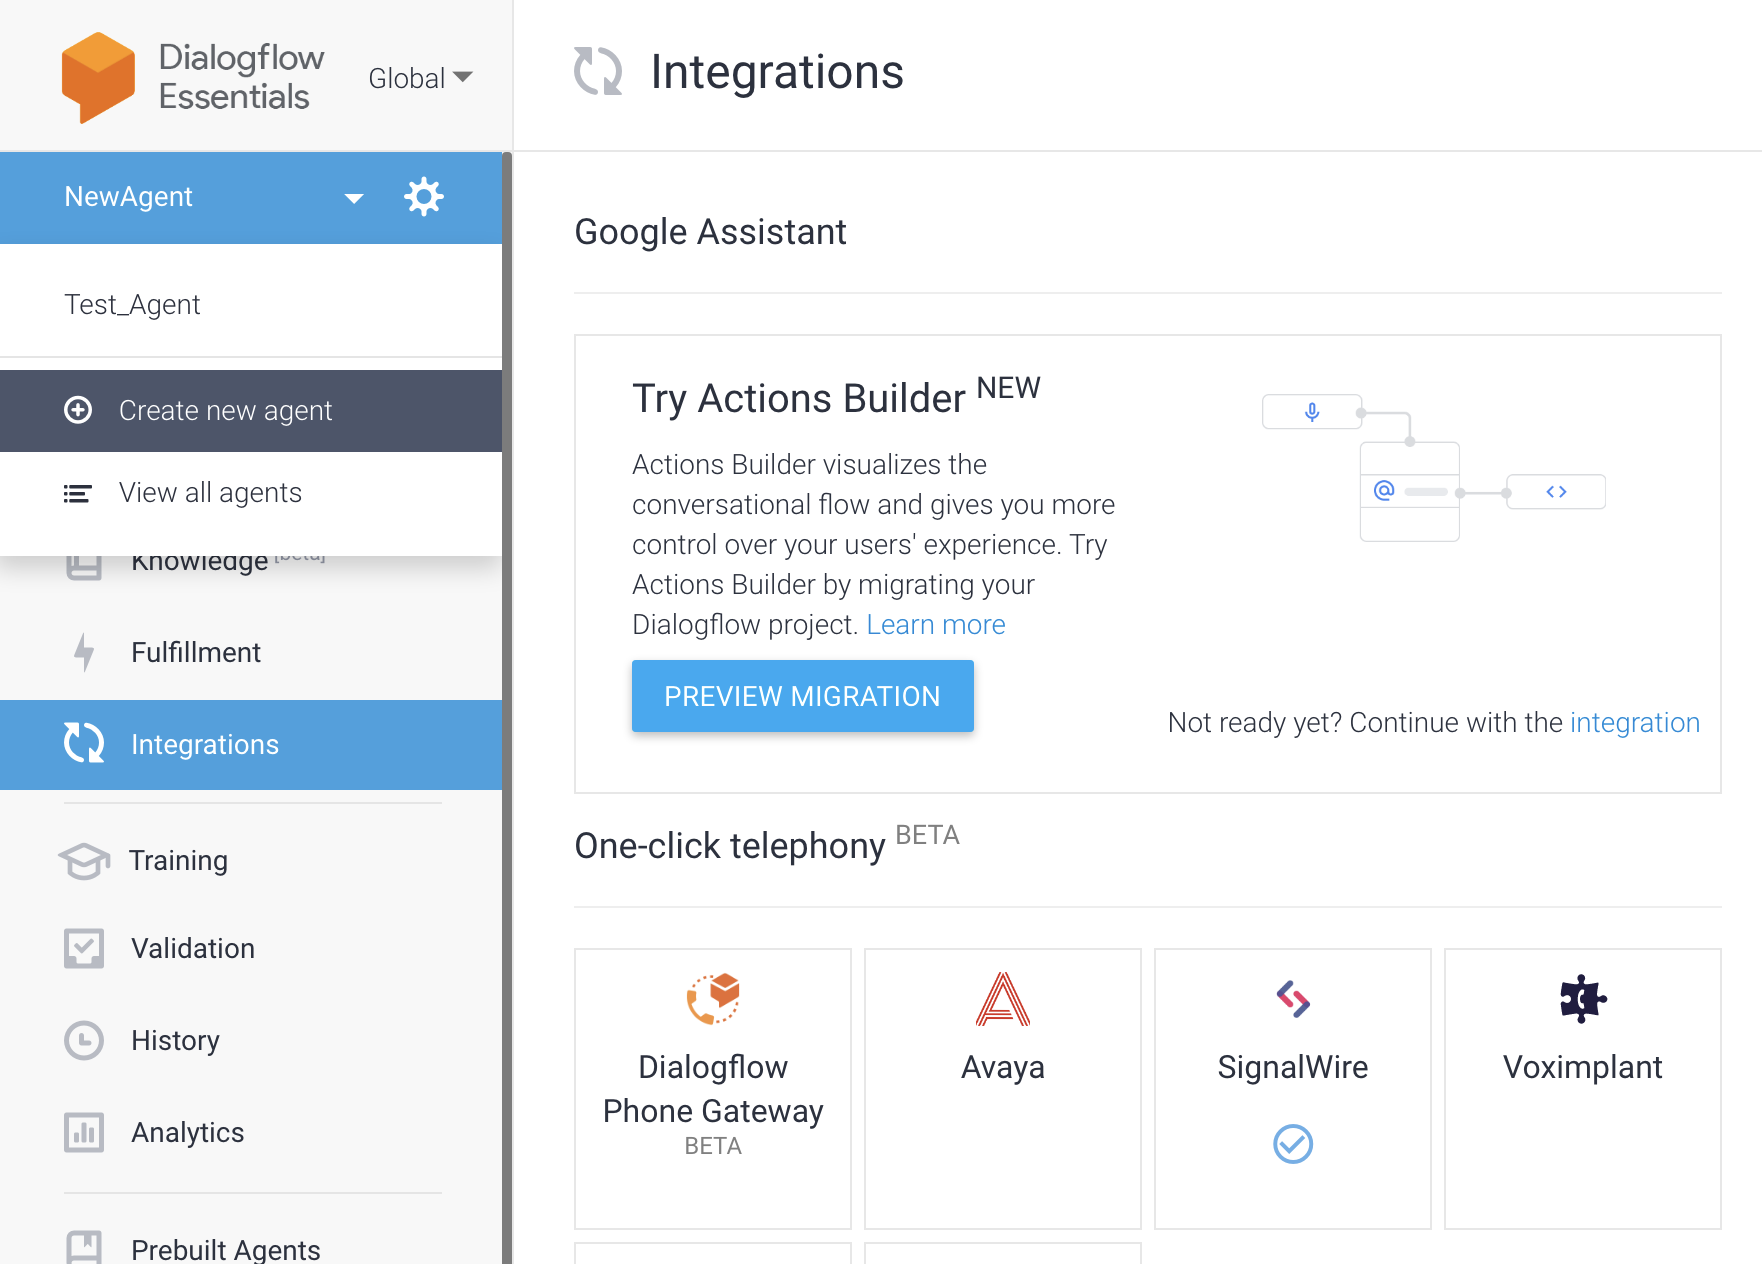
A popup will prompt you to open the Dialogflow Console. After clicking on "Go to Dialogflow Console", you will get redirected to Dialogflow's landing page. Once there, select the Integrations tab from the left sidebar. Then, click on SignalWire to begin the integration process.
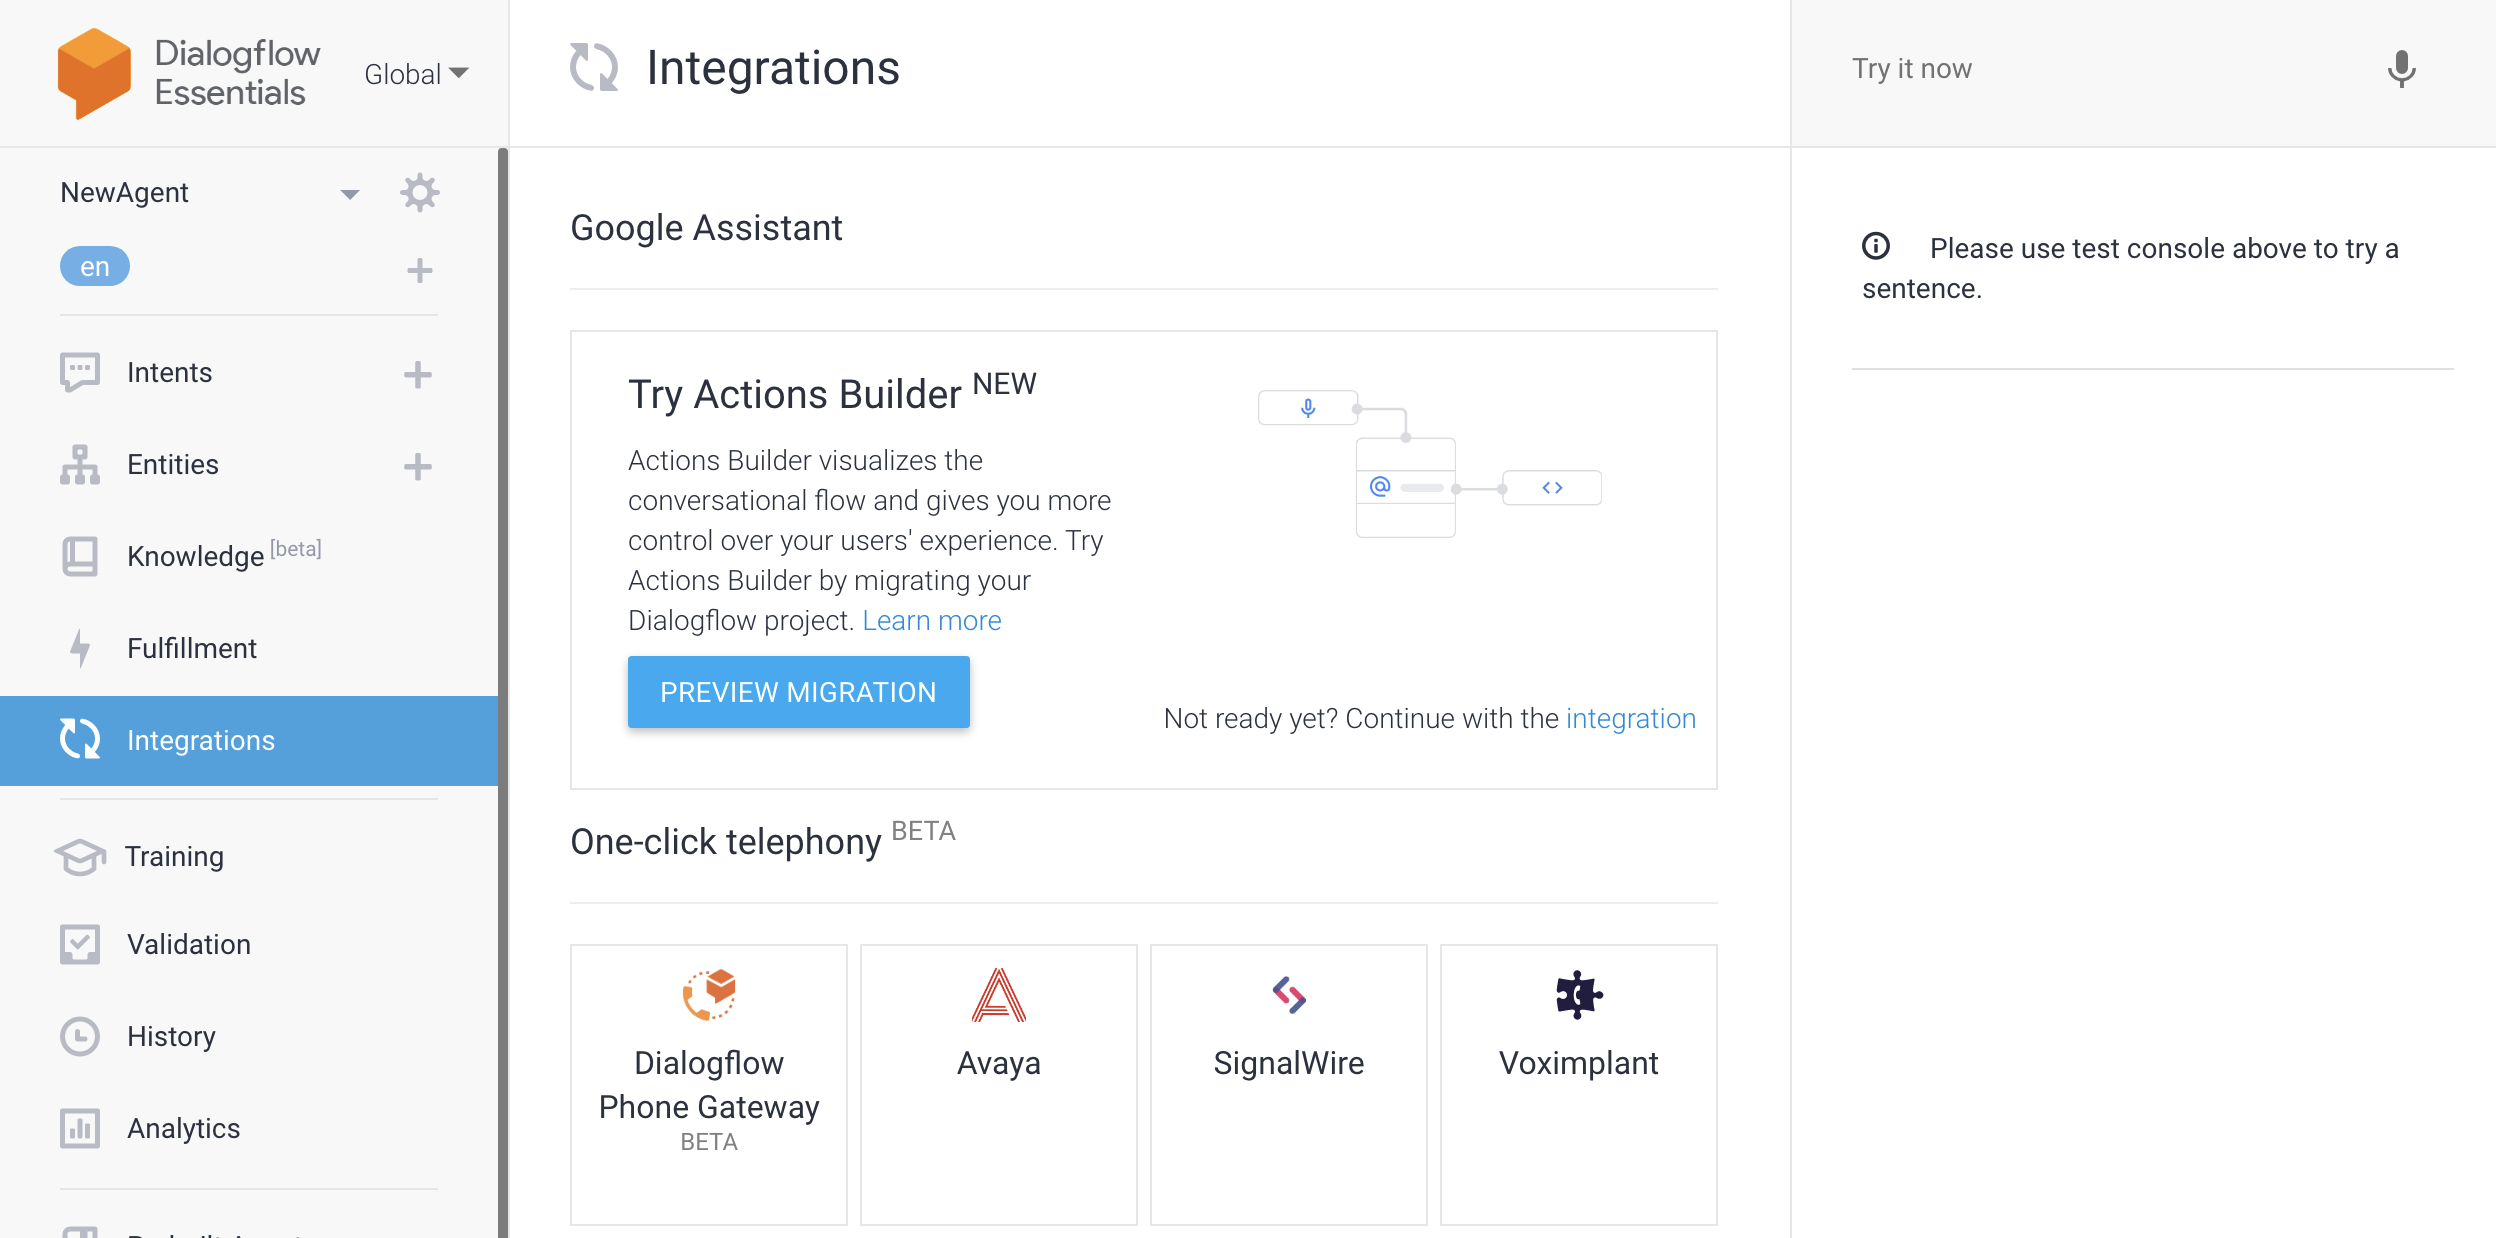
The "Integrations" tab in Dialogflow. You can notice the SignalWire logo at the bottom.
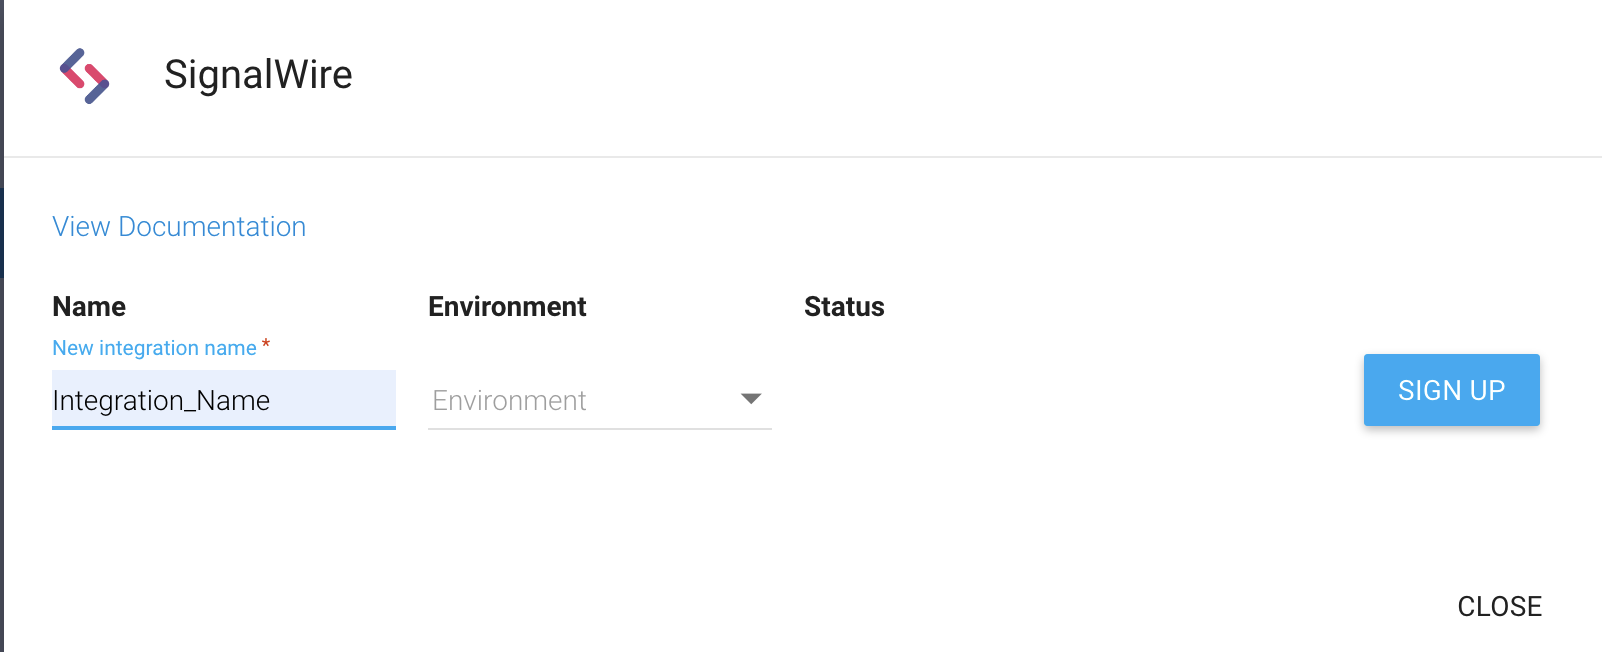
Give this new Integration a name and then click Sign Up
Once you sign in and consent Dialogflow to access your SignalWire cloud Space, the next step is to associate a phone number to this agent. You can click Link with New Number to have a number purchased and configured for this. Or, you can edit your phone settings after this integration to use a number that is already in your Space.
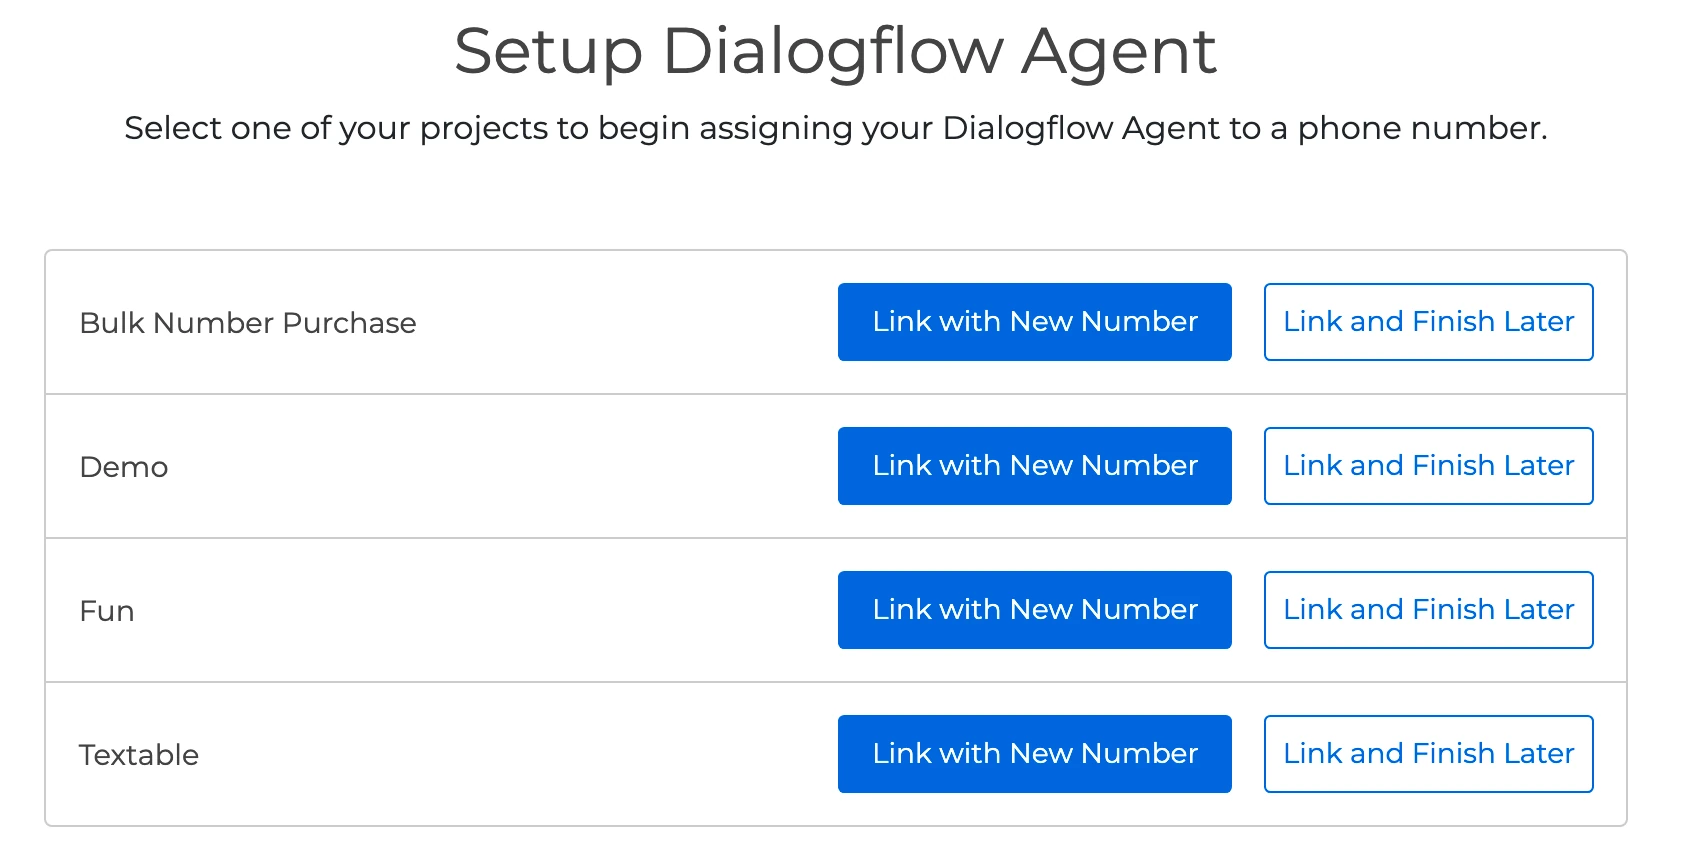
Dialogflow integration setup screen. You can choose between linking to a Space and creating a new number automatically, or linking and associating a number manually at a later time.
Creating a Dialogflow Agent
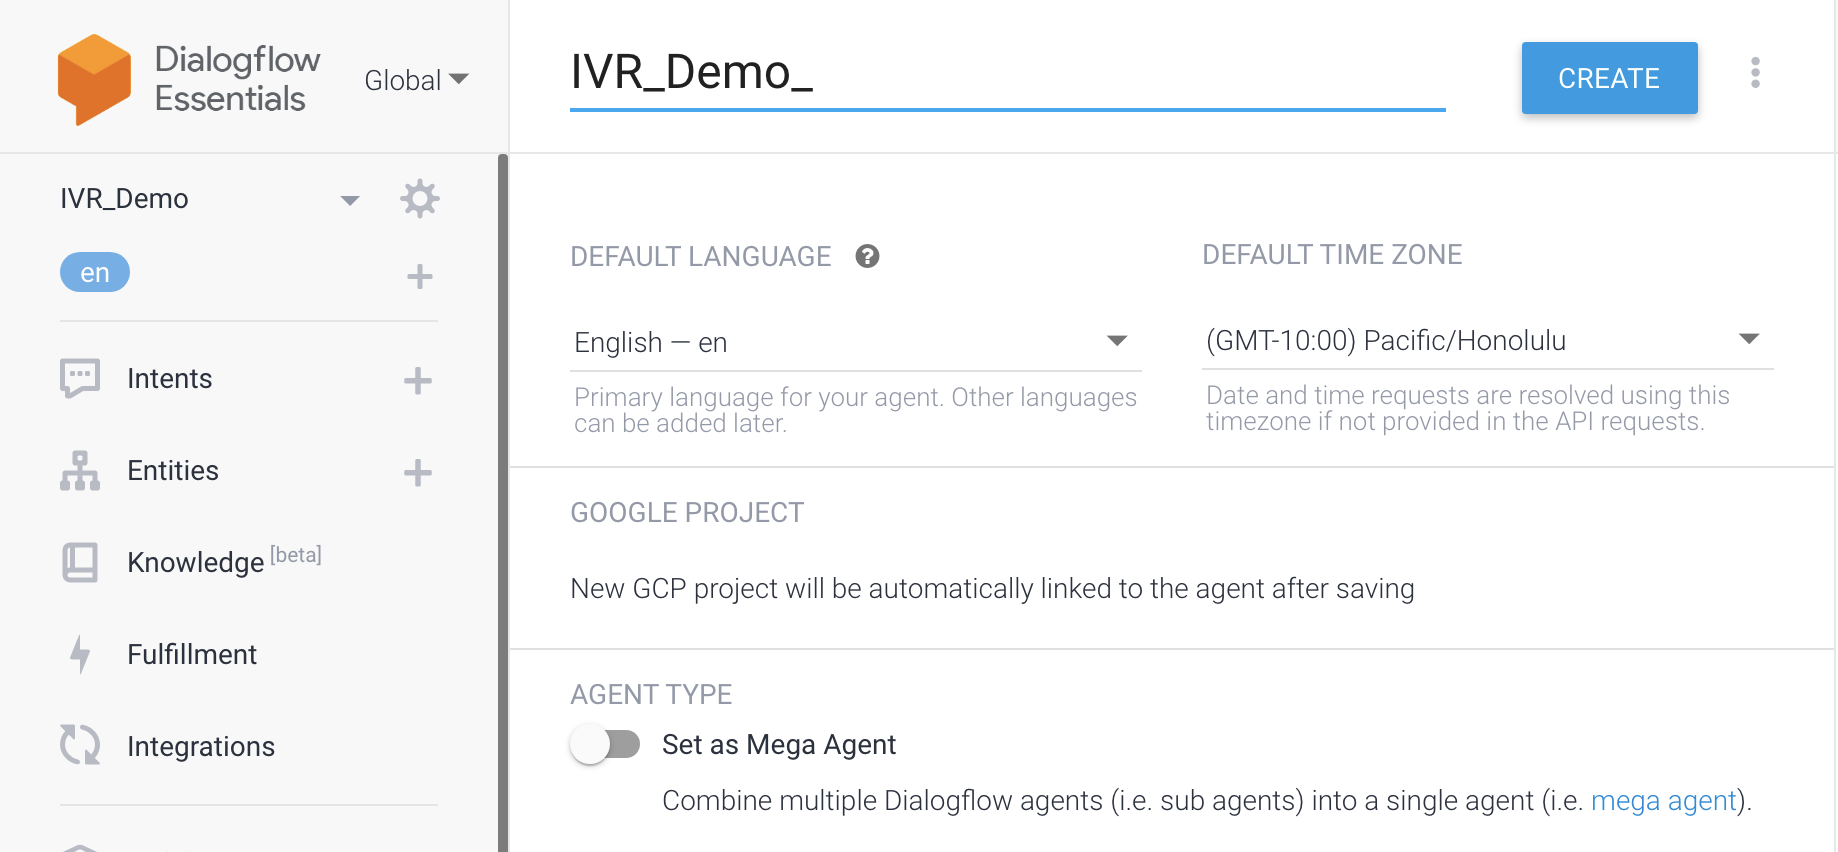
Now that your SignalWire Space and a number have been linked with your Dialogflow account, it is time to create a new Agent. On the left panel, click on Create new agent.
Then, name your new agent and click Create. Once your agent is created, click on the Settings (Gear) icon in the top right corner of the screen which is next to your agent's name.
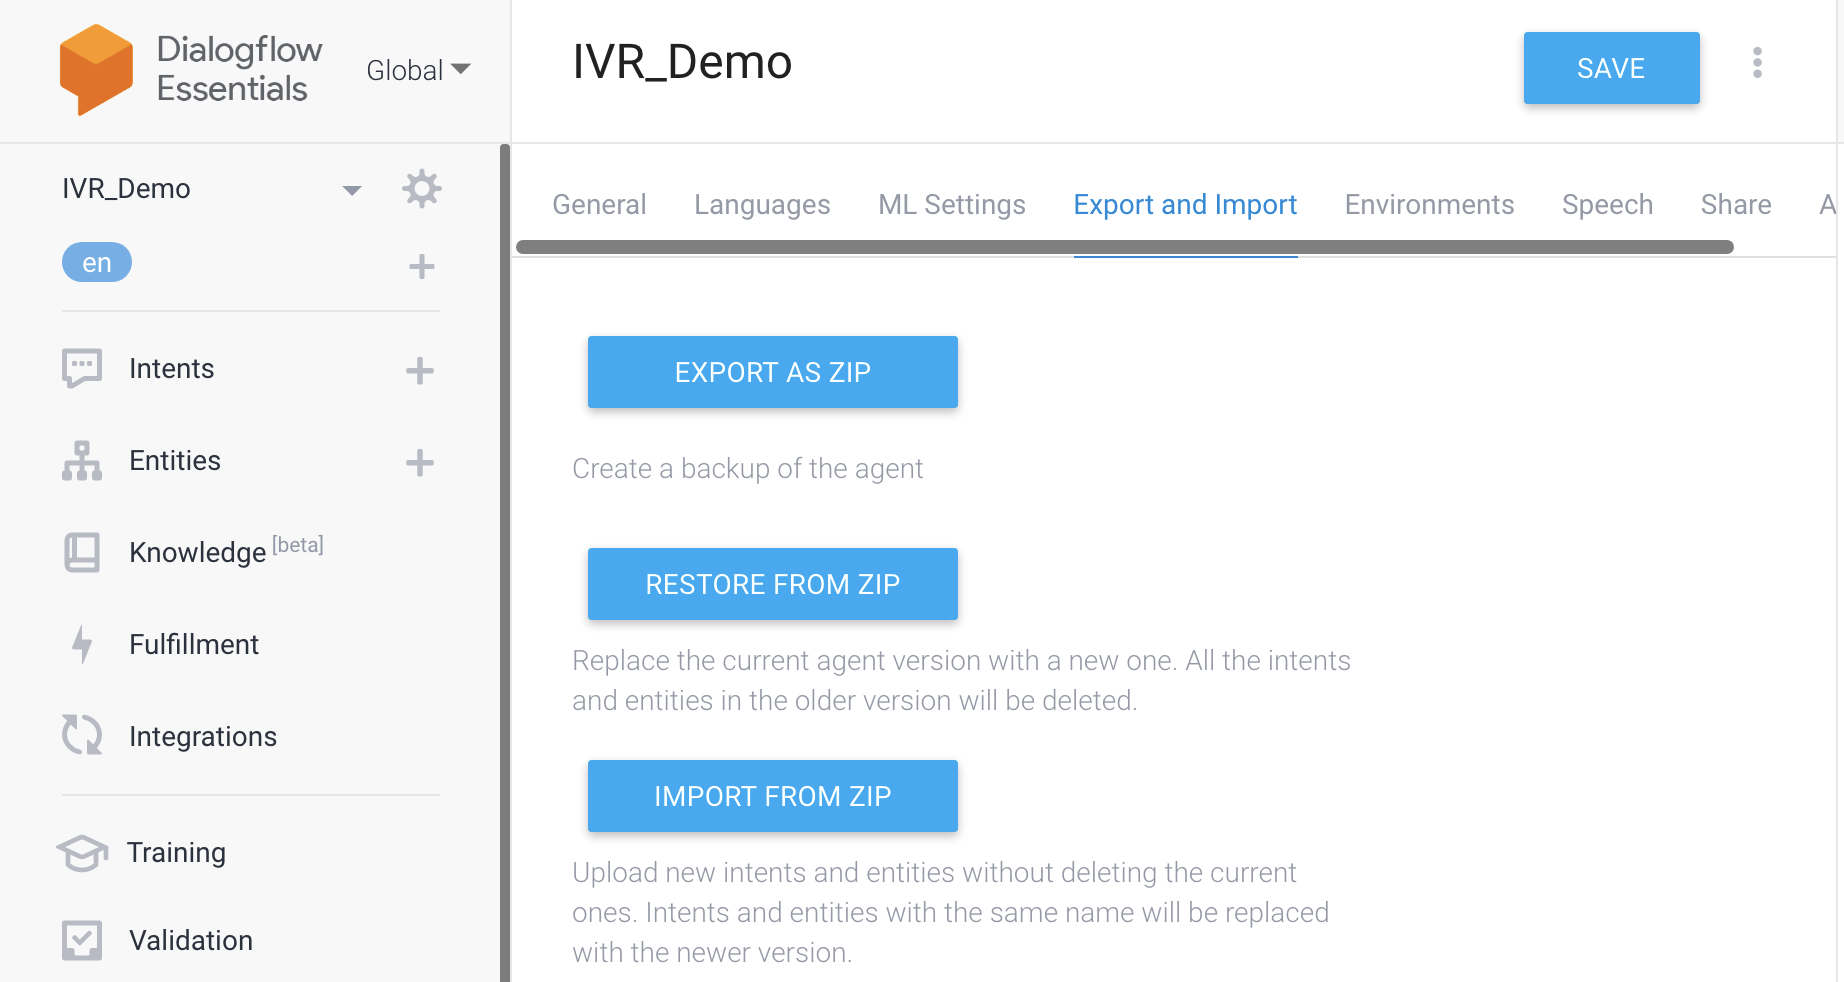
Once in the settings of your agent, click on the Export and Import tab. If you have an agent that is already stored locally, you can import this as a zip file. For this demo, we will click Import From Zip. Our sample zip file can be found HERE.
Note: after selecting the zip file to upload, you must type in "IMPORT" for the import to process successfully.
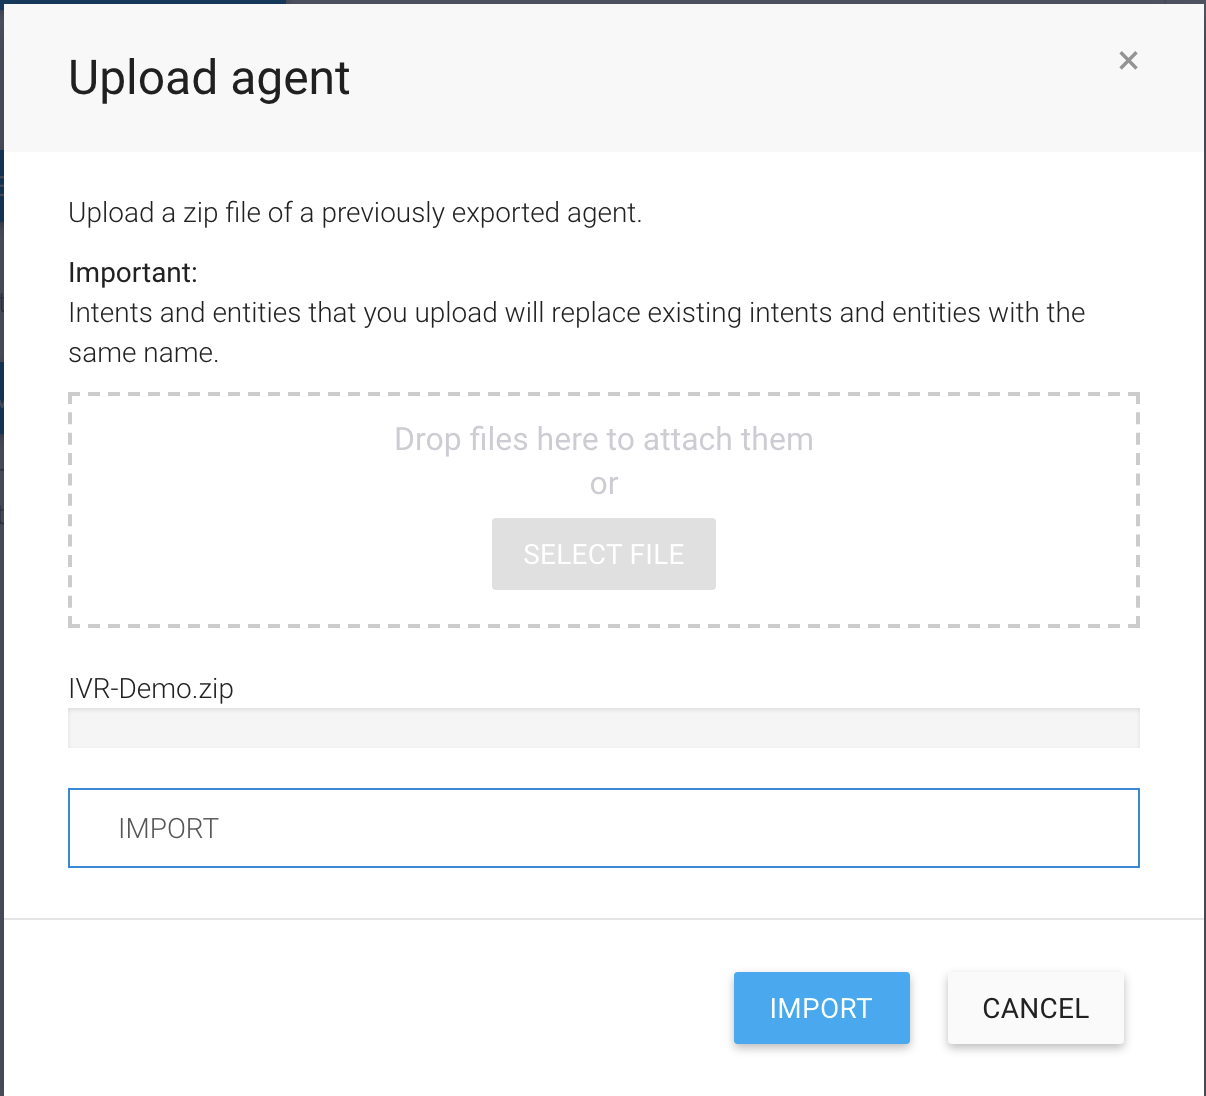
Import dialog. You can select a zip file to upload, and then click "Import".
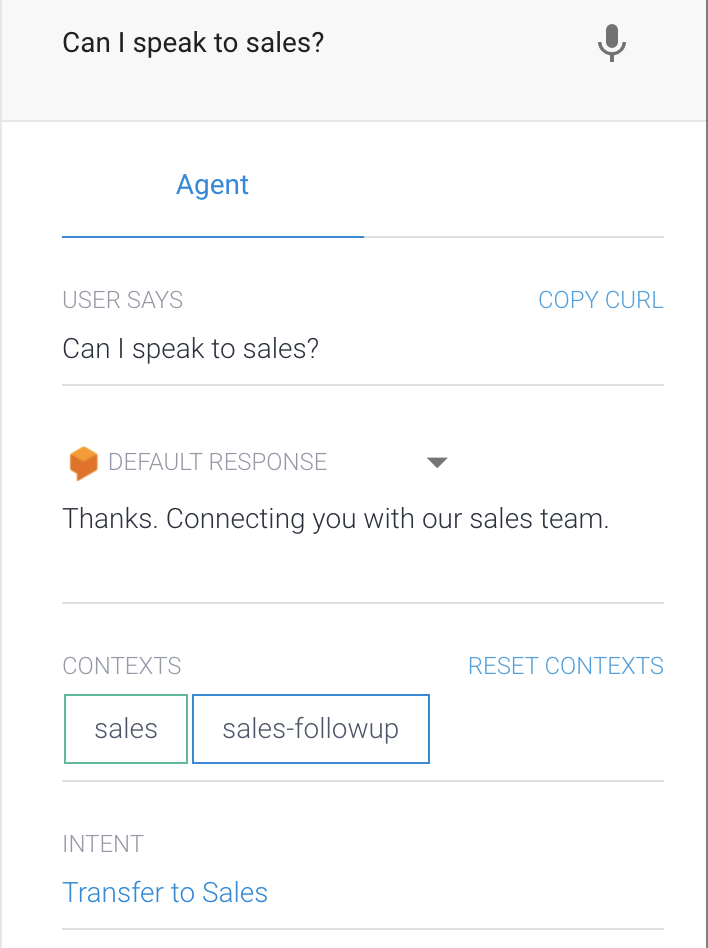
Congratulations! Your agent is now up and running within your Dialogflow account, which is linked to your SignalWire Space. You can try this out by typing into the console on the right side of your Dialogflow Dashboard.
In addition, you can remove imported agents from your SignalWire Space. Removing agents will make them unavailable when creating future Dialogflow calls and will be removed from any Phone Numbers that are configured to use it. You can add these removed agents back anytime.
To handle calls using Dialogflow agents, configure your phone numbers to handle calls using a Dialogflow Agent and choose which agent to run when a call comes in.
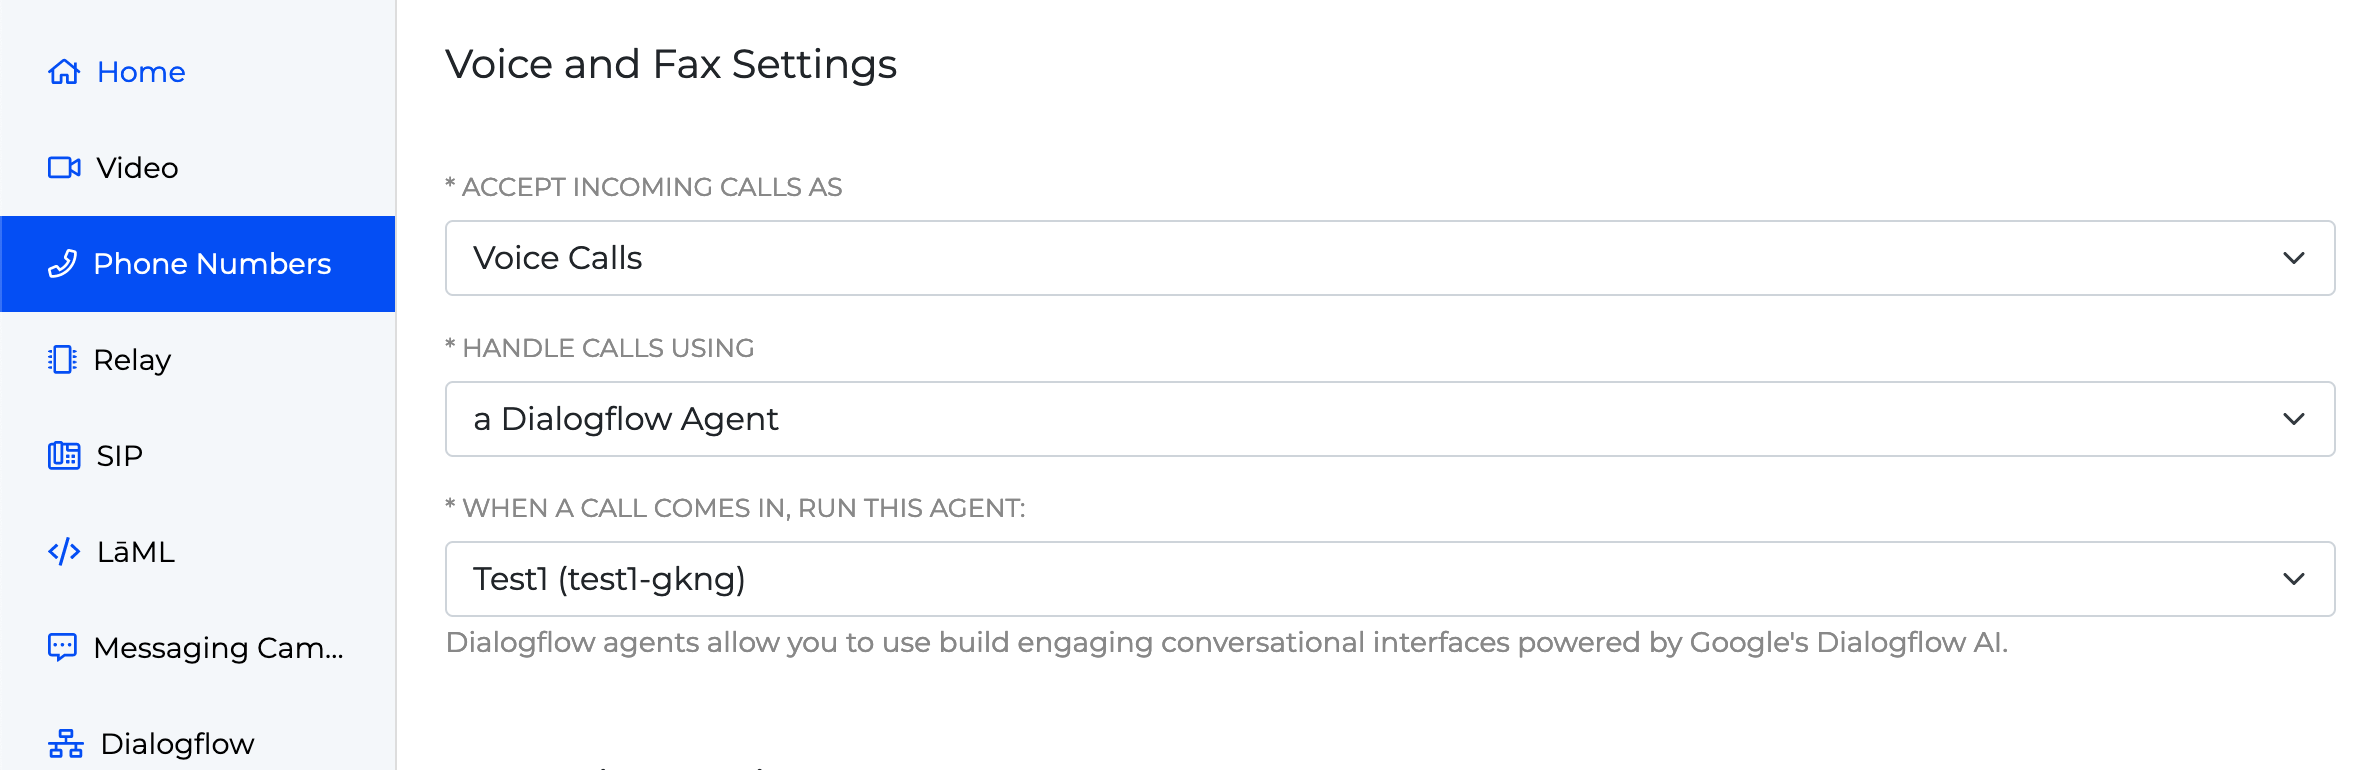
You can associate a phone number to Dialogflow by configuring your phone number within your SignalWire Space.
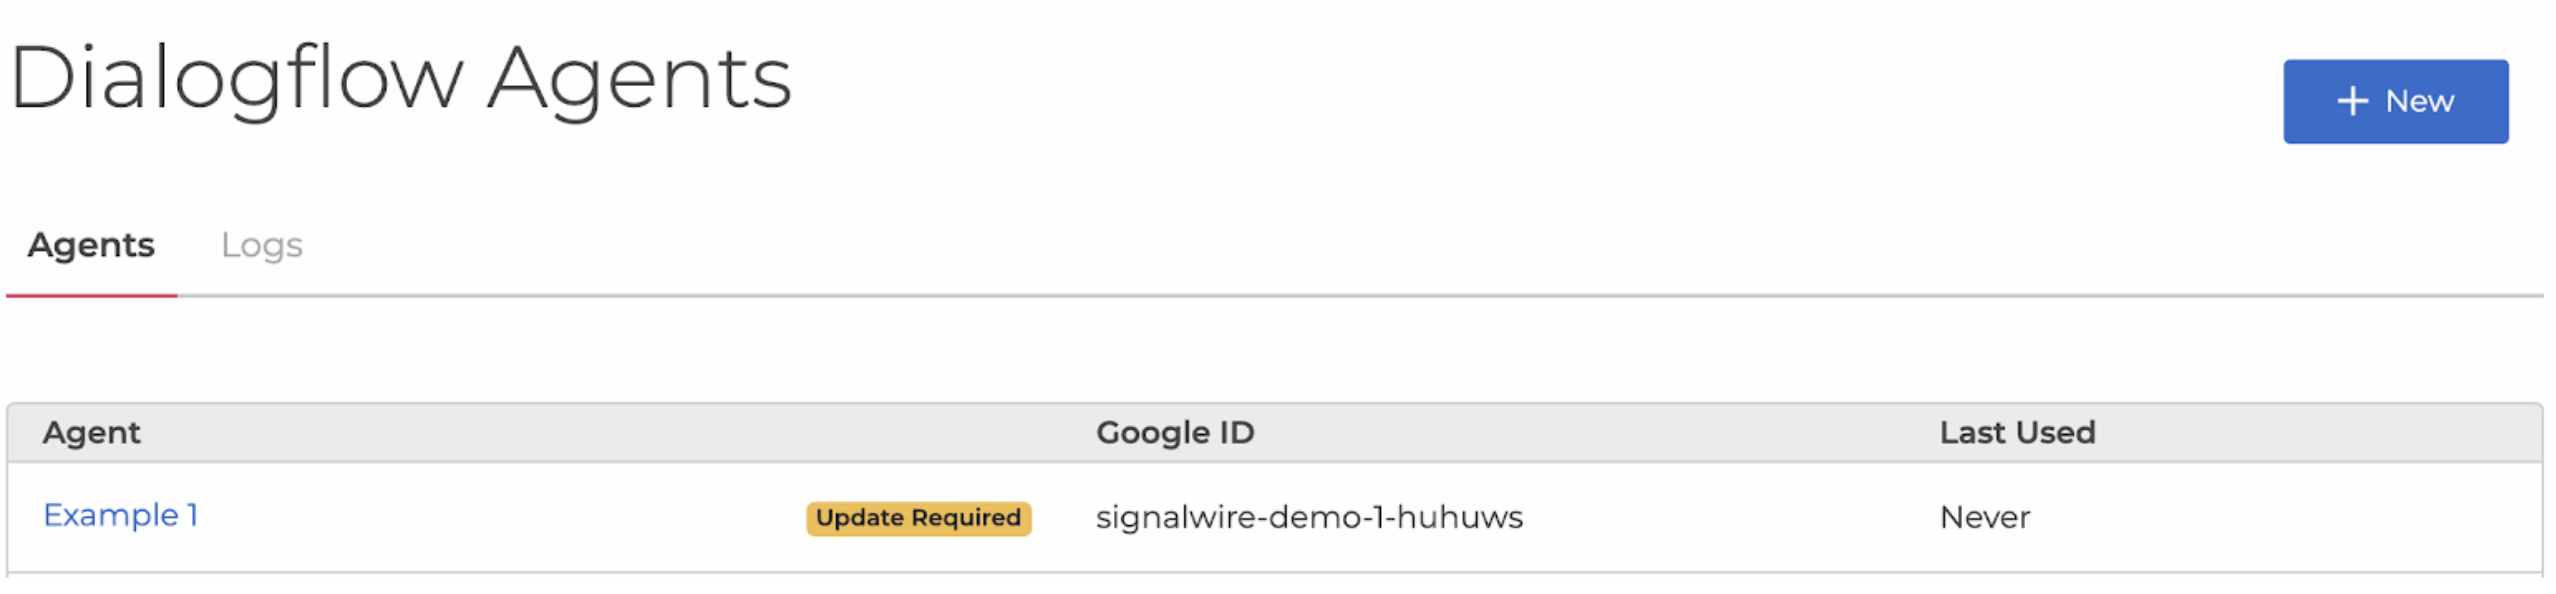
You may also re-import DialogFlow agents to upgrade to the new integration method within the SignalWire Space.
Upgrading your Dialogflow Agent
Within your SignalWire Space, navigate to the Dialogflow section. Then, click on the “Update Required” badge associated with the agent that needs to be re-imported.
Because the new integration method is initiated from within the Dialogflow interface, a modal is presented describing the next steps and a link to open the Dialogflow console where the agent can be re-imported using the new integration method.

Wrap up
We provided a guide on how to integrate SignalWire with Dialogflow agents. For a step-by-step tutorial on the processes mentioned above, check out the videos below and follow along as we demonstrate how to perform this integration.
For Dialogflow specific inquiries, refer to the Dialogflow documentation page.